Portraits of the Fallen: The Crew of the Dogpatch Express, in Photographs

The world we live in is, by nature, unpredictable.  Some events appear – by all standards of understanding and reason – to present us with seemingly irrevocable and misfortune and challenge.  Other situations and experiences can carry us – by all measures of sense and logic – to a horizon of apparently good fortune.  But then, in time, what appears to have been misfortune may actually – albeit unknown to us, at the time – be a reprieve and “second chance”, while what seems to have been bountiful luck may – in a way of which we are comfortably unaware – presage a much more dire outcome.

If this is so during “conventional” times, then vastly more so during a time of war, when the pace, sweep, and nature of events – and the danger inherent to those events – is magnified many fold.

Some 75 years ago, such a situation transpired in the life of the pilot of a B-24 Liberator bomber. 

But first, an explanation.

______________________________

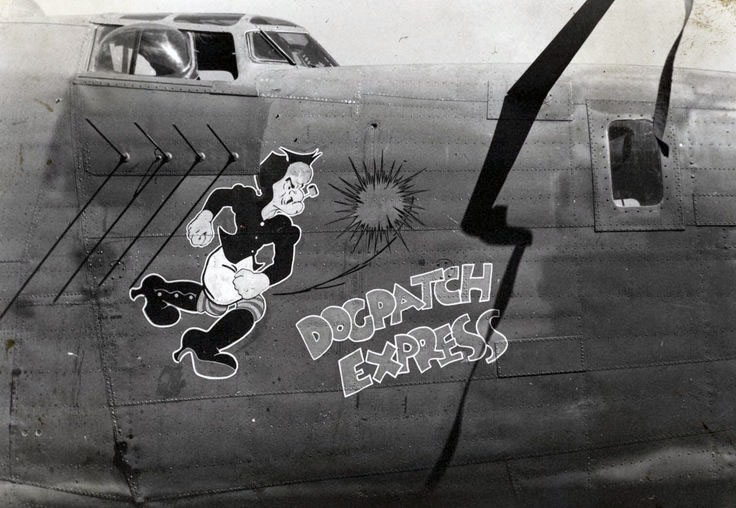
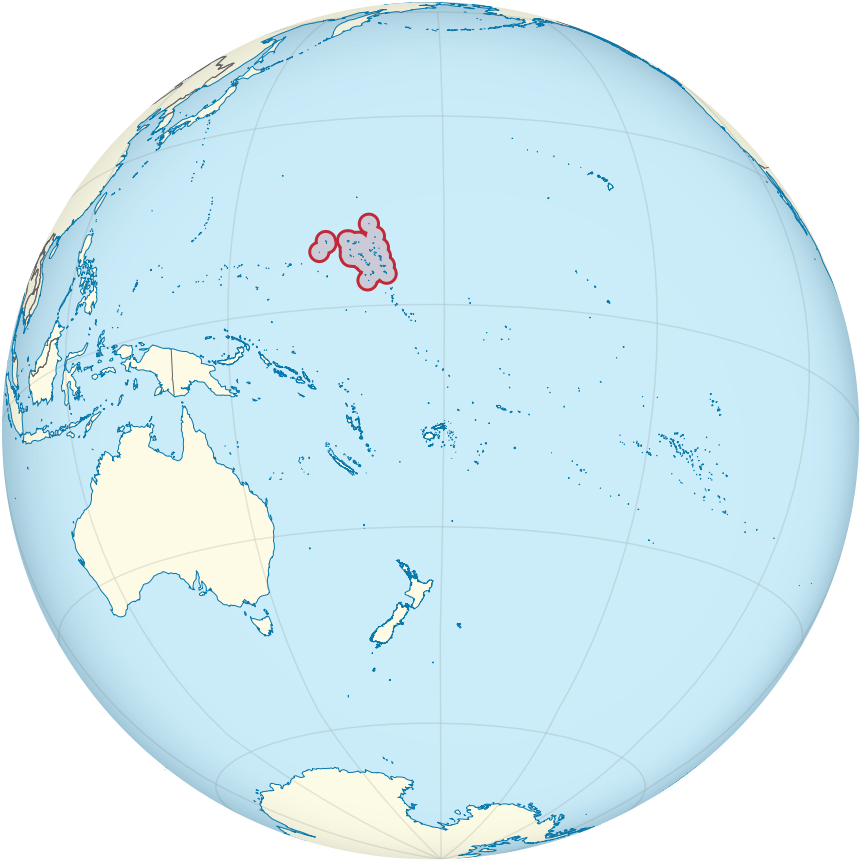
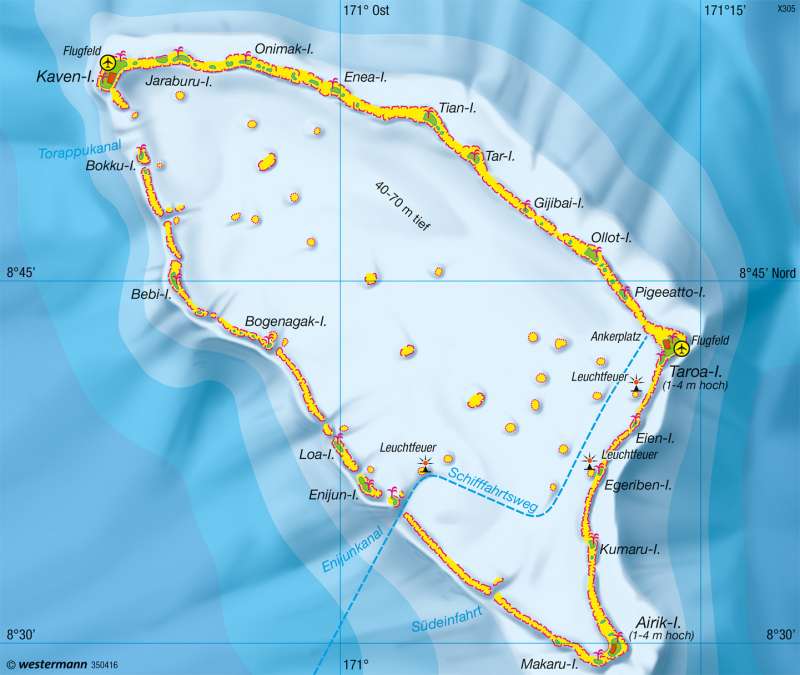
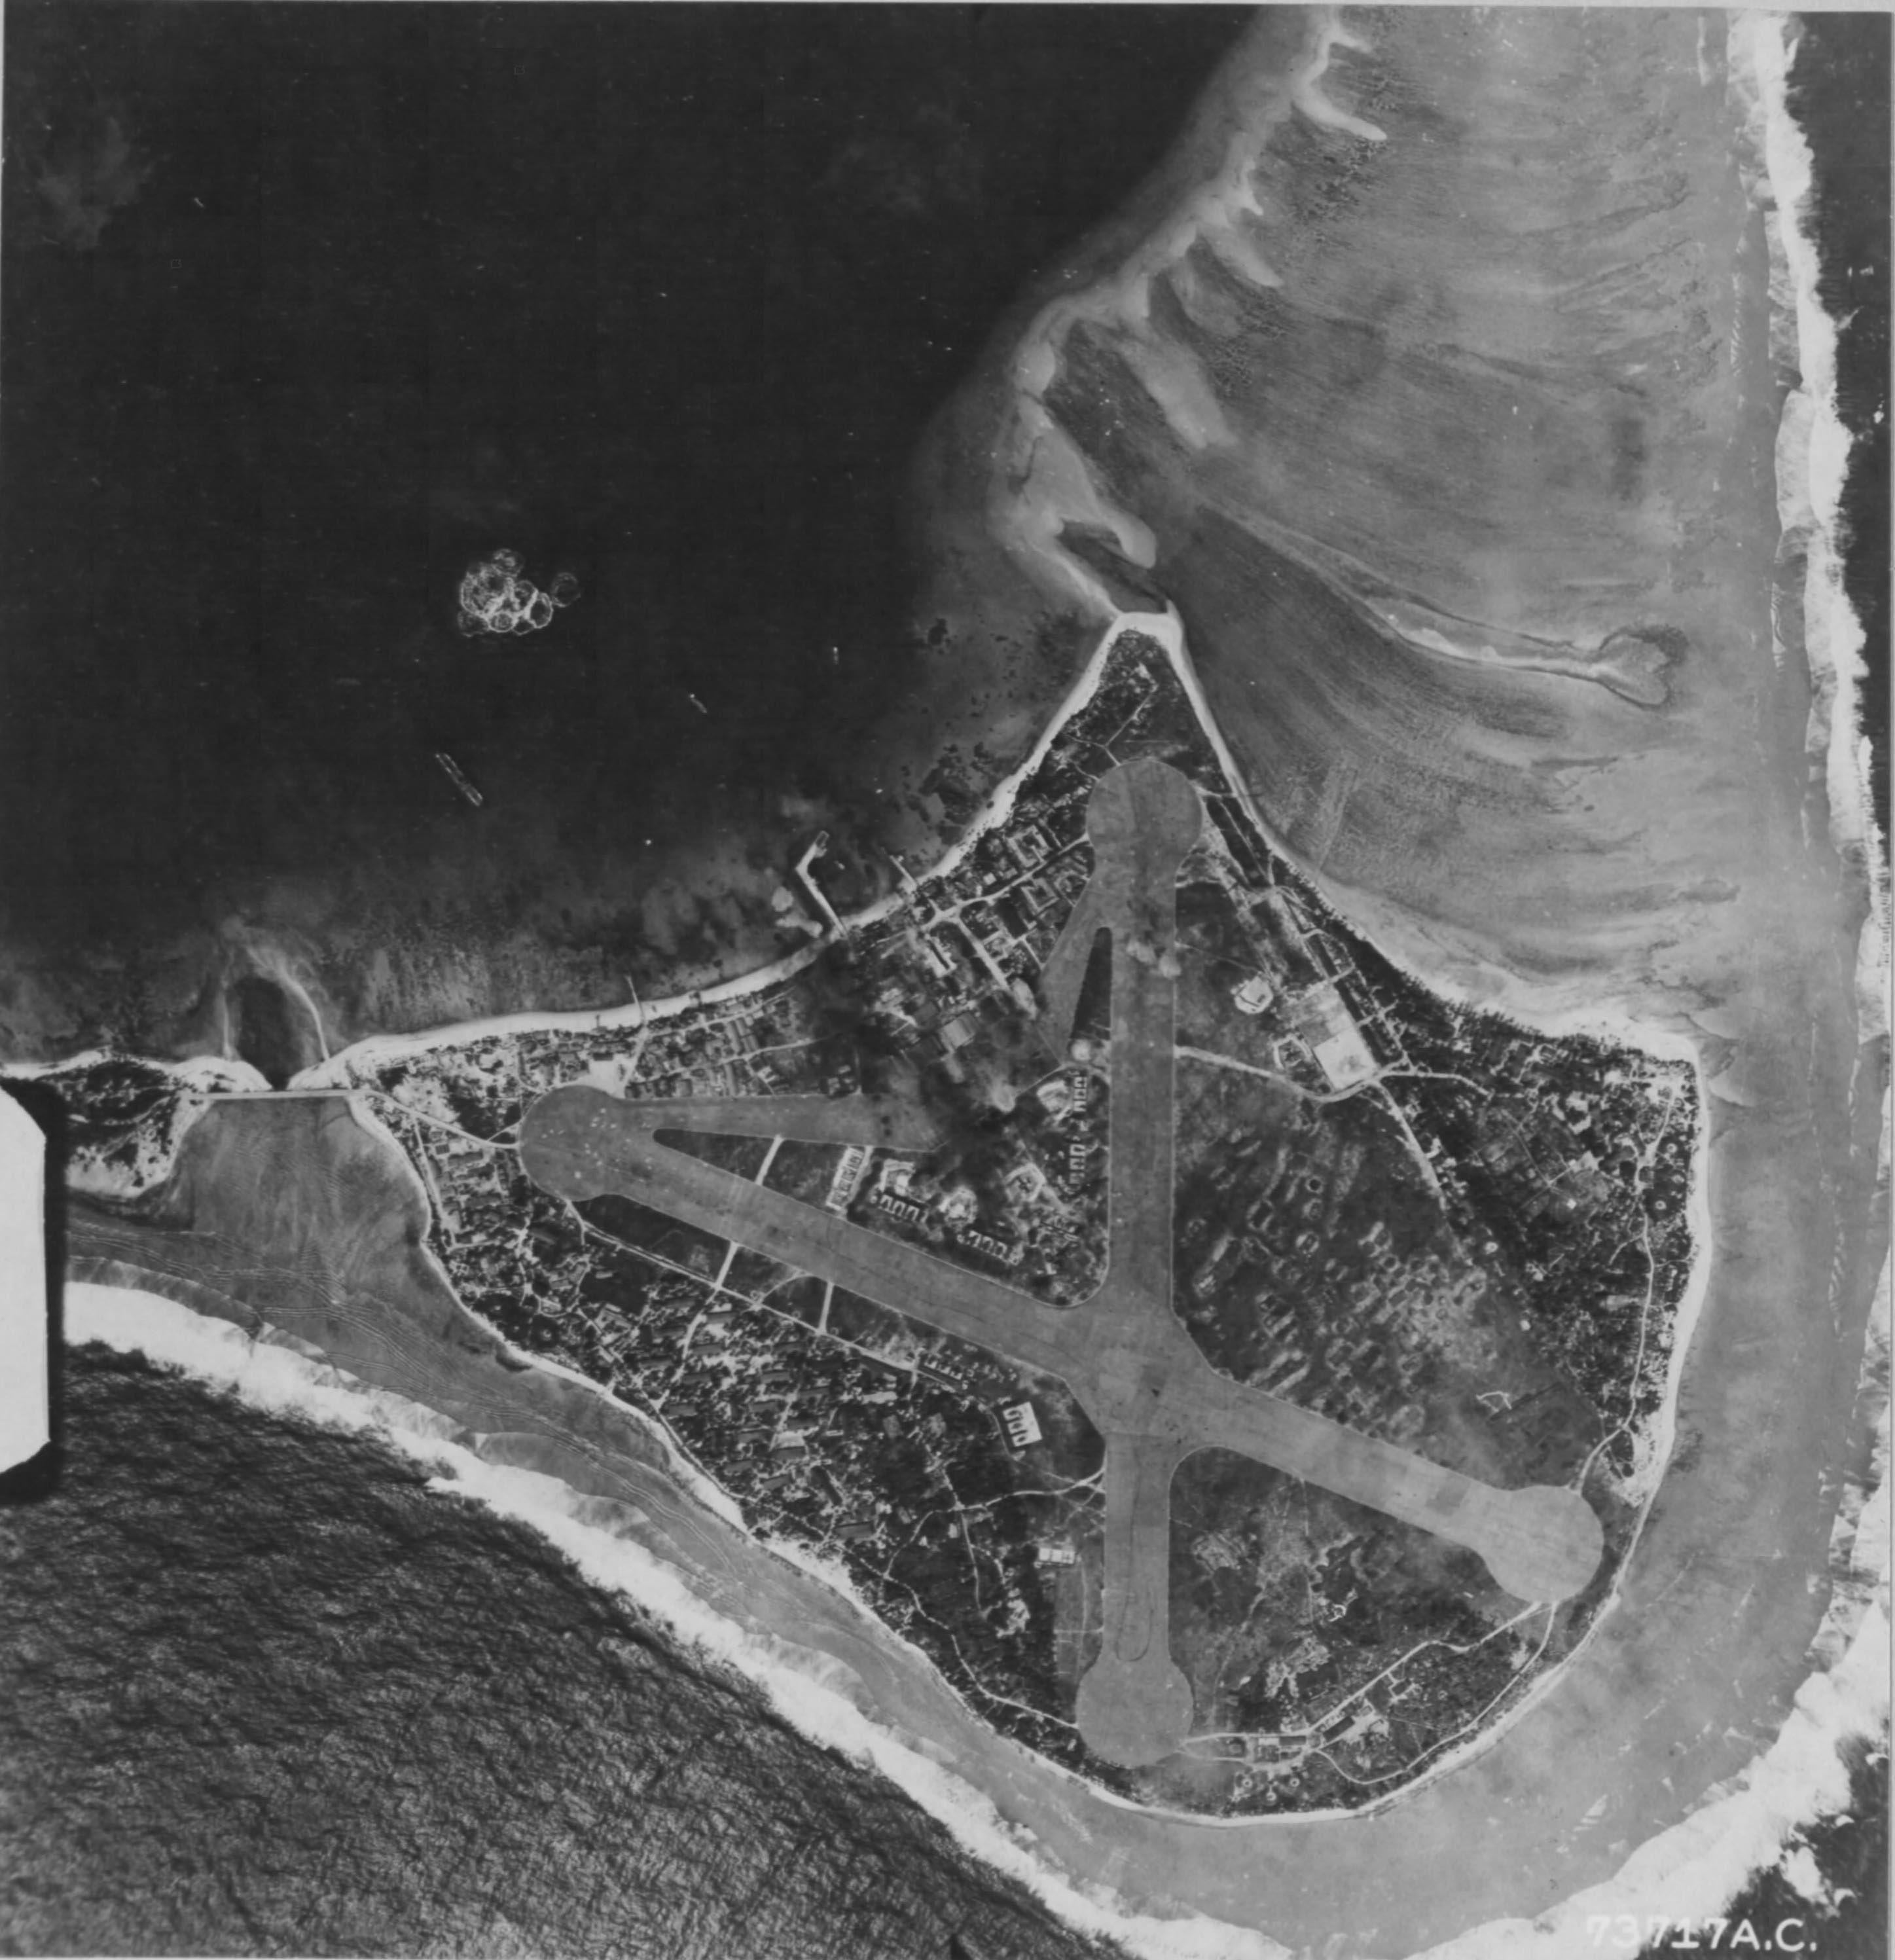
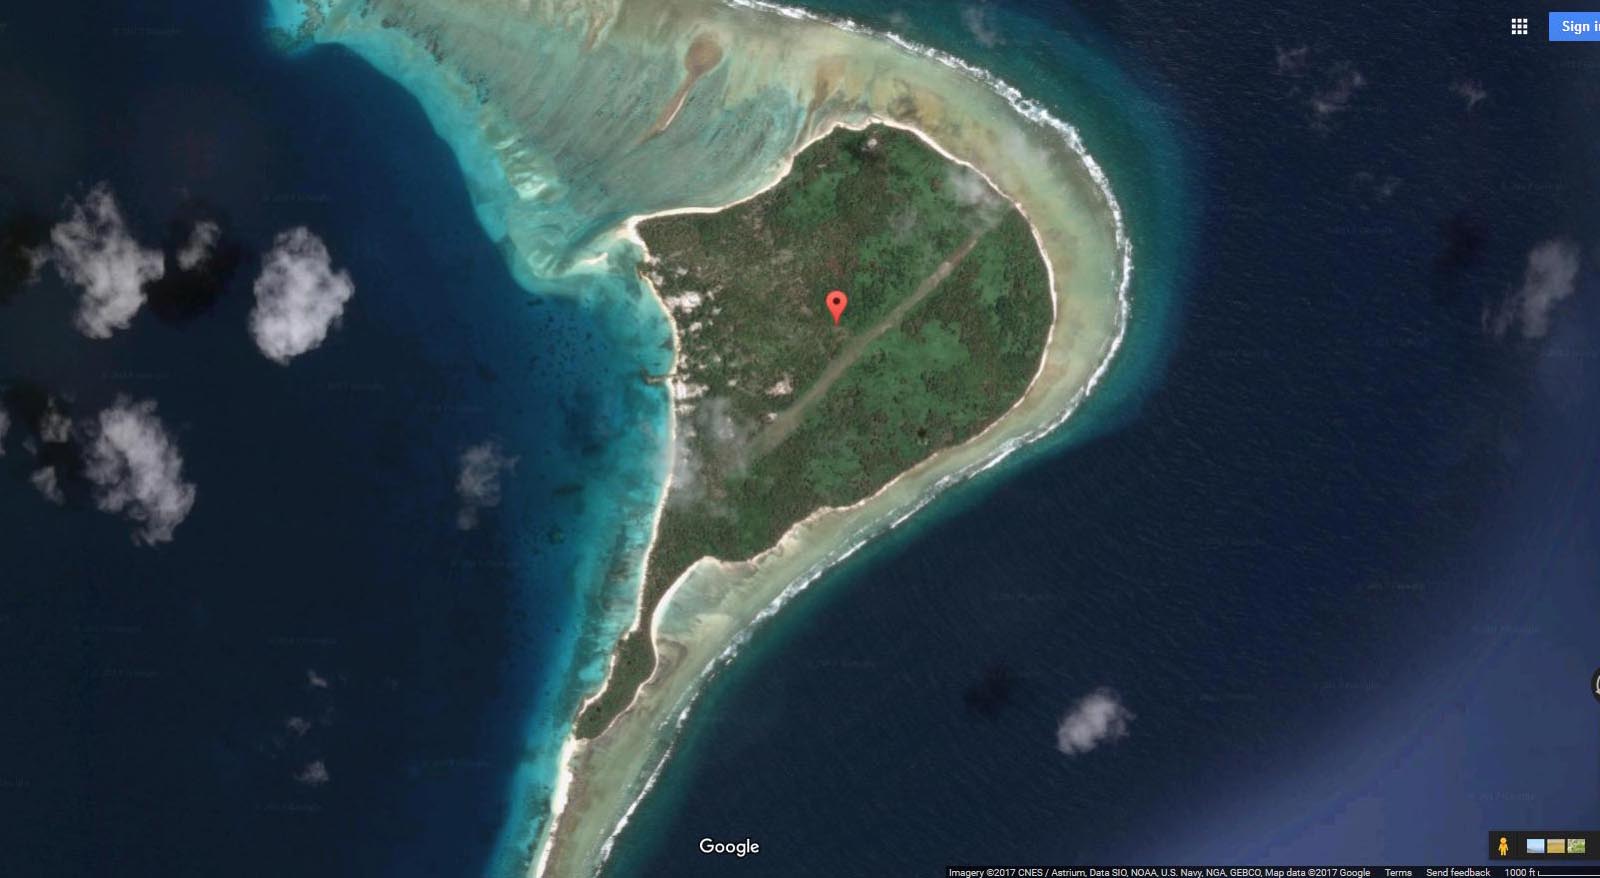
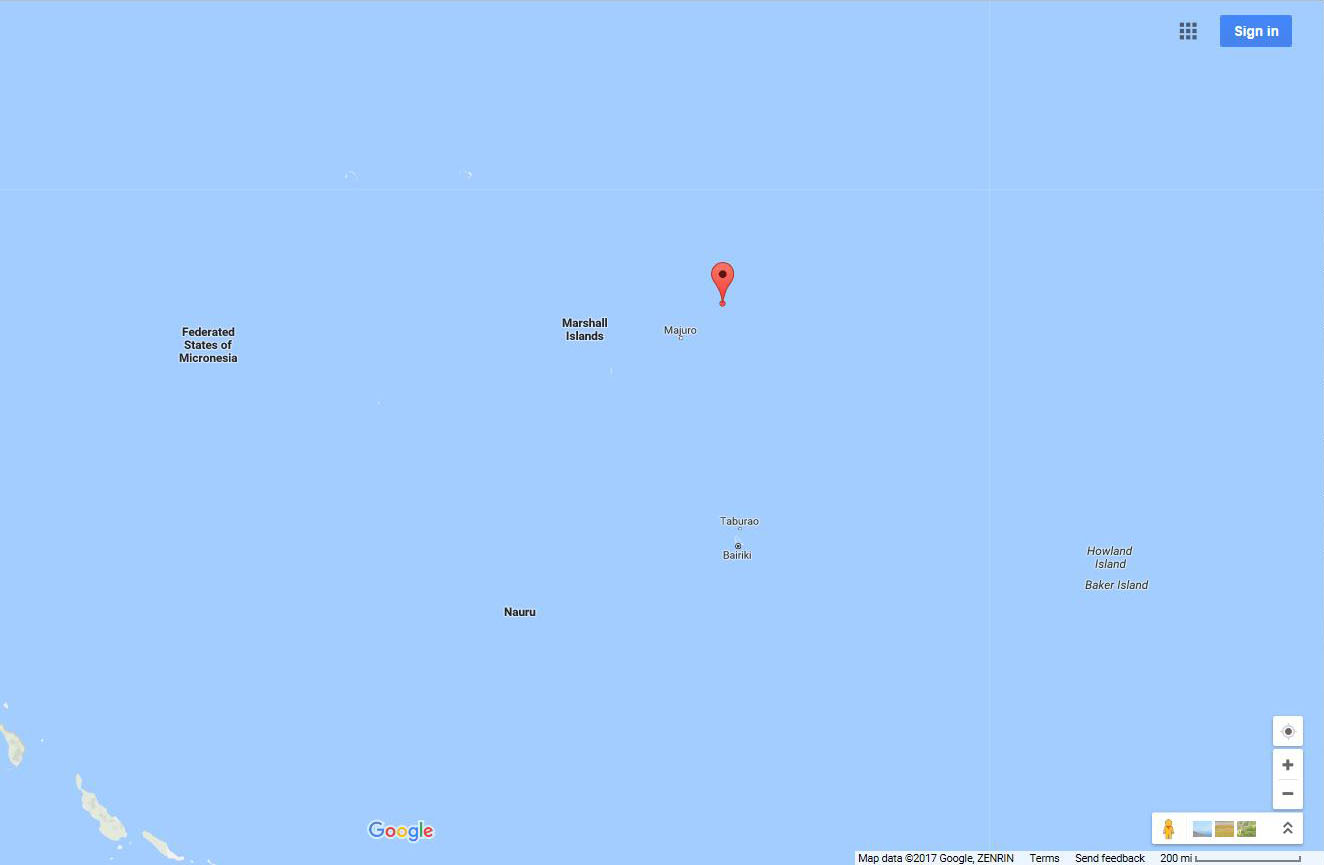
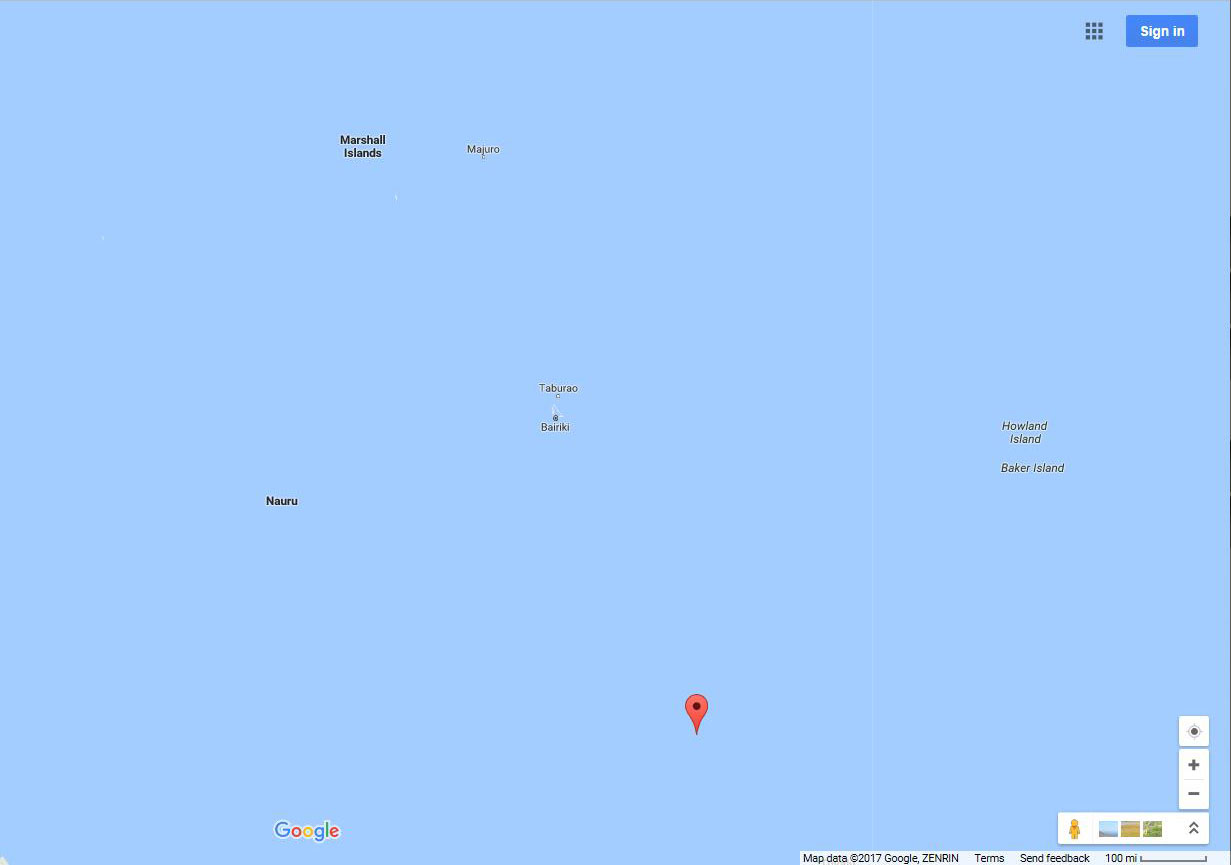
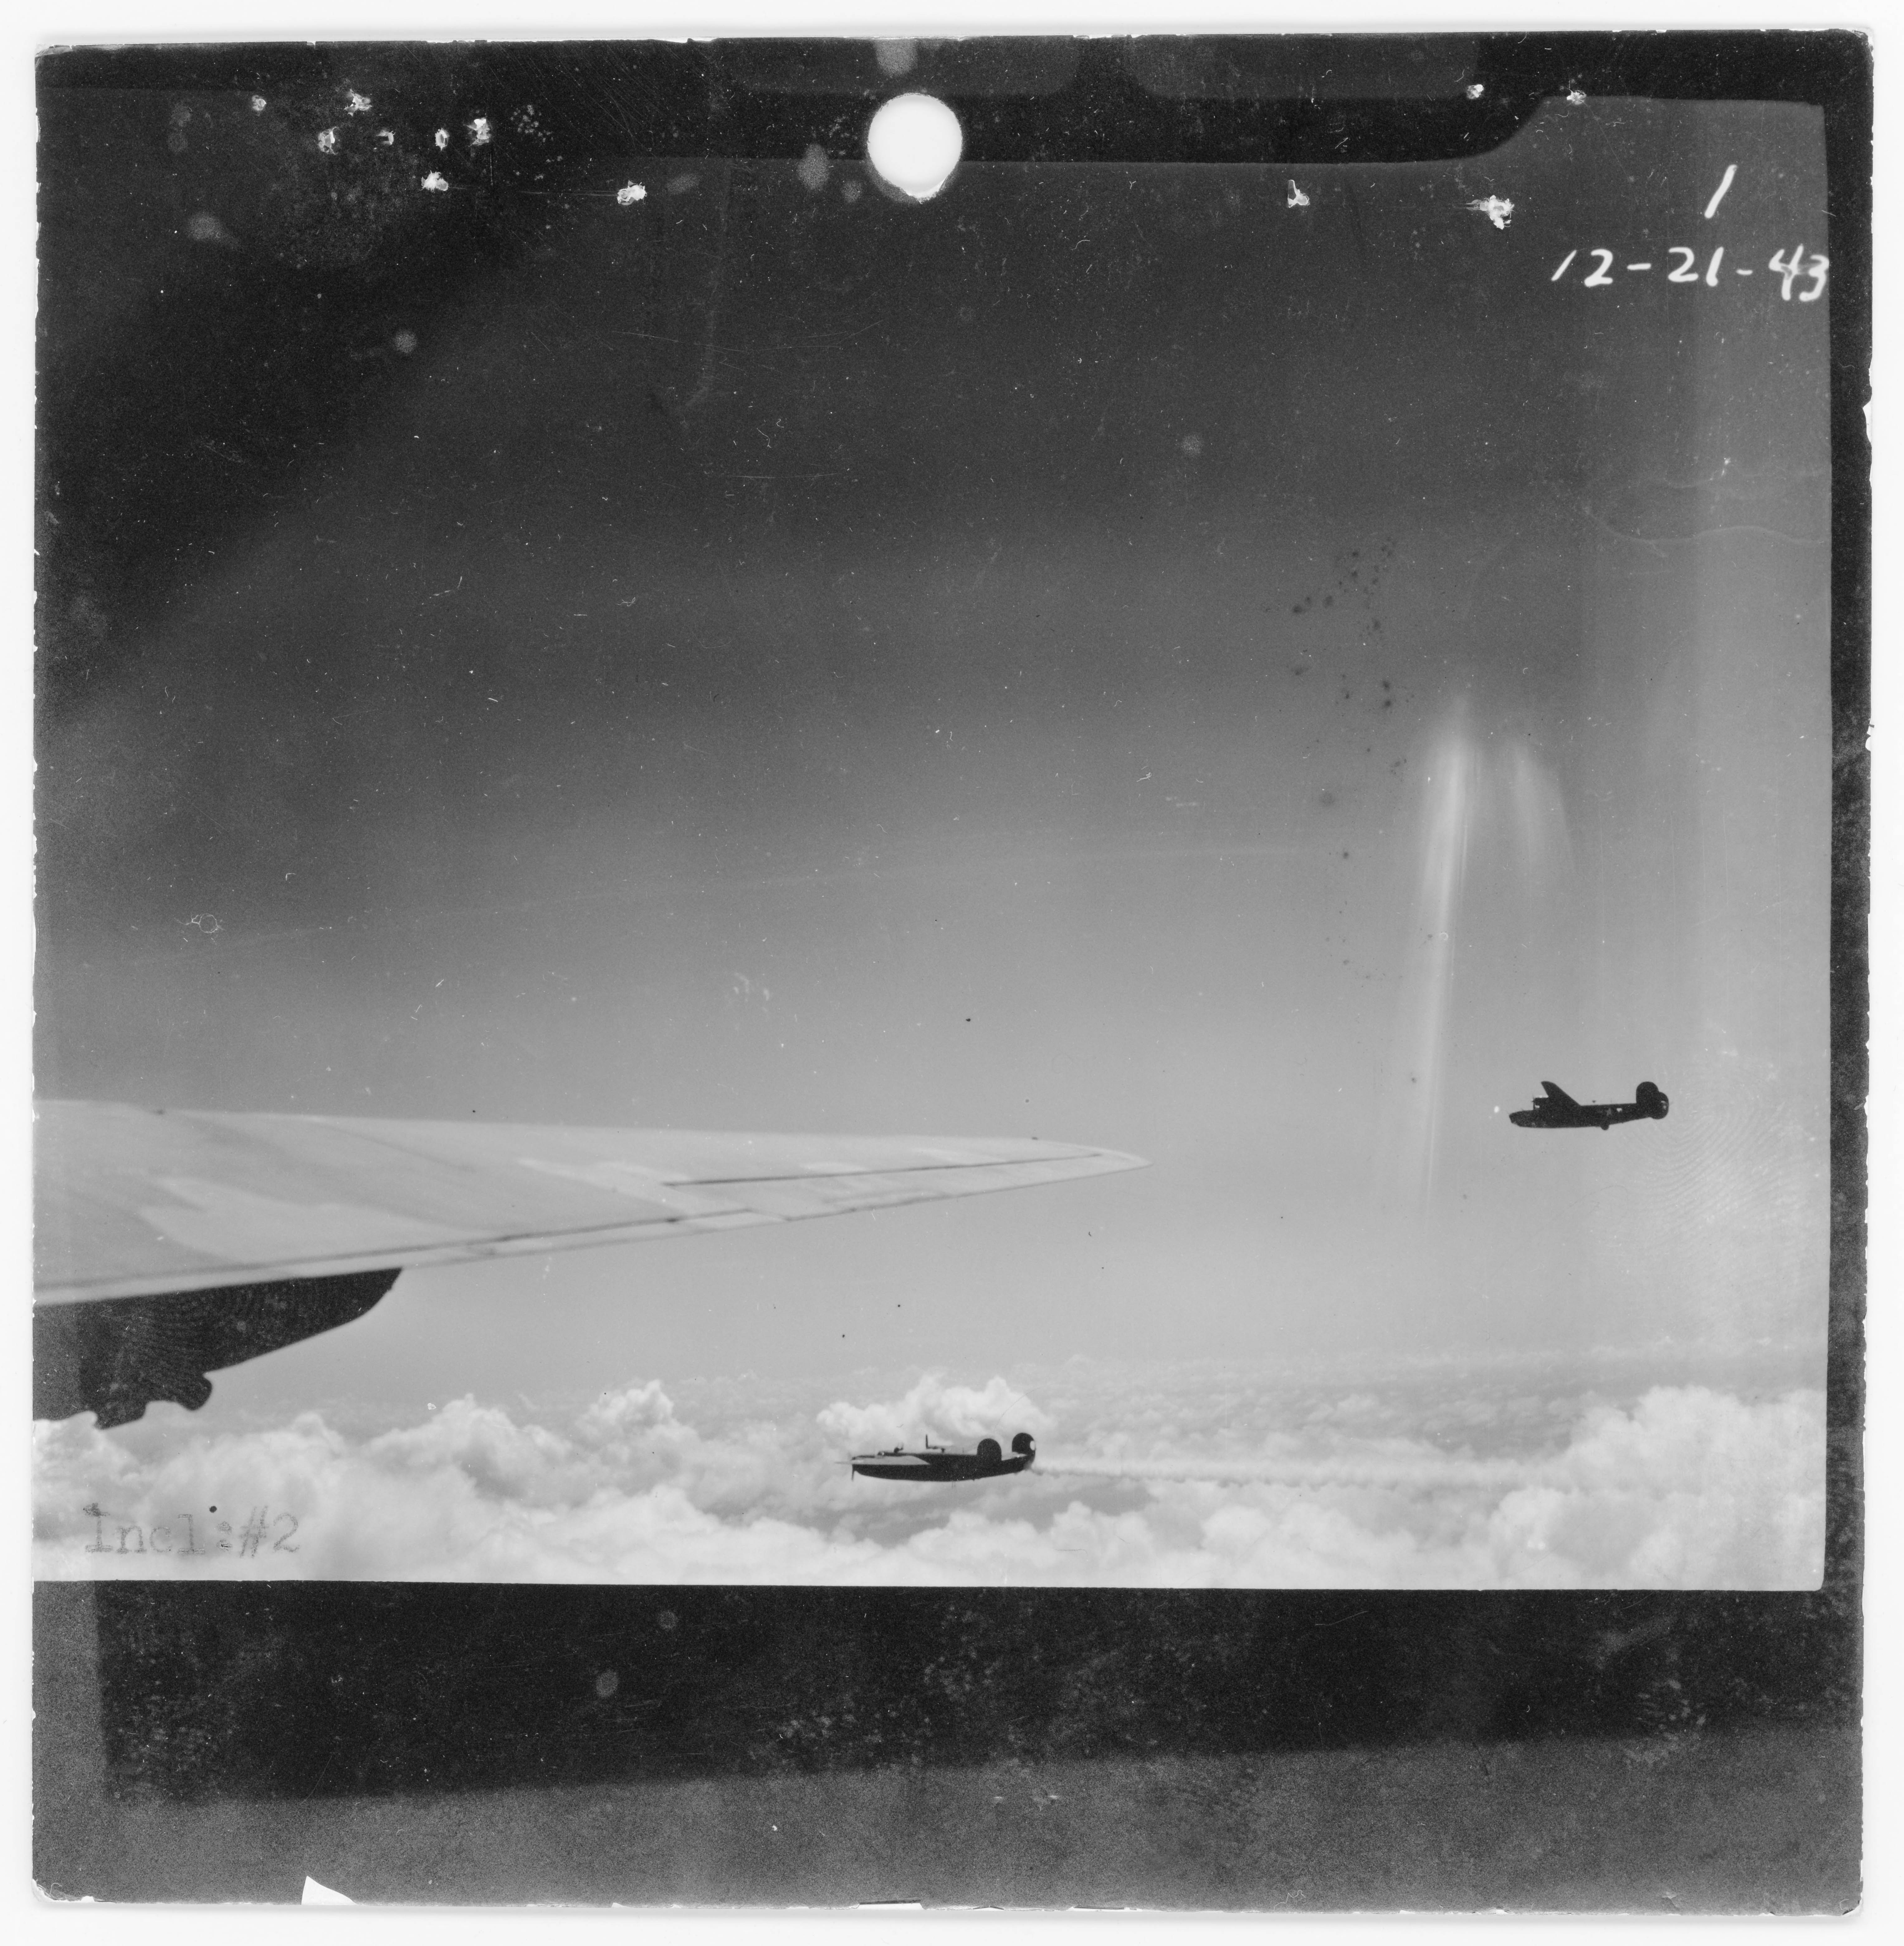
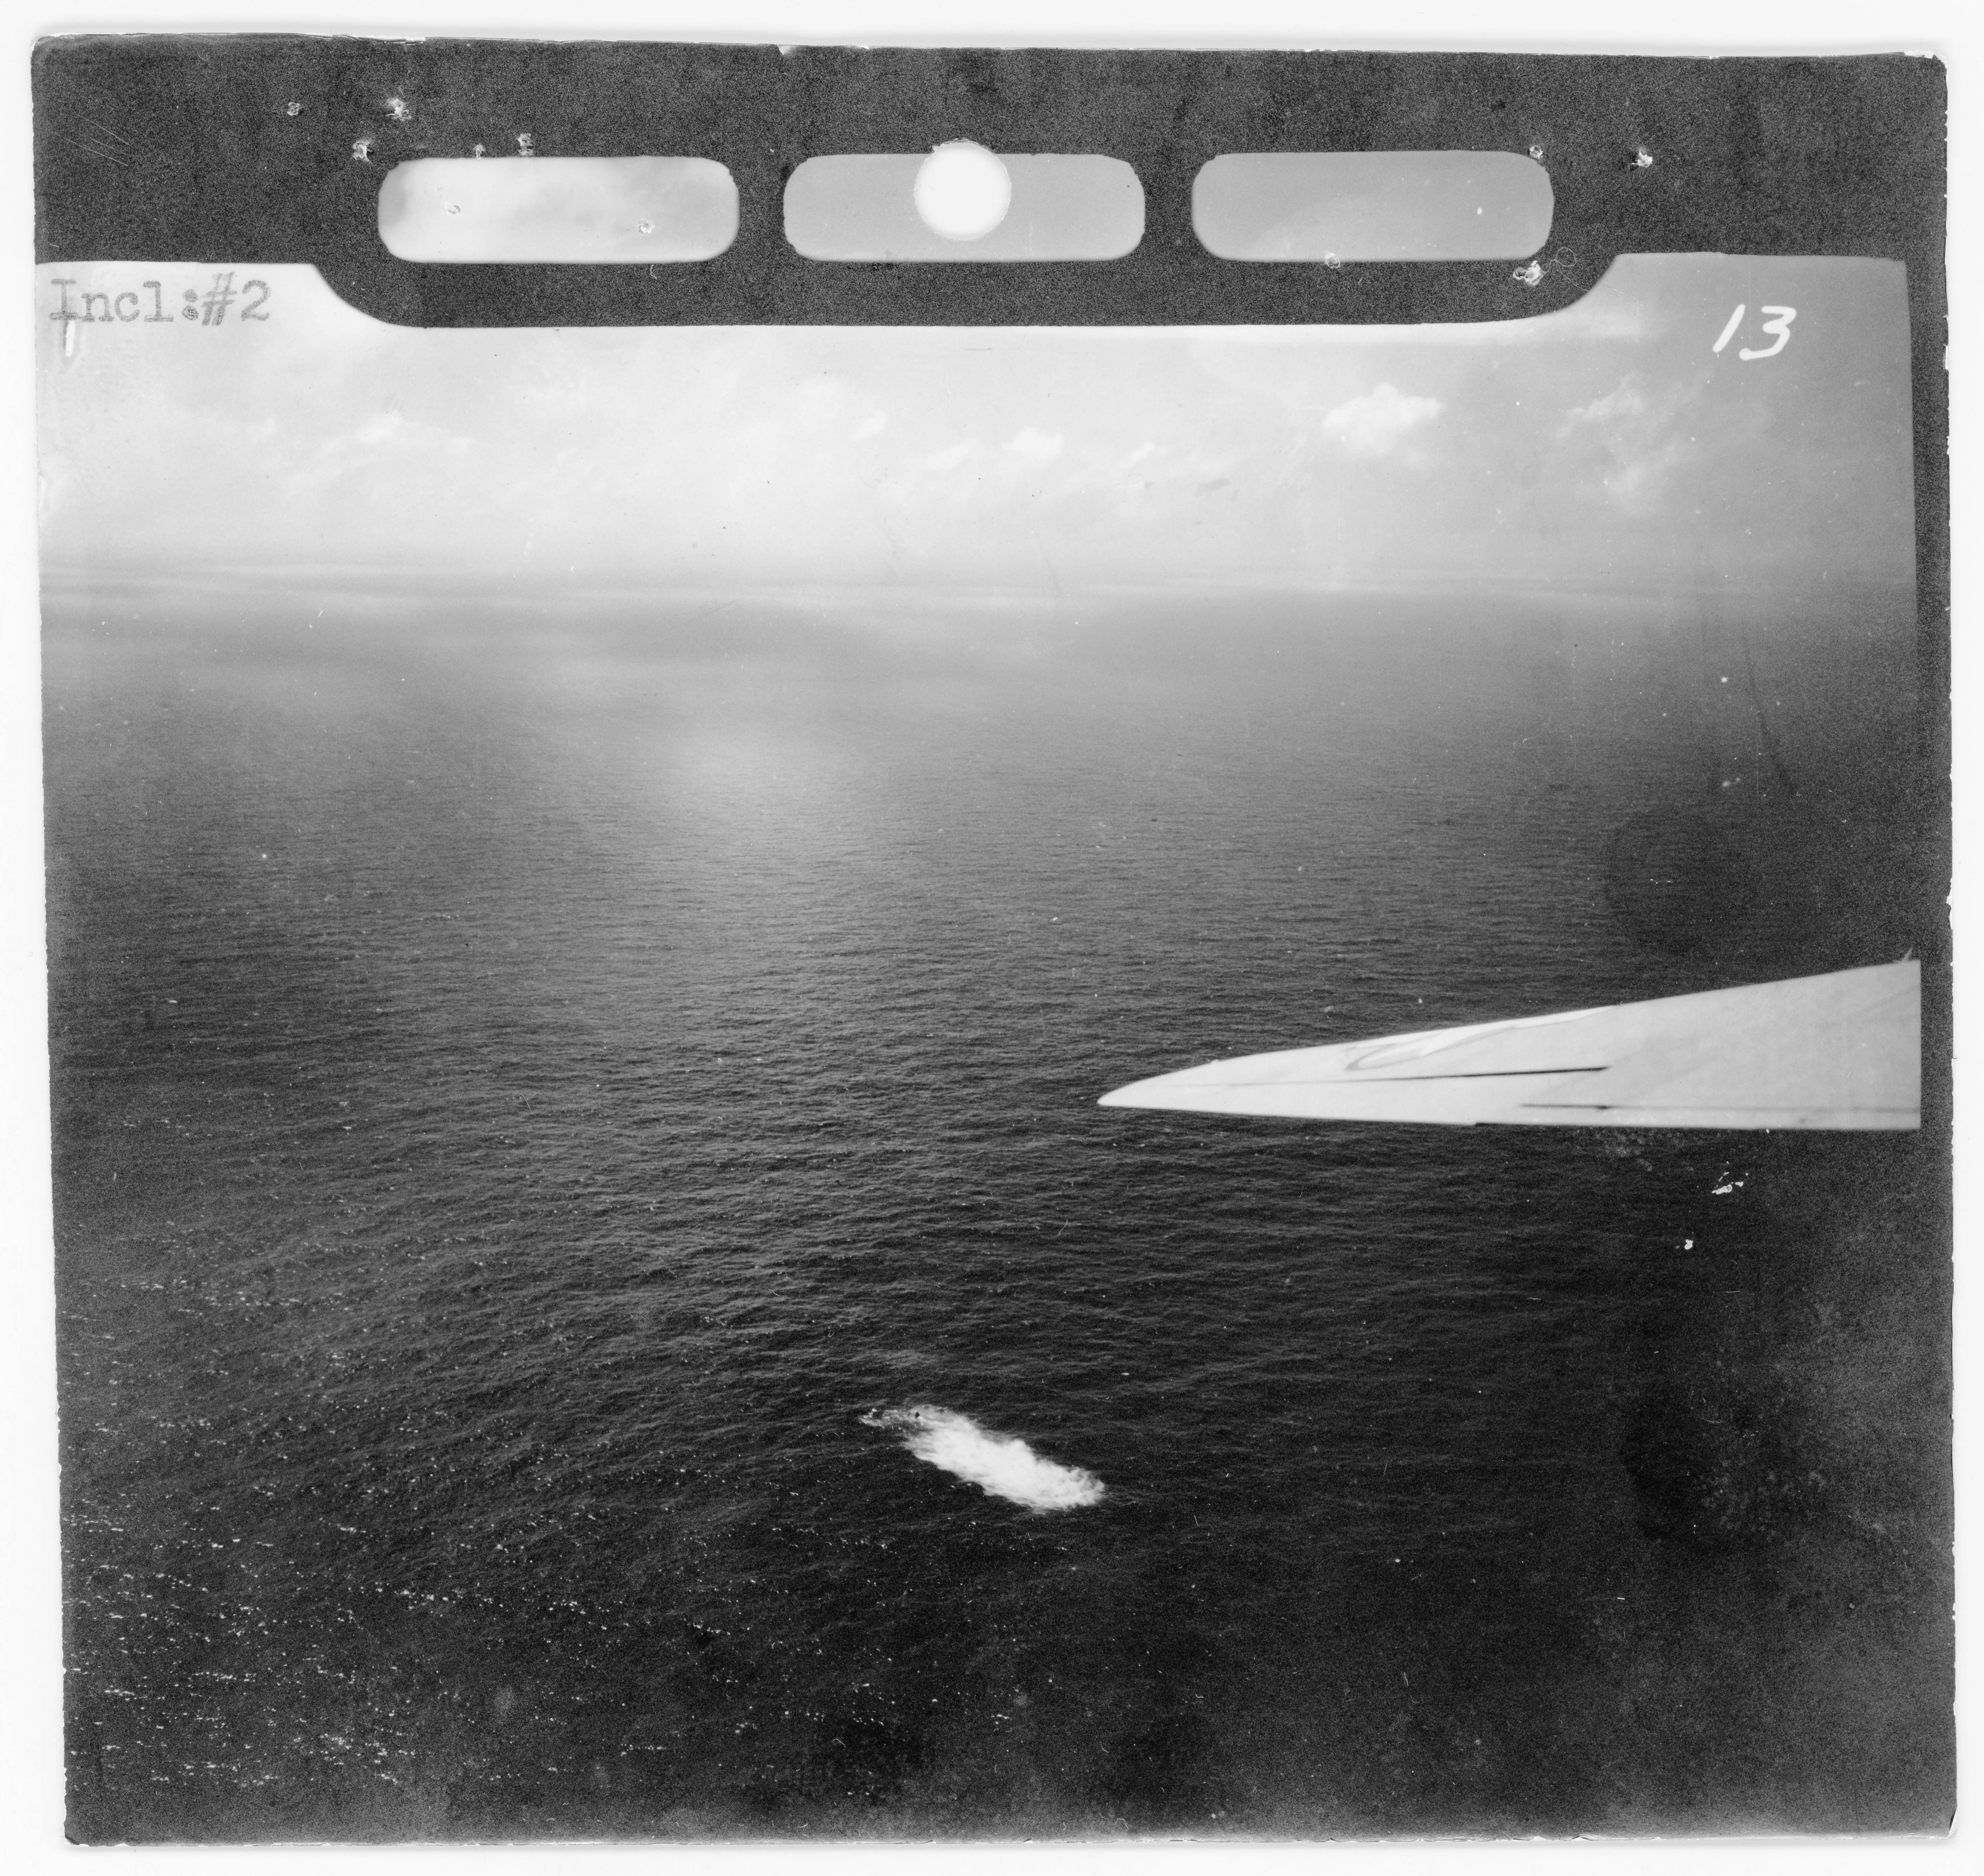
In March and April of 2017, I created two blog posts concerning photographs I’d discovered at the United States National Archives in MACR (Missing Air Crew Report) number 1423.  This MACR covers the loss of a B-24D Liberator (41-24214 – Dogpatch Express) of the 11th Bomb Group’s 42nd Bomb Squadron, over the Central Pacific Ocean, after a mission to the atoll of Taroa Island, in the Maloelap Atoll of the Marshall Islands, on December 21, 1943.

A particular image appearing in the “first” post is a very high resolution (2400 dpi) cropped scan of one of the photographs, showing the damaged bomber shortly before it crashed into the sea…

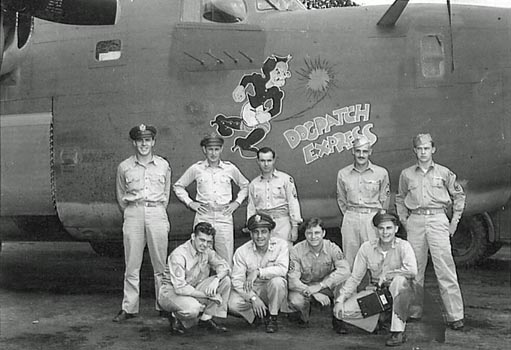
The “second” blog post includes an image accompanying the FindAGrave biographical profile of T/Sgt. Roy T. Gearon, the bomber’s radio operator, via FindAGrave contributor Patrick Maher, Sgt. Gearon’s cousin.  The picture shows most of the ill-fated bomber’s crew, as they appeared some months prior to the December twenty-first mission.  The image is captioned: “Roy’s crew picture taken a few months before they were shot down.  T/Sgt. Roy Thomas Gearon bottom left.”  While T/Sgt. Gearon’s FindAGrave profile gives no further information about this image, in light of recently acquired information and photographs (see much more below…), it’s seen that T/Sgt. Gearon is at the far left, standing.

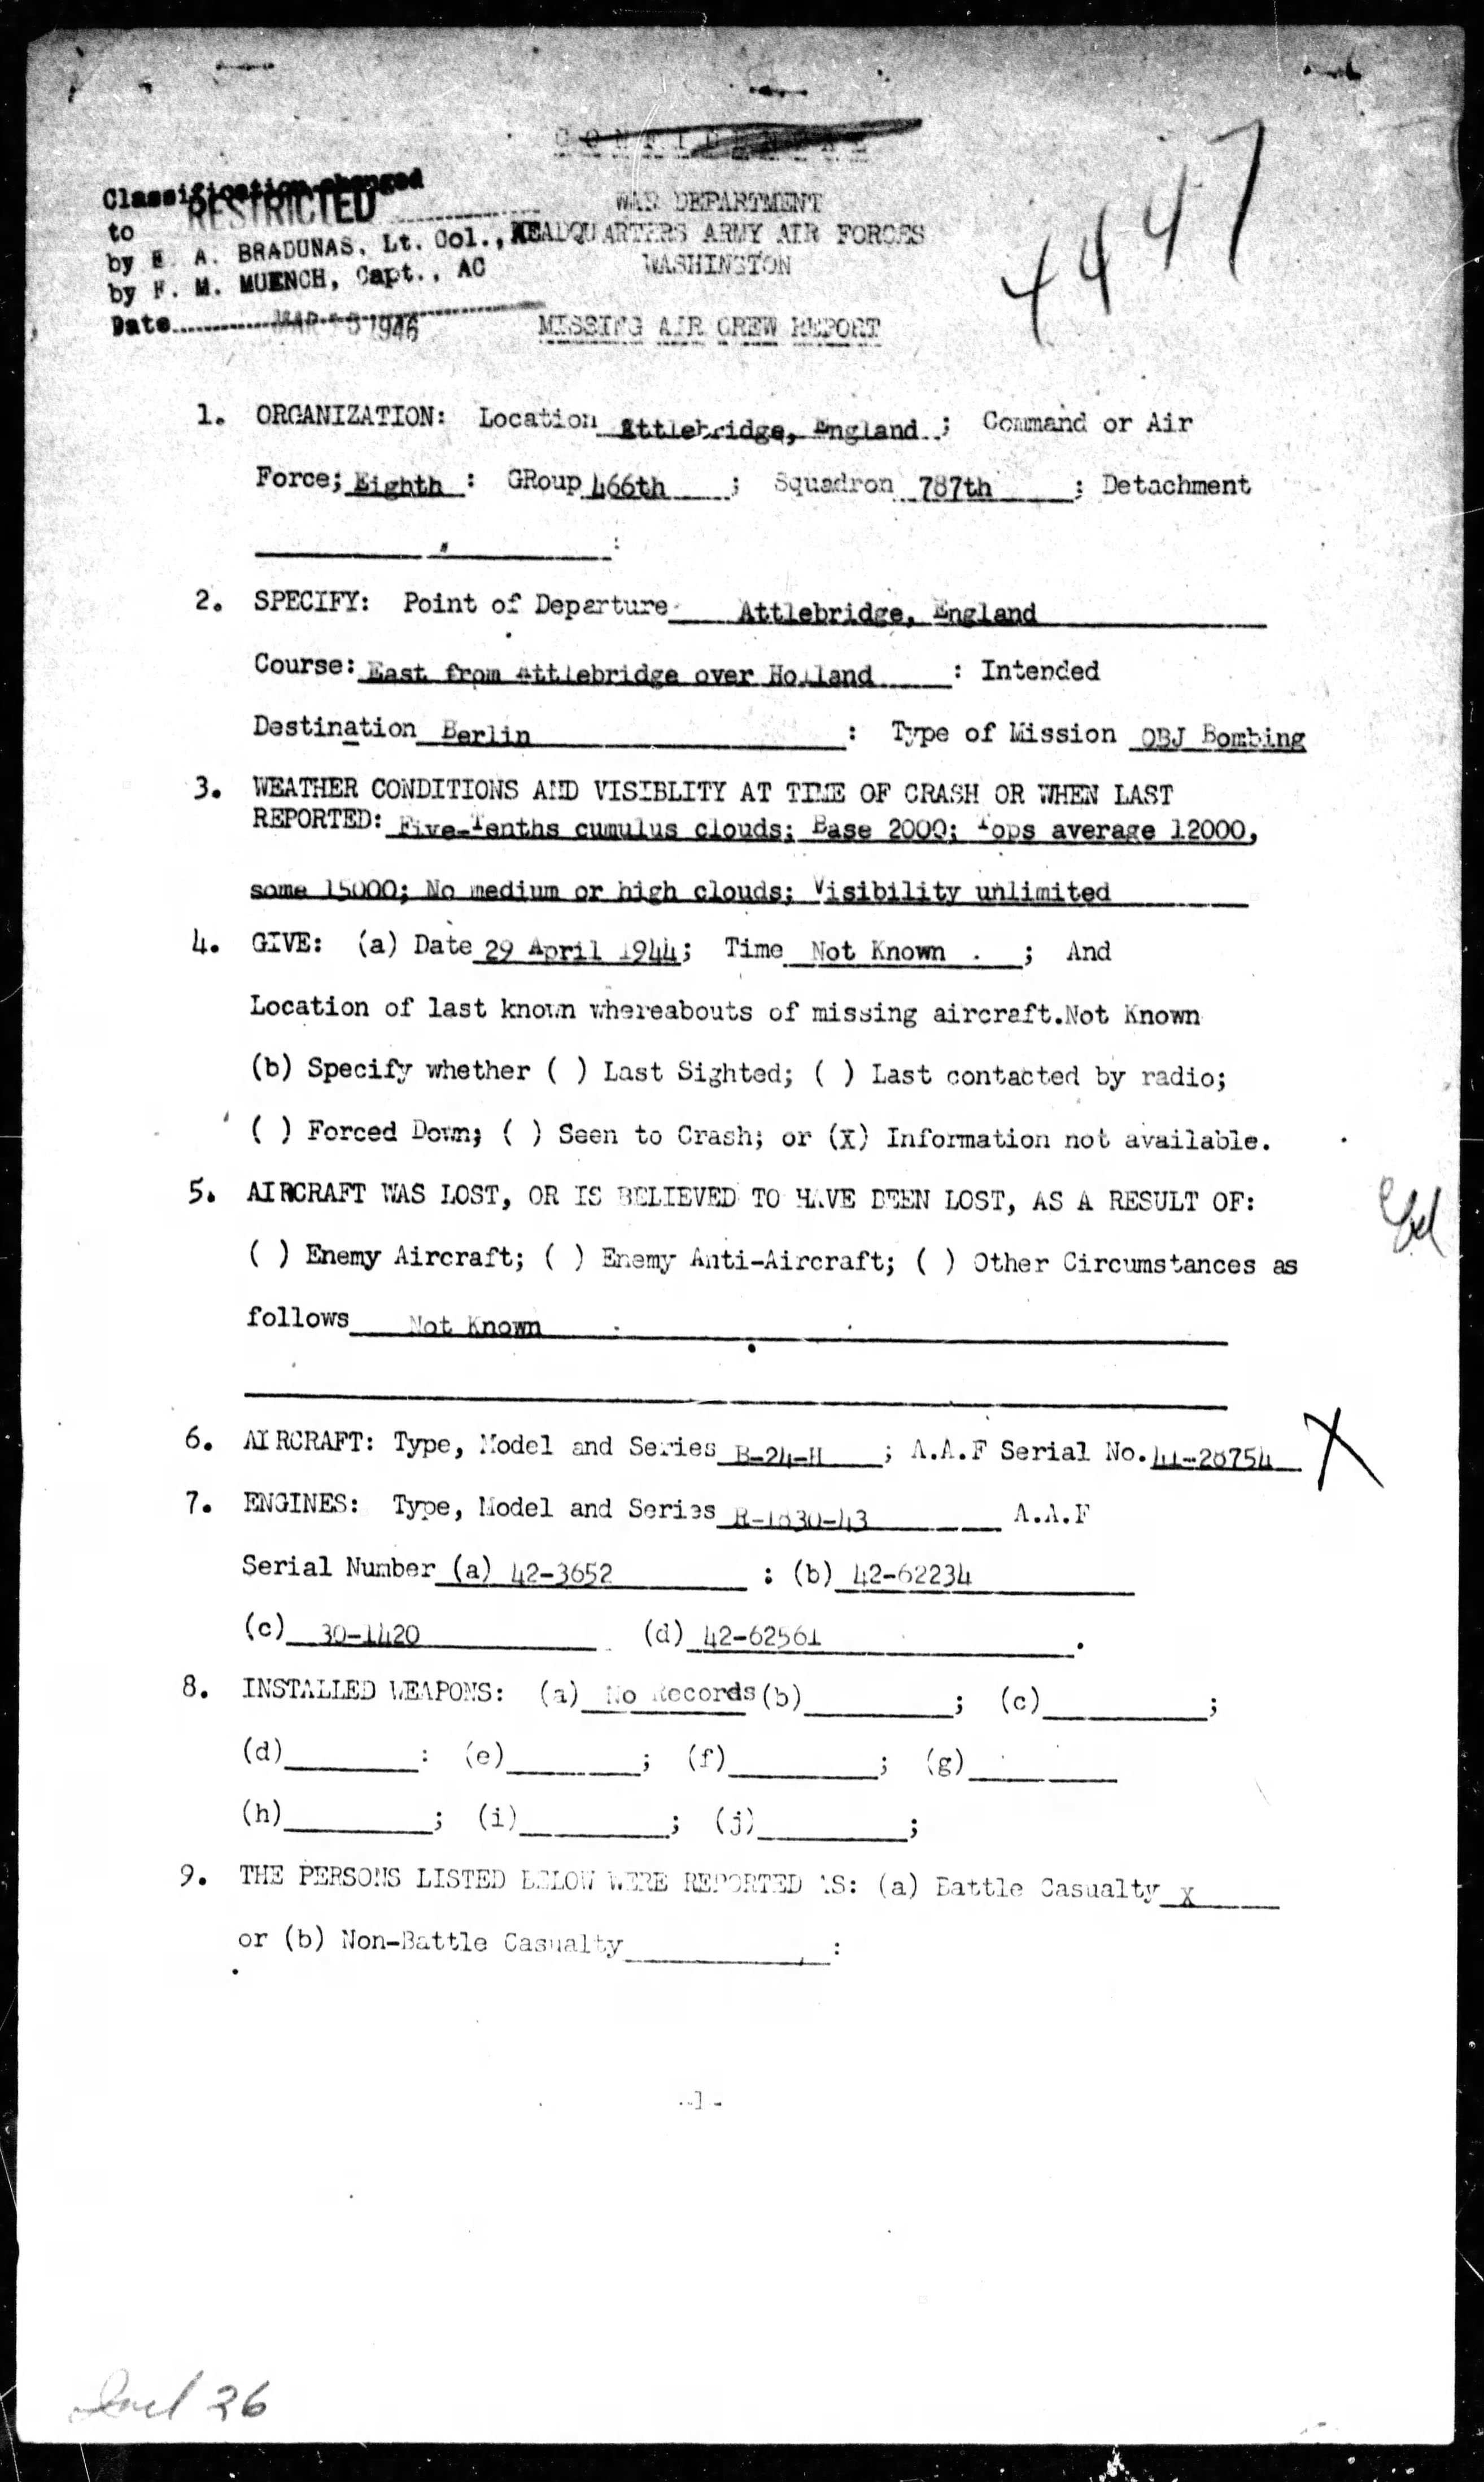
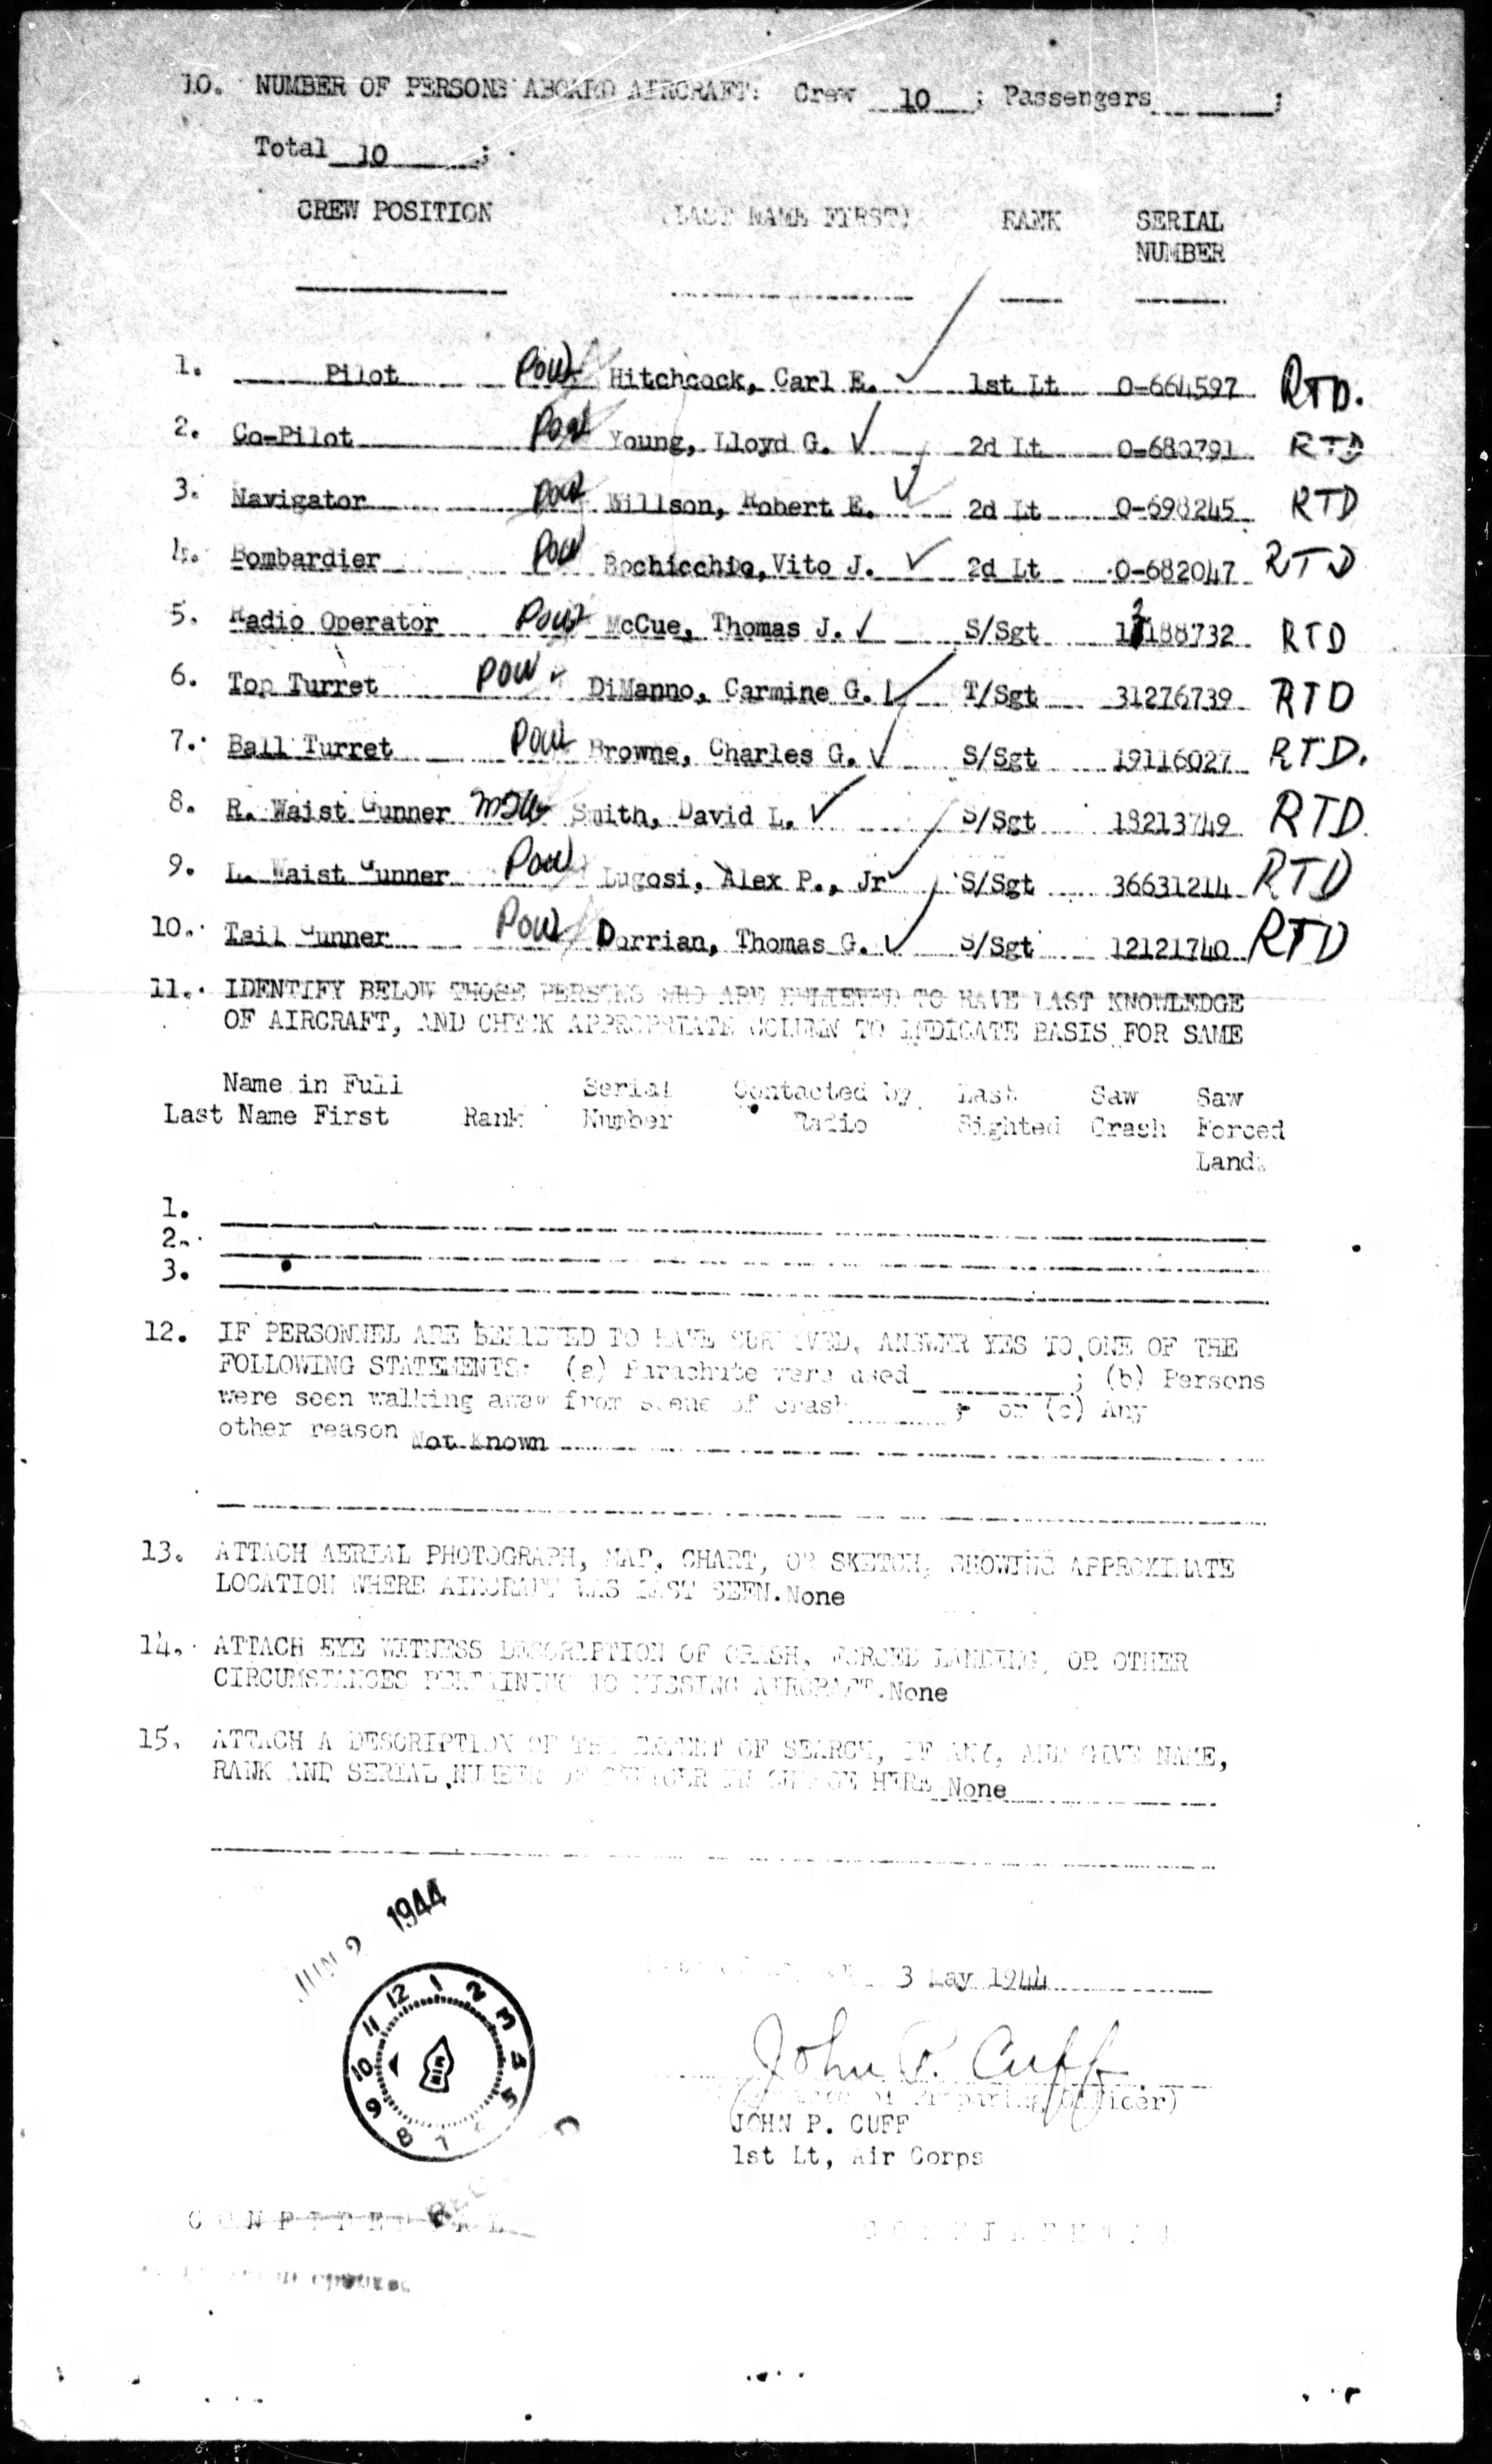
Though my prior posts list the names of the plane’s crew members (from MACR 1423 – the first sheet is below), in the absence of other information it was then impossible to attach “names to faces”.

Thus, the men in the photograph remained, in senses both symbolic and very real, “unknown”.

______________________________

Well, time passes.

Sometimes; all too often (especially in the world of 2018) time can drape a veil of forgetfulness over history.

But, on occasion, the passage of time can actually bring the past into clarity, memory, and awareness.  Fortunately, such has happened with the names of the crewmen of Dogpatch Express.

Recently, I was contacted by Richard “Rich” Thomspon, Jr., through whom I learned that the officer in the center of the above photo – the fellow seated in the wheelchair – was his father, Second Lieutenant Richard (“Dick”) Sydney Thomspon, Sr.  At the time the image was taken, Dick, severely wounded during the 11th Bomb Group’s mission to Wake Island, on July 24, 1943, was recovering from his injuries, probably at Oahu, Hawaii.  As indicated by Roy Gearon’s FindAGrave biography, Dick indeed was being visited by his crewmen. 

All but two of the men in the photo – aboard Dogpatch Express five months later – would not survive the war.

Rich has created a detailed, profusely illustrated, and well-written account of his father’s military experiences and postwar life, entitled Wicked Witch, which he has kindly shared with me.  A few of the many evocative images from this document appear below.

As a result, through Rich’s assistance and enthusiasm, I’m now able to “attach” names to faces, and, casting aside time’s anonymity, definitively identify each airman.  The mens’ identities have thus become more than the nominal information – “name, serial number, and next of kin” – typical of Missing Air Crew Reports and Casualty Lists.

______________________________

Dick Thompson was born in Boston on December 9, 1918.  His family eventually moved to Pennsylvania, residing at 25 Rolling Road in West Park Station, a suburb of Carrol Park, near Philadelphia’s Overbrook Park section.  

Dick entered the military in 1941 (prior to which time he’d been an iron-worker), before Japan’s attack on Pearl Harbor.  He was eventually assigned to the “22nd Military Police” of the 1st Armored Division, and was stationed in Louisiana.

In time – though the details and specific dates are unknown – Dick entered the Army Air Force.  Having completed training as an Aviation Cadet, he was commissioned as a Second Lieutenant on the 12th of December (Saturday), 1942.  The other significant – if not greater – transition in his life was his marriage the next day to Elizabeth Marie McCaffrey, of Philadelphia.

Though the details are unknown, Dick spent the Winter and Spring of 1943 doing further training in the southwestern United States.  According to Rich, it’s unknown,when his crew was assigned or how much stateside “bonding” they got in before leaving for Hawaii.”

In any event, his crew initially – almost certainly – consisted of:

2 Lt. John E. Lowry, Jr. – co-pilot
2 Lt. Carl A. “Mort” Mortenson – navigator
Lt. Lori – bombardier
Technical Sergeant Clarence T. Sopko – Flight Engineer
Staff Sergeant Arnold J. Paradise – Radio Operator
Staff Sergeant Carl N. Dell – gunner
Staff Sergeant Earl D. Neilsen – gunner
Sergeant Del Vickio (spelling uncertain – could be “Del Vechio”, or, “Del Vecchio”) – gunner

Rich notes that each of the enlisted men wore at least four sergeant’s stripes, indicating that they may well have accrued more service time than their own four officers.  The crew eventually arrived at Kualoa, Hawaii (specific date unknown – probably mid-June), where they were assigned to the 11th Bomb Group’s (the “Grey Geese”) 42nd Bomb Squadron. 

On June 16, 1943, they flew aircraft 42-20688, the WICKED WITCH, as verified from data at the Oak Trust Library.  Lt. George W. Smith, who would pilot the ill-fated DOGPATCH EXPRESS six months later, is known to have piloted the WITCH earlier – on June 7 – for a test of the plane’s automatic flight control equipment.

The 11th Bomb Group’s second combat mission since June of 1942 (the first having been a bombing and photo reconnaissance mission, staged from Funafuti (in the Ellice Island Group) to Makin and the Jaluit Islands), scheduled for July 24, 1943, was to be to Wake Island.  For this purpose, the 11th staged at Fongafele Island, at Funafuti.  Prior to that time the 11th Bomb Group was engaged in organizing itself as a combat organization, and, flying practice and patrol missions around the Hawaiian Islands.

Here’s an image of Dick having briefly “gone native” near the Funafuti Island church…

The July 24 mission would be Dick’s first opportunity to fly the WITCH since June 16.  As noted by Rich (via historian Bob Livingstone of Brisbane, a member of the Aviation Historical Society of Australia and author of two books on the B-24), “…when a new crew came in with a new plane, the other air crews would “seize” their plane and give the new crew one of the ratty old planes that was pretty well used up.  Hard to argue after seeing what happened to the “WITCH”  as it did 6 missions in the 5 weeks dad was there but with Lieutenants Deasy, Stay, and Sands.”  (In the time intervening since his arrival, Dick had piloted 9 other B-24s on a total of 18 missions.)  Rich has also suggested that the allocation of new planes to veteran crews was, “…part of the training for a new crew.  If they just got to fly a new plane all the time, they would likely as not have any mechanical issues to deal with. … Flying the older planes, especially during training and sea search missions would give them a chance to think and interact as a team trying to survive under extenuating circumstances.  I think this was all by design of the bomb group commander, Colonel William J. Holzapfel, Jr., At this point in the war, he was responsible to ensure his airman were trained in the skills to win the war and he was learning right along with his air crews.”

As noted by Richard, “in terms of aerial warfare, [the mission to Wake Island] was just one more mission with nothing to distinguish it from others.  Conducted by Liberators of the reconstituted 11th, it was a “nuisance raid” ordered by the navy to relieve pressure in the South Pacific and to confuse the enemy as to where the next blow would fall.”

“12 planes were scheduled, 10 took off and eight went over the target to drop seven 500 pound general purpose bombs, 55 fragmentation bomb clusters and three 650 pound depth charges.  Hits were scored on Wake’s oil storage areas, barracks and a gun emplacement.”

“When Lt. Richard Thompson’s WICKED WITCH got to Midway from Hawaii to stage for the Wake raid, their tail gunner, S/Sgt. Earl D. Nielsen, required an emergency appendectomy.  When … Colonel Holzapfel asked the Marines for a replacement, there were more than 200 volunteers.  So, the name of Sgt. William C. Campbell was drawn out of the hat.  A Marine Captain offered $1,000 to take the Sergeant’s place, but was refused and Sgt. Campbell took over the tail guns of WICKED WITCH and over Wake, he downed a Zero.  (The eight-plane raid claimed nine Zeroes destroyed, four probable and three damaged.)”

The Wake Island mission cost the 11th Bomb Group two B-24s and twelve airmen.

One aircraft, B-24D 42-40676 (Cabin in the Sky), piloted by First Lieutenant James R. Cason, was struck in the port fin and rudder by a Zero (whether accidentally or deliberately will remain unknown), crashing into the sea with no survivors.  The plane’s loss is covered in Missing Air Crew Report 314. 

Lieutenant Richard W. Lipman, whose detailed, frank, and often moving diary (encompassing November, 1942, through December, 1944) appears in Grey Geese Calling, recorded that, “Cason had his rear stabilizer rammed by a Zero and he spiraled down shooting all the way to explode upon hitting the water.  I don’t know but I can’t seem to swallow the fact that the guys I know so well and the ship I flew in from Kualoa to Midway are gone forever.  Clean cut Cason, good natured Thompson, “Slick” Moore, McConnell and Kane [?] just out of Cadets.  Man, this ain’t for me!”

Along with Cason, the plane’s crew comprised:

1 Lt. Loren E. Thompson – Co-Pilot (Nehama County, Nebraska)
2 Lt. Robert B. McConnell – Navigator (Multnomah County, Oregon)
2 Lt. Ernest W. Moore – Bombardier (Anderson County, South Carolina)
T/Sgt. Lee R. Sterner – Flight Engineer (Muscatine County, Iowa)
S/Sgt. Lloyd R. Taylor – Radio Operator (Wilson County, Kansas)
S/Sgt. James W. Strope – Gunner (Chicago, Illinois)
Sgt. Louis N. Lane – Gunner (Lenawee County, Michigan)
S/Sgt. Harlan G. Davis – Gunner (Harrison County, West Virginia)
Sgt. Robert O. Stephens – Gunner (Los Angeles, California)
Cpl. Walter F. Kowalski – Photographer (Lackawanna County, Pennsylvania)

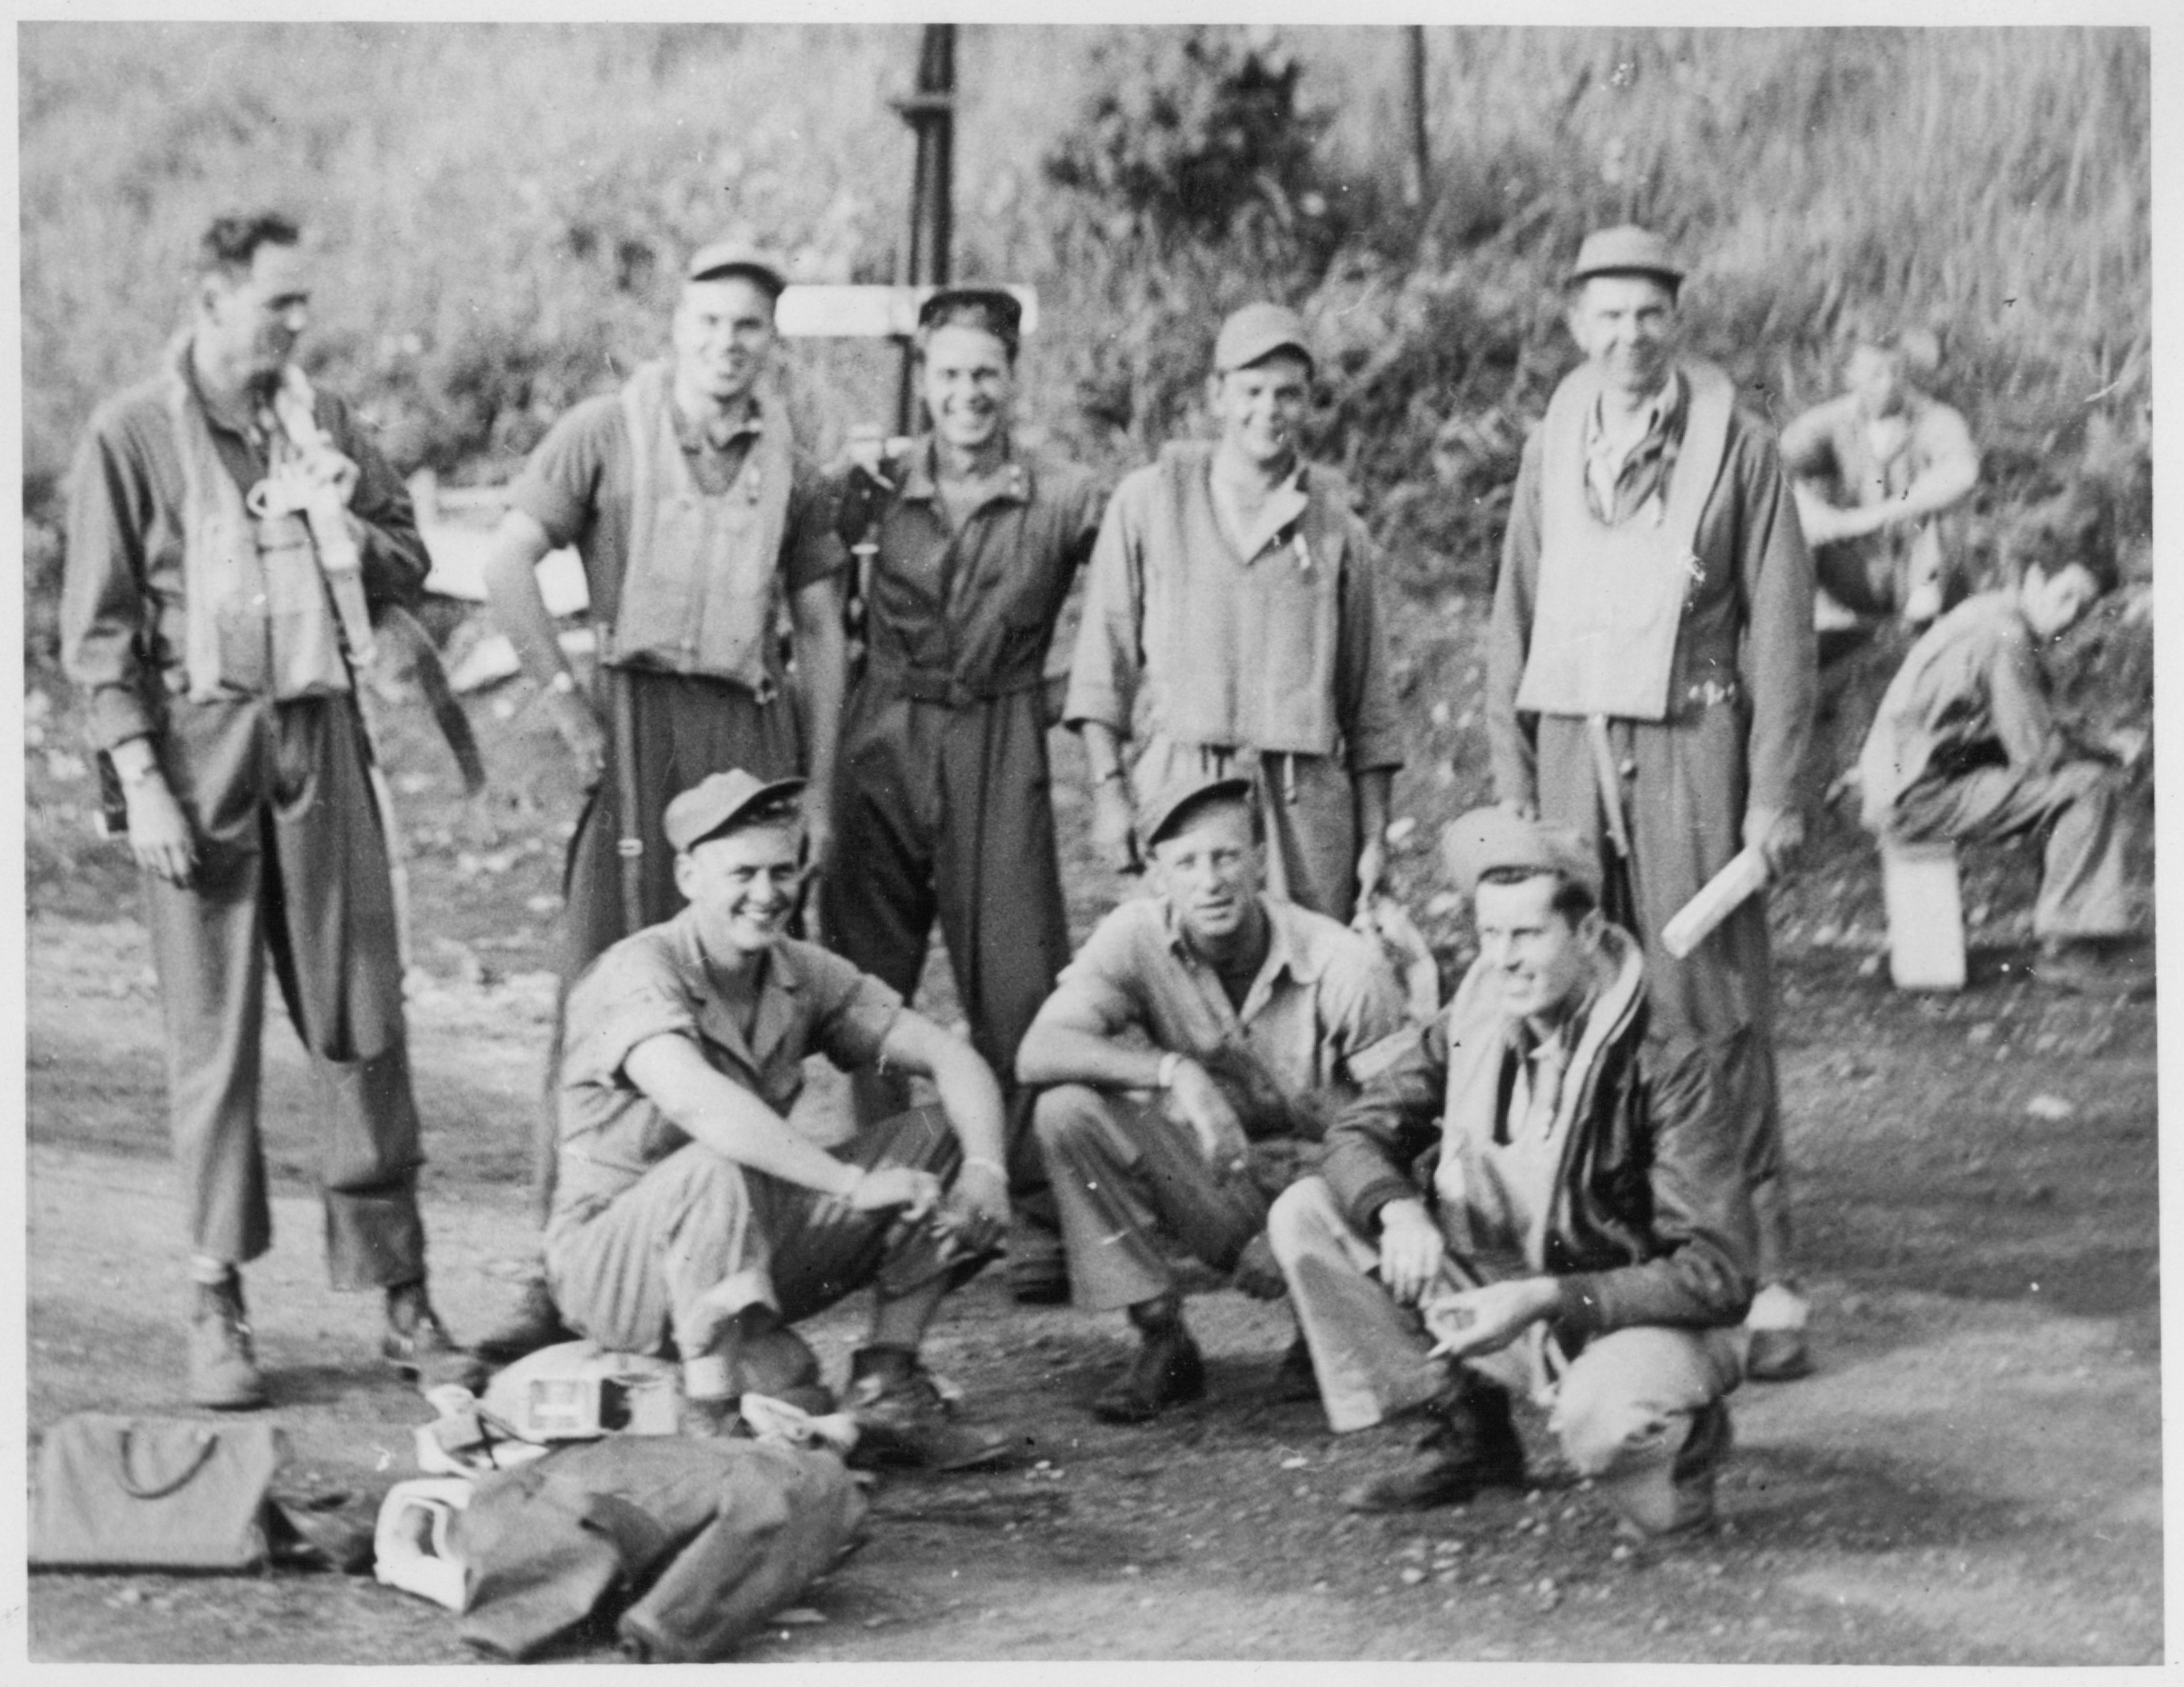
Here’s a photograph of eight members of James Cason’s crew, reportedly taken a few hours before this mission, from Cason’s FindAGrave biographical profile, provided by contributor Terry Woodward.  The image comes from the scrapbook of Bill Morrison.  Unfortunately, no names – “who is who?” – are listed.

…and, also from Bill Morrison’s scrapbook, we find an image of Lt. Cason, as seen in Hawaii in the summer of 1943 (also contributed by Terry Woodward):

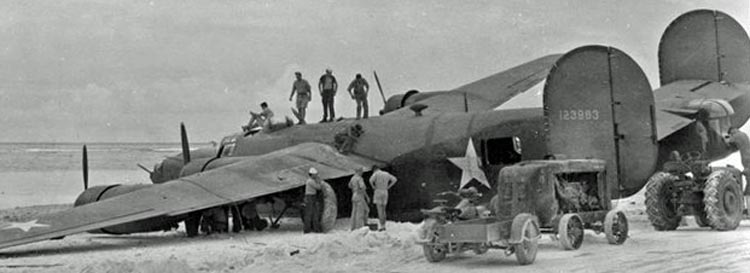
Aboard another B-24D, 41-23983, 1 Lt. Joseph A. Gall’s Daisy Mae, two crew members were killed and two wounded during attacks by Zero fighters.  Lt. Gall and F/O Van Horn crash-landed their bomber at Sand Island, one of the three islands comprising the Midway Atoll (the others are Eastern and Spit Islands).

Included in Lt. Gall’s crew were:

F/O John N. Van Horn – Co-Pilot
2 Lt. Benjamin I. Weiss – Navigator – Wounded
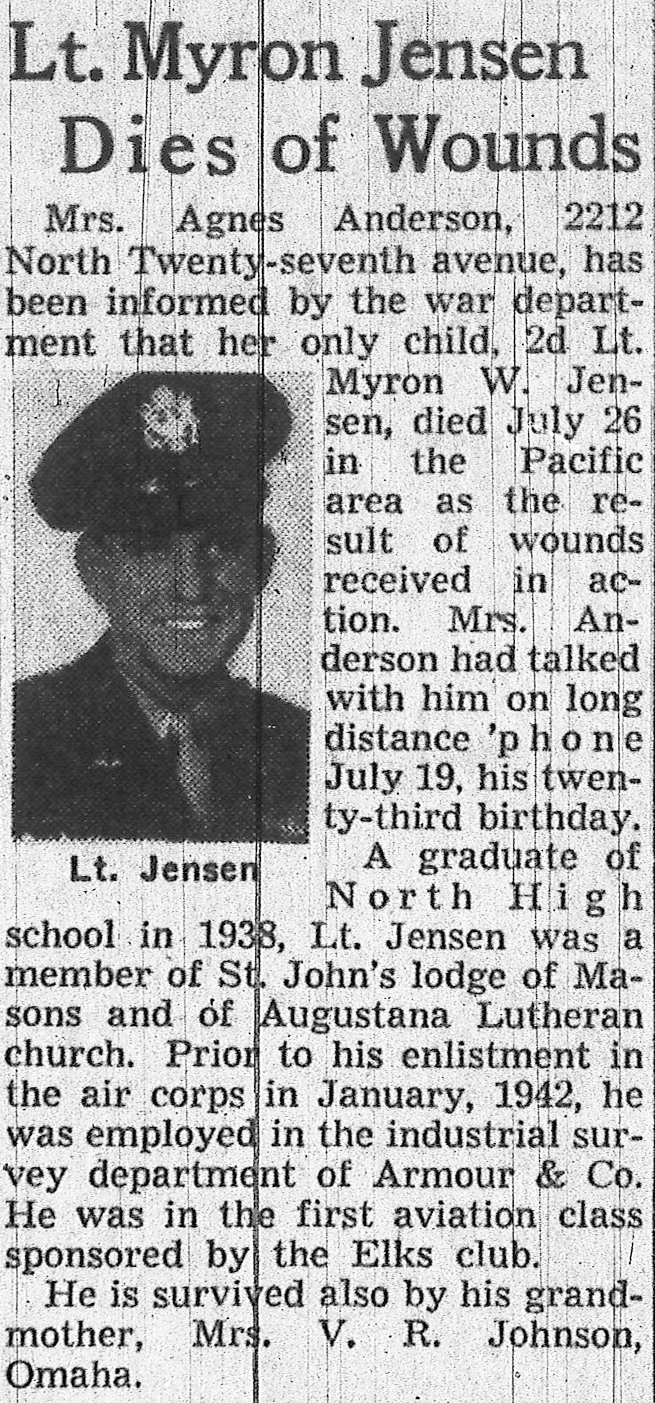
2 Lt. Myron W. Jensen – Bombardier – Died of Wounds (Douglas County, Nebraska)
S/Sgt. Arvid B. Ambur – Flight Engineer / Waist Gunner – Wounded
T/Sgt. Thomas Wyckoff – Top Turret Gunner – Wounded
S/Sgt. Robert L. Patterson – Radio Operator / Waist Gunner
S/Sgt. Francis J. Perkins, Jr. – Gunner
S/Sgt. Robert B. Storts – Nose Gunner
S/Sgt. Earl W. Conley – Tail Gunner
Sgt. Joseph P. Evans – Photographer – Killed in Action (Tom Green County, Texas)

As described by Lt. Lipman, “Gall got shot up plenty.  His ship I mean.  Jenson [sic] got hit in the gut, shoulder and wrist – has a 50-50 chance of living.  Sgt. Evans, photographer, got a gut wound and died before returning.  There were 2 other injuries on board.  There were 200 holes in “Daisy Mae”.  I went over and saw it where Gall pulled to a stop on its nose 2 inches from the ocean at the end of the runway.  He came in with 3 engines and no brakes.”

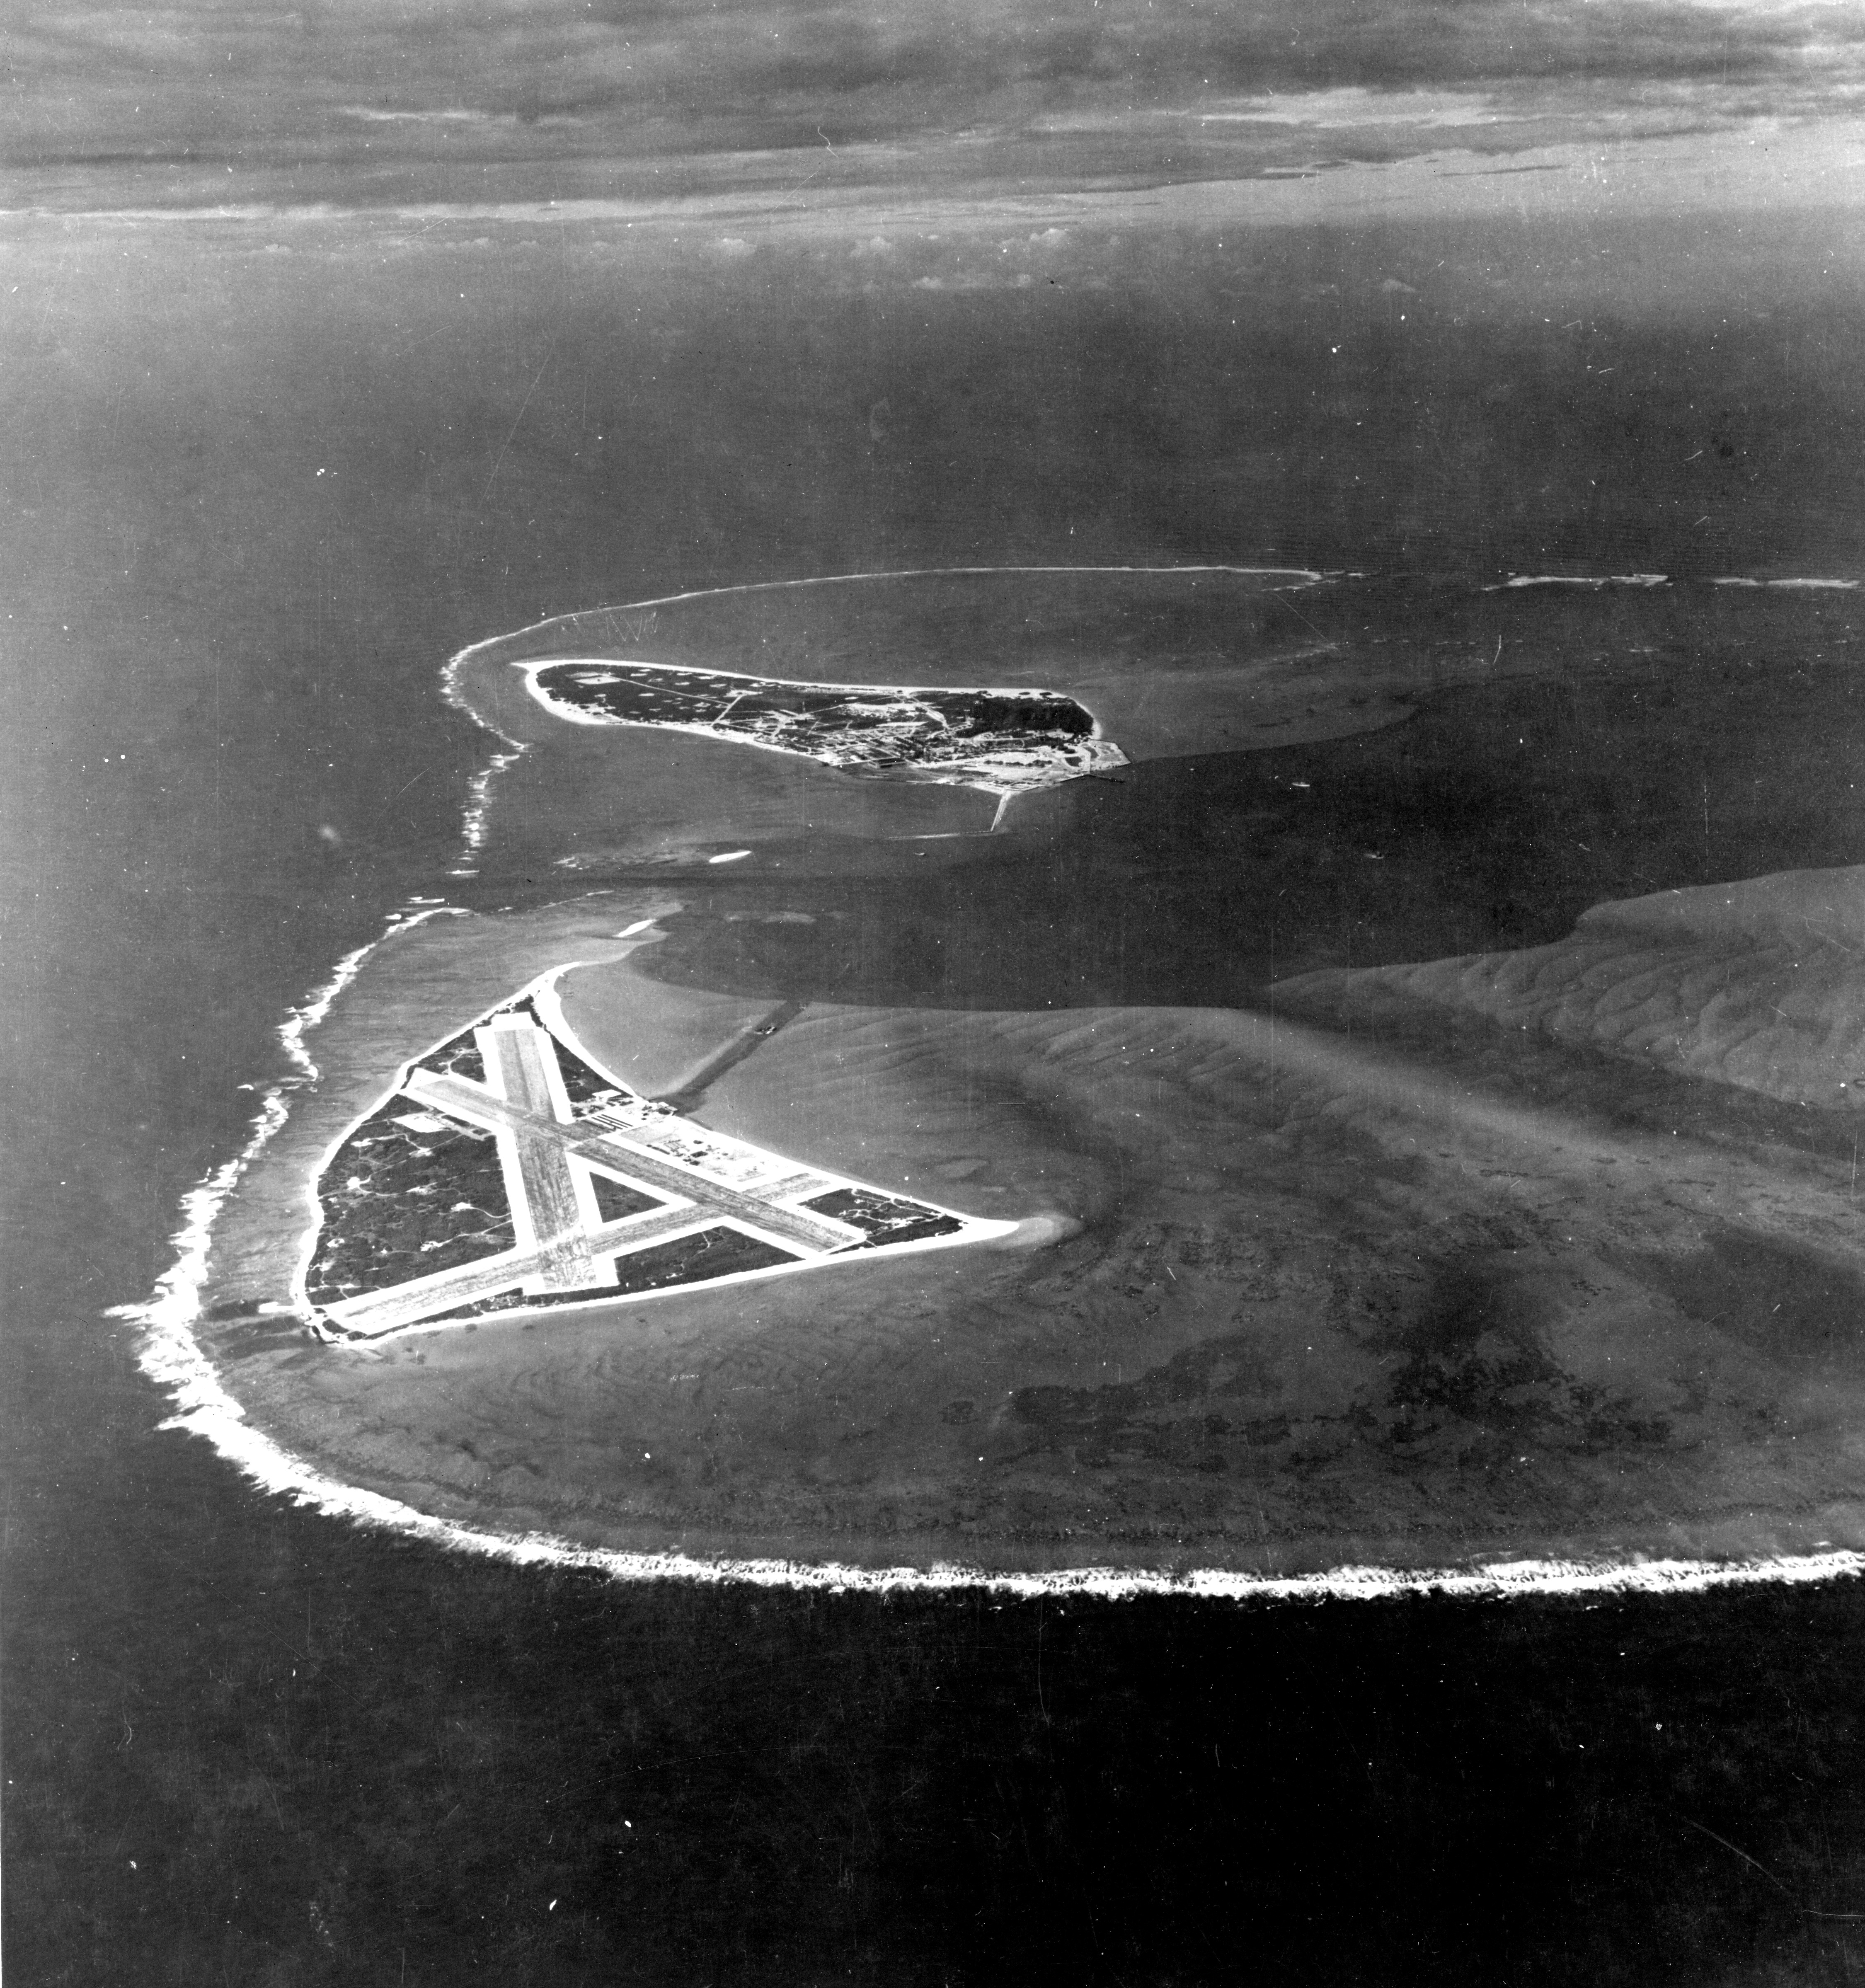
Here’s a view of the Midway Atoll taken on November 24, 1941, 14 days before December 7, 1941.  (Image 80-G-451086)  Eastern Island is in the foreground, and Sand Island is across the entrance channel, in the center background.

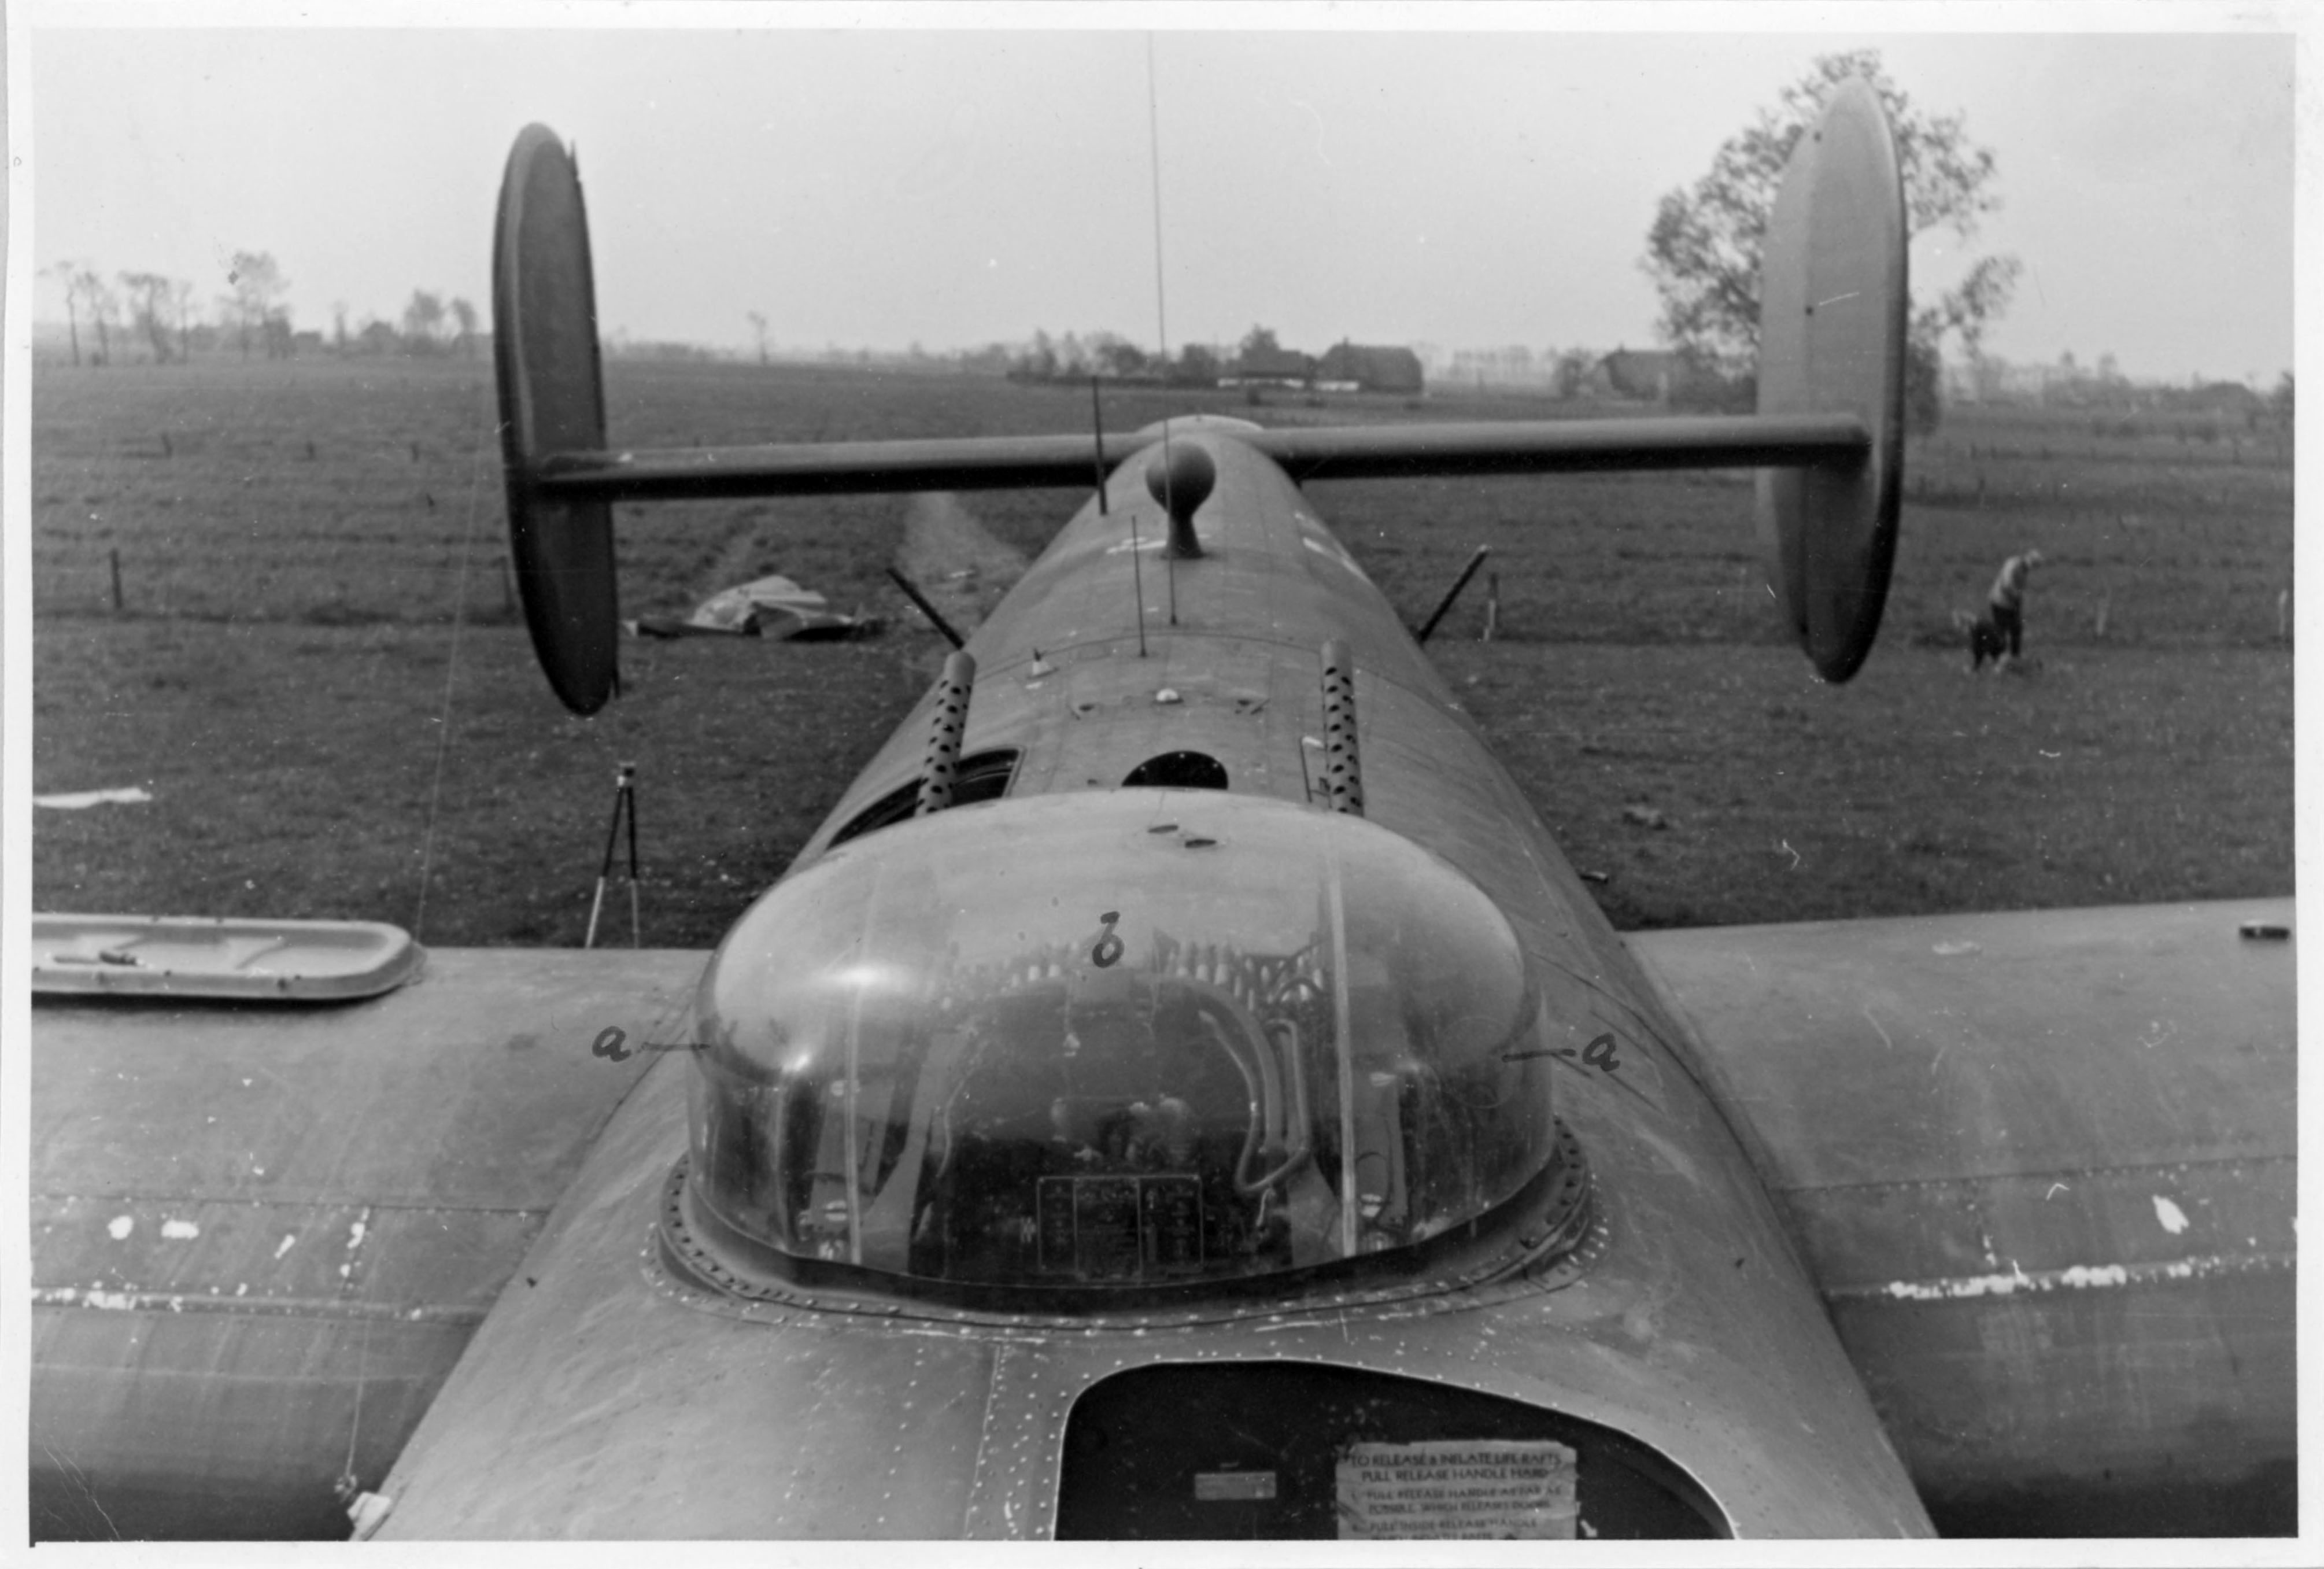
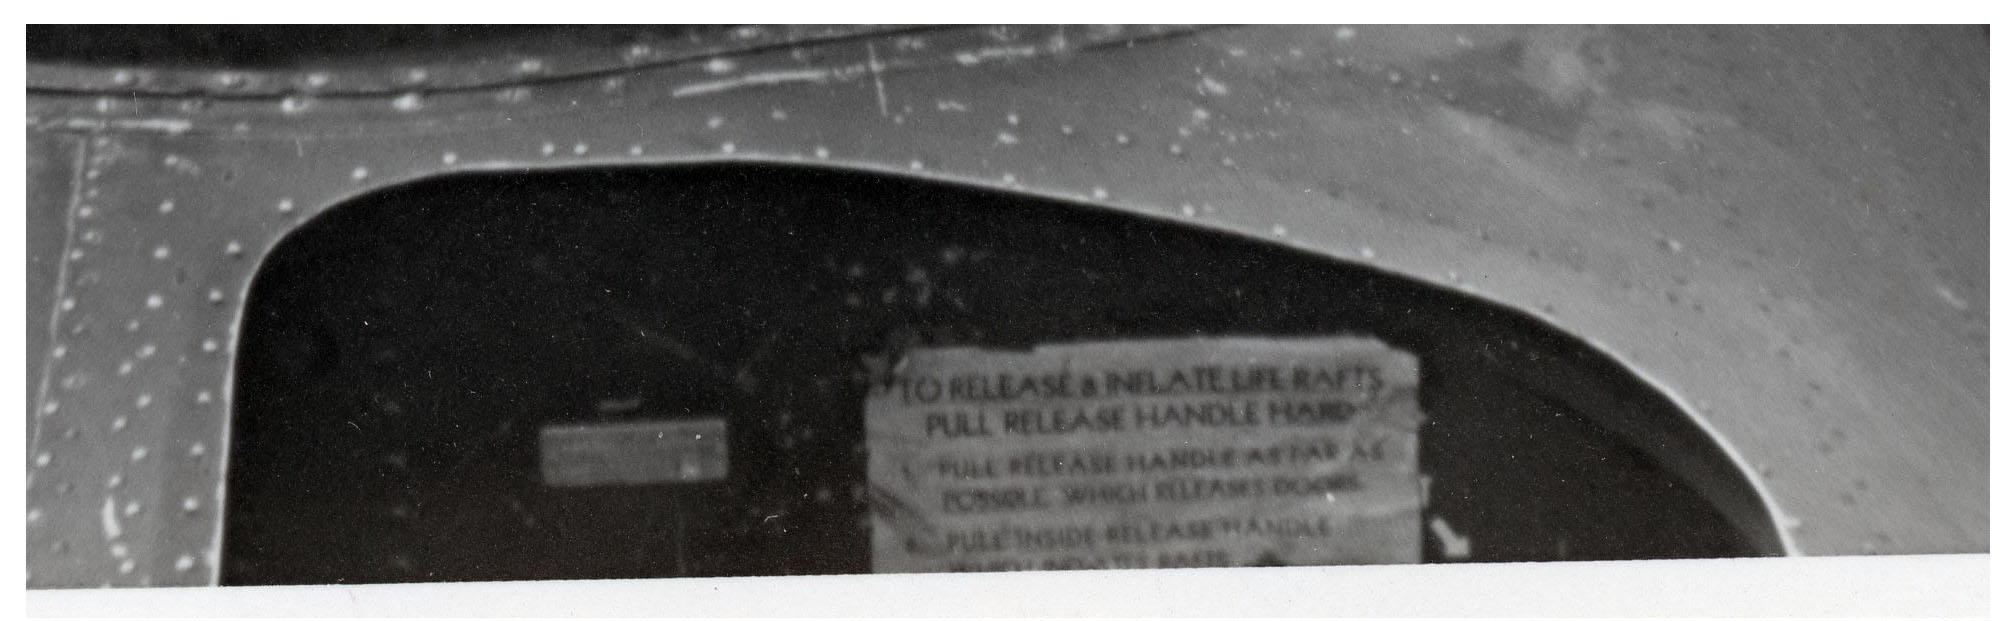
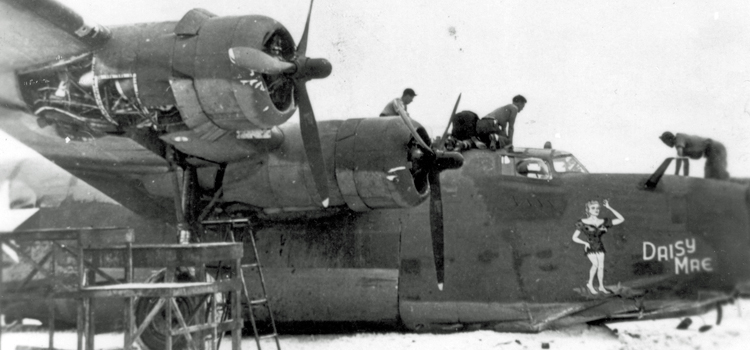
These two images, from B-24 Best Web, show Daisy Mae after her crash-landing, at the water’s edge.  Not visible in the lower photograph is the presence of a nose turret (a grafted-on B-24 tail turret) which replaced the bombardier’s “birdcage” typical of B-24Ds.

Lt. Jensen’s obituary, from his FindAGrave biographical profile, (contributed by Loren Bender) appears below:

Despite Daisy Mae’s return, Lt. Jensen’s name is commemorated on the Courts of the Missing at the Honolulu Memorial.  Quite strangely, it appears that he has no actual grave. 

______________________________

And, aboard the WICKED WITCH?

During the attack by intercepting Zero fighters, the aircraft was struck by a projectile which penetrated the left forward fuselage, directly through the location of the painted WITCH’s left arm.  (See photo below.)   The shell penetrated Dick’s calf left leg and thigh, the pain and loss of blood rendering him unconscious.  According to bombardier Lt. Thrasher, another projectile entered the WITCH in front of the nose wheel, passing between his legs and knocking him away from his bombsight. 

Lieutenant John Lowry, Dick’s co-pilot, took control of the aircraft, bringing it safely back to Funafuti.  After repairs, the WITCH would bear the symbol of one Japanese flag, for the Zero shot down by Sgt. Campbell.

Lt. Thrasher described both projectiles as having been 20mm cannon shells (from the Zeros fighters’ Type 99-1 cannon).  Though it’s a point of conjecture, given the destructive explosive power of such shells and the evident (fortunate!) seeming absence of a actual explosions within the aircraft, I wonder if the plane was actually struck by .303 machine-gun bullets.  Just an idea.  If so, this would be consistent with a letter of 30 July sent to Dick’s wife from Adjutant General J.A. Ulio, which specifically states that, “Lieutenant Thompson sustained gunshot wounds…”

______________________________

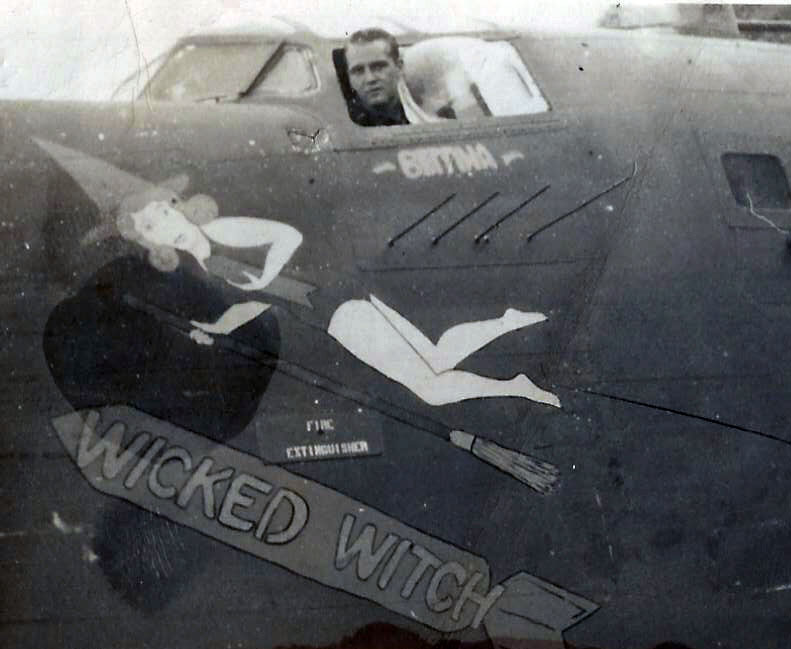
This photo, taken some months before the July mission, shows Dick in the cockpit of the WITCH.  Note the name “BETTINA” – evidently inspired by the name of his wife, Betty – below the cockpit.  A name (“MUGGSIE”) also appeared under the co-pilot’s window, possibly the nickname of John Lowry’s wife, Margaret.

______________________________

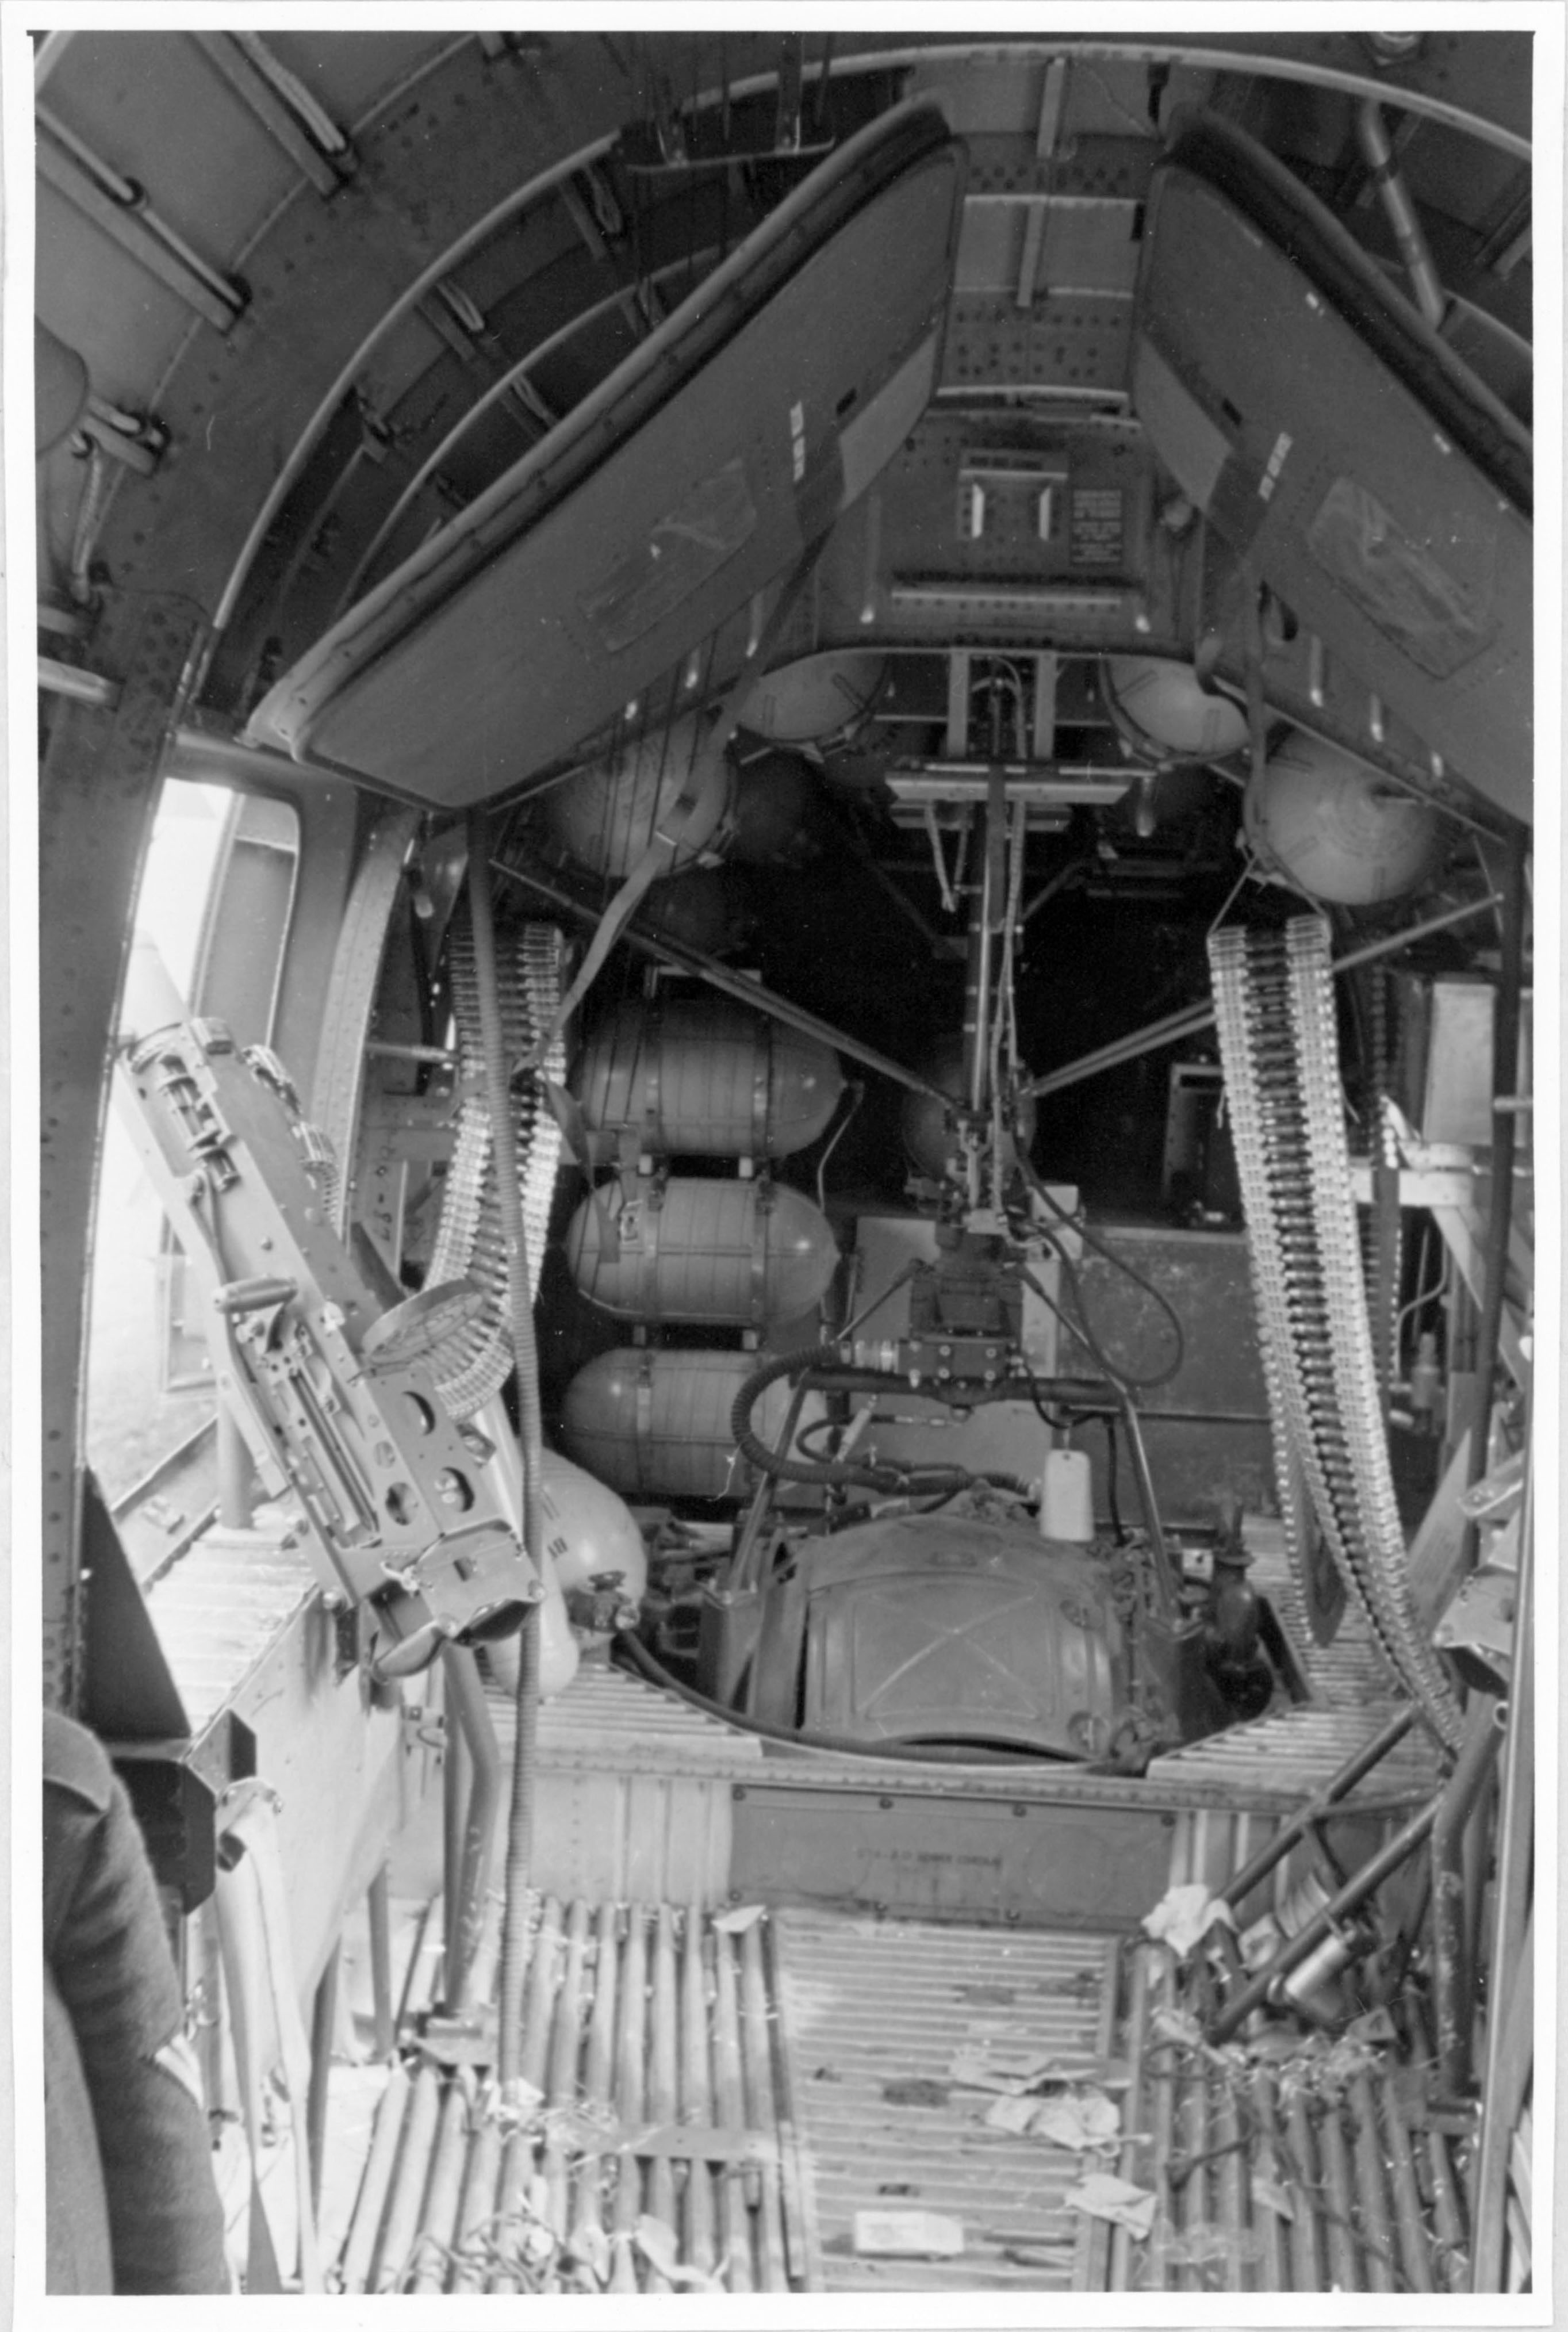
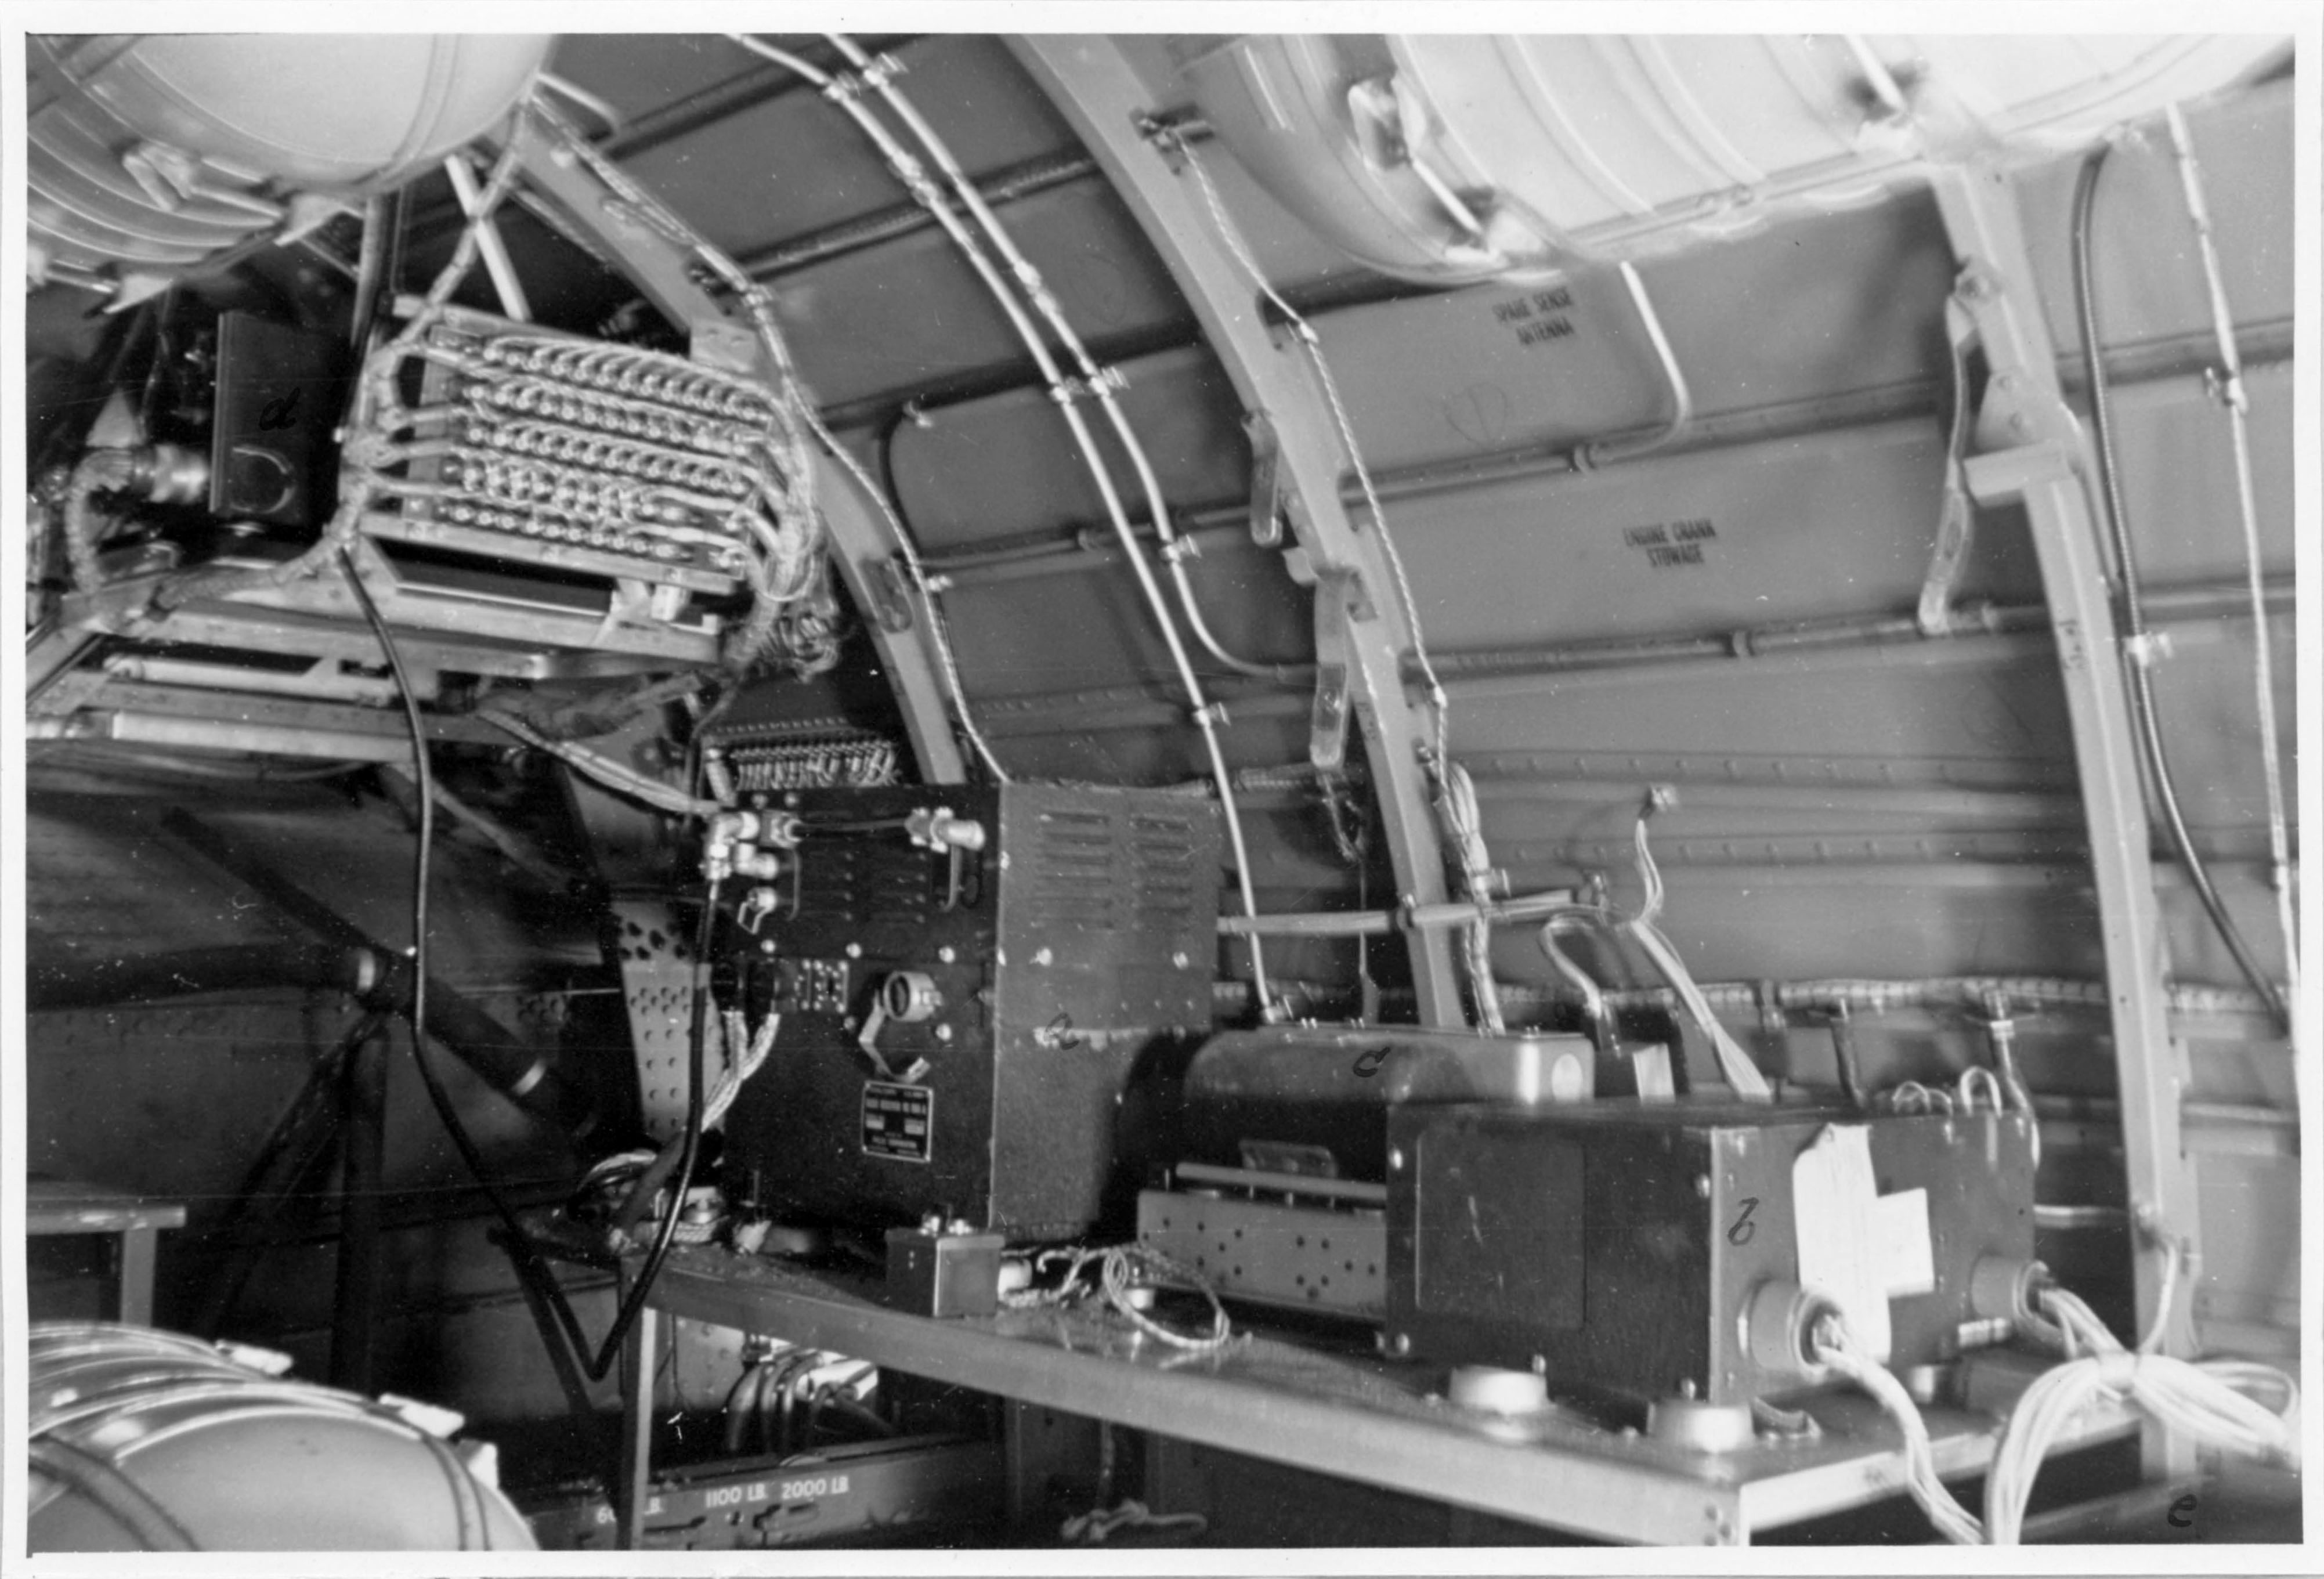
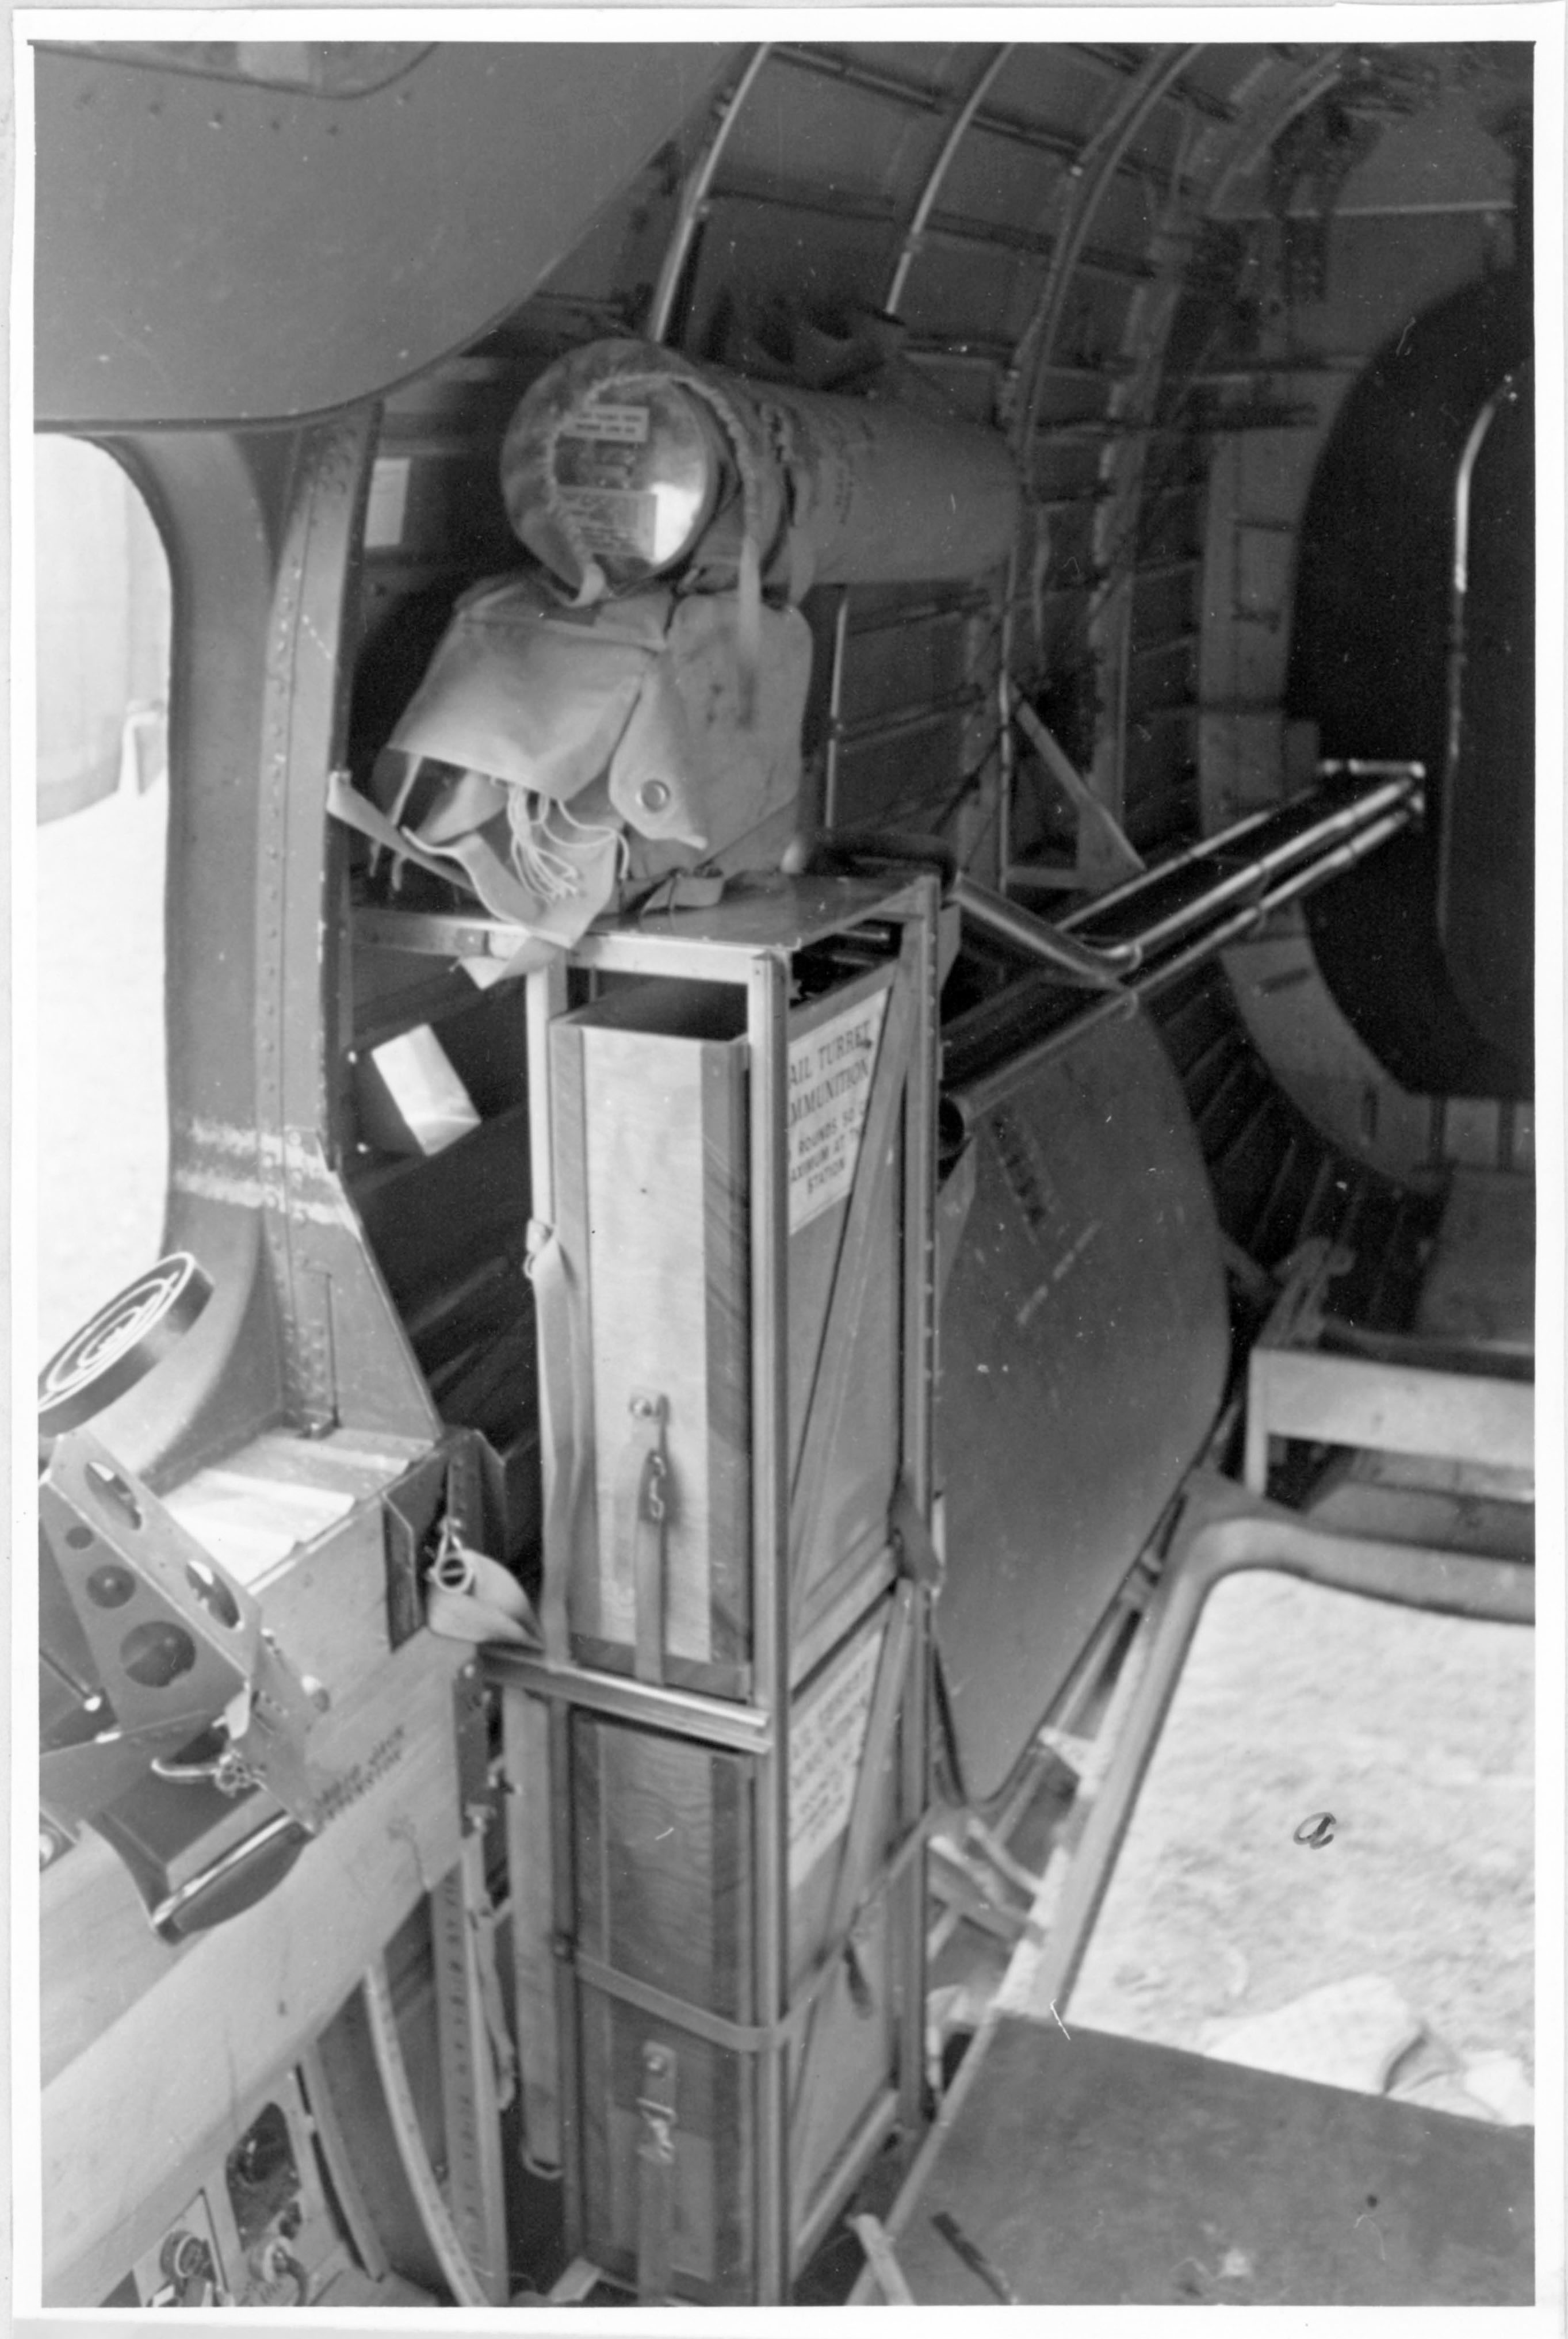
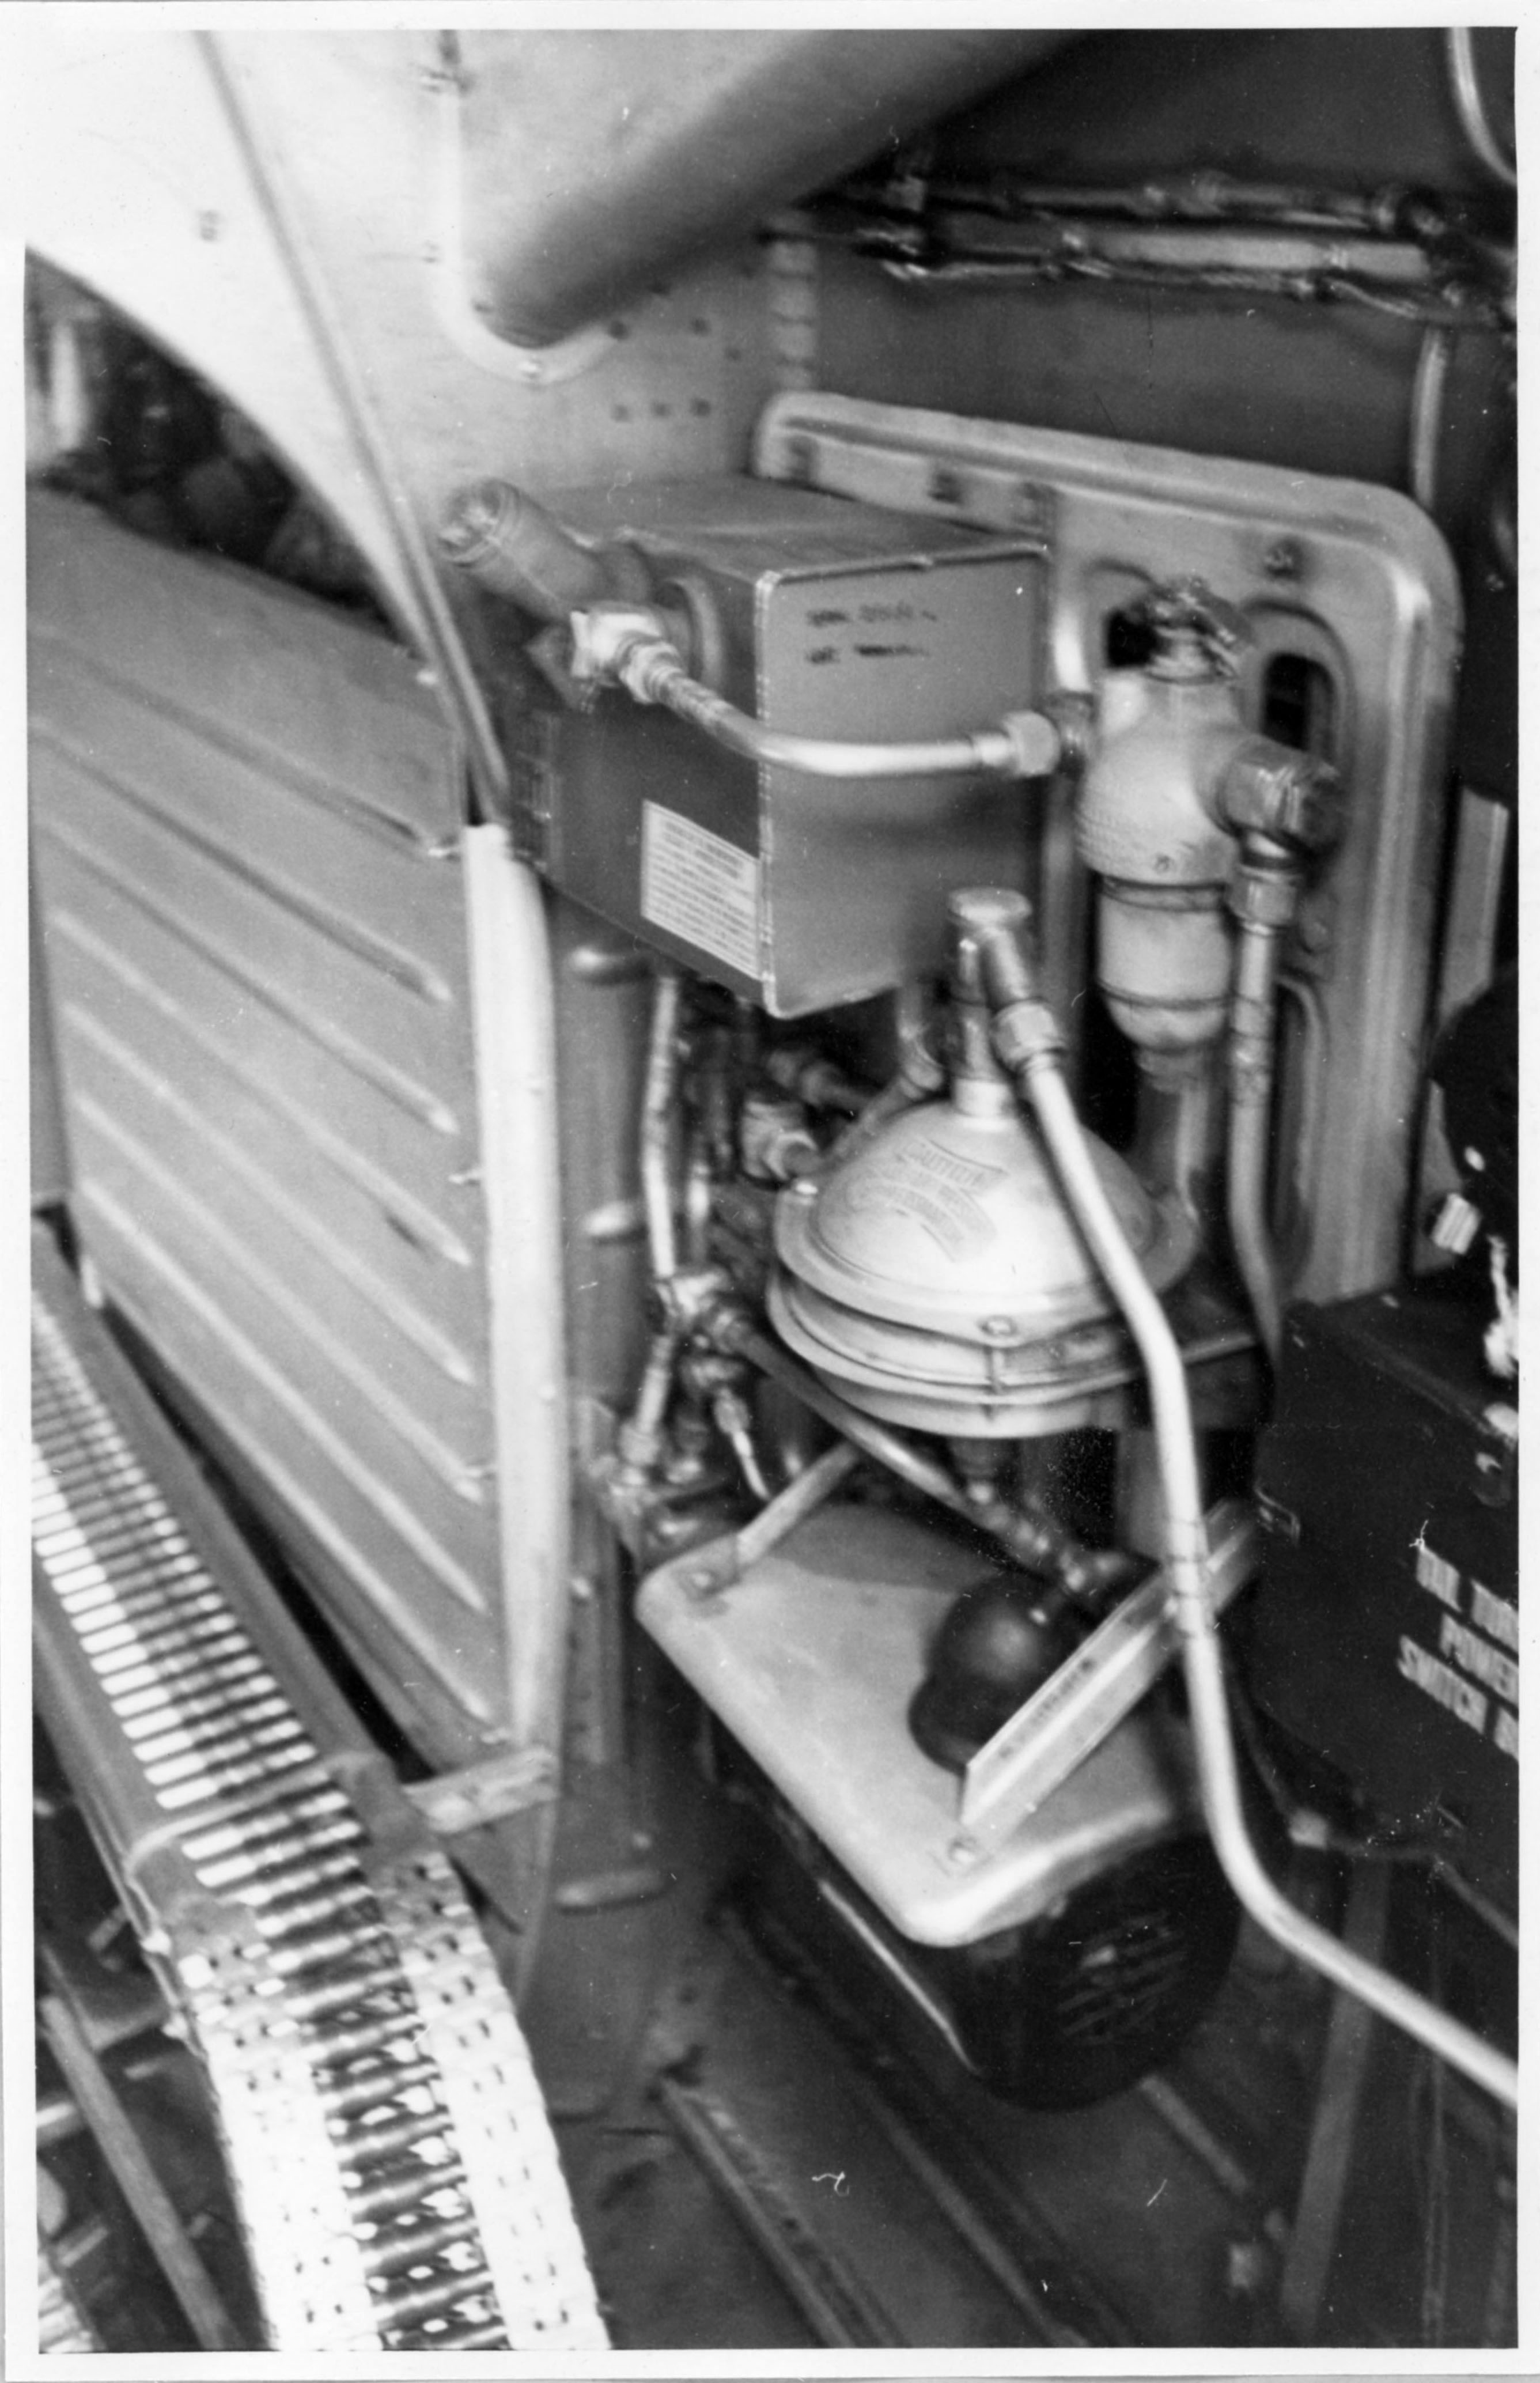
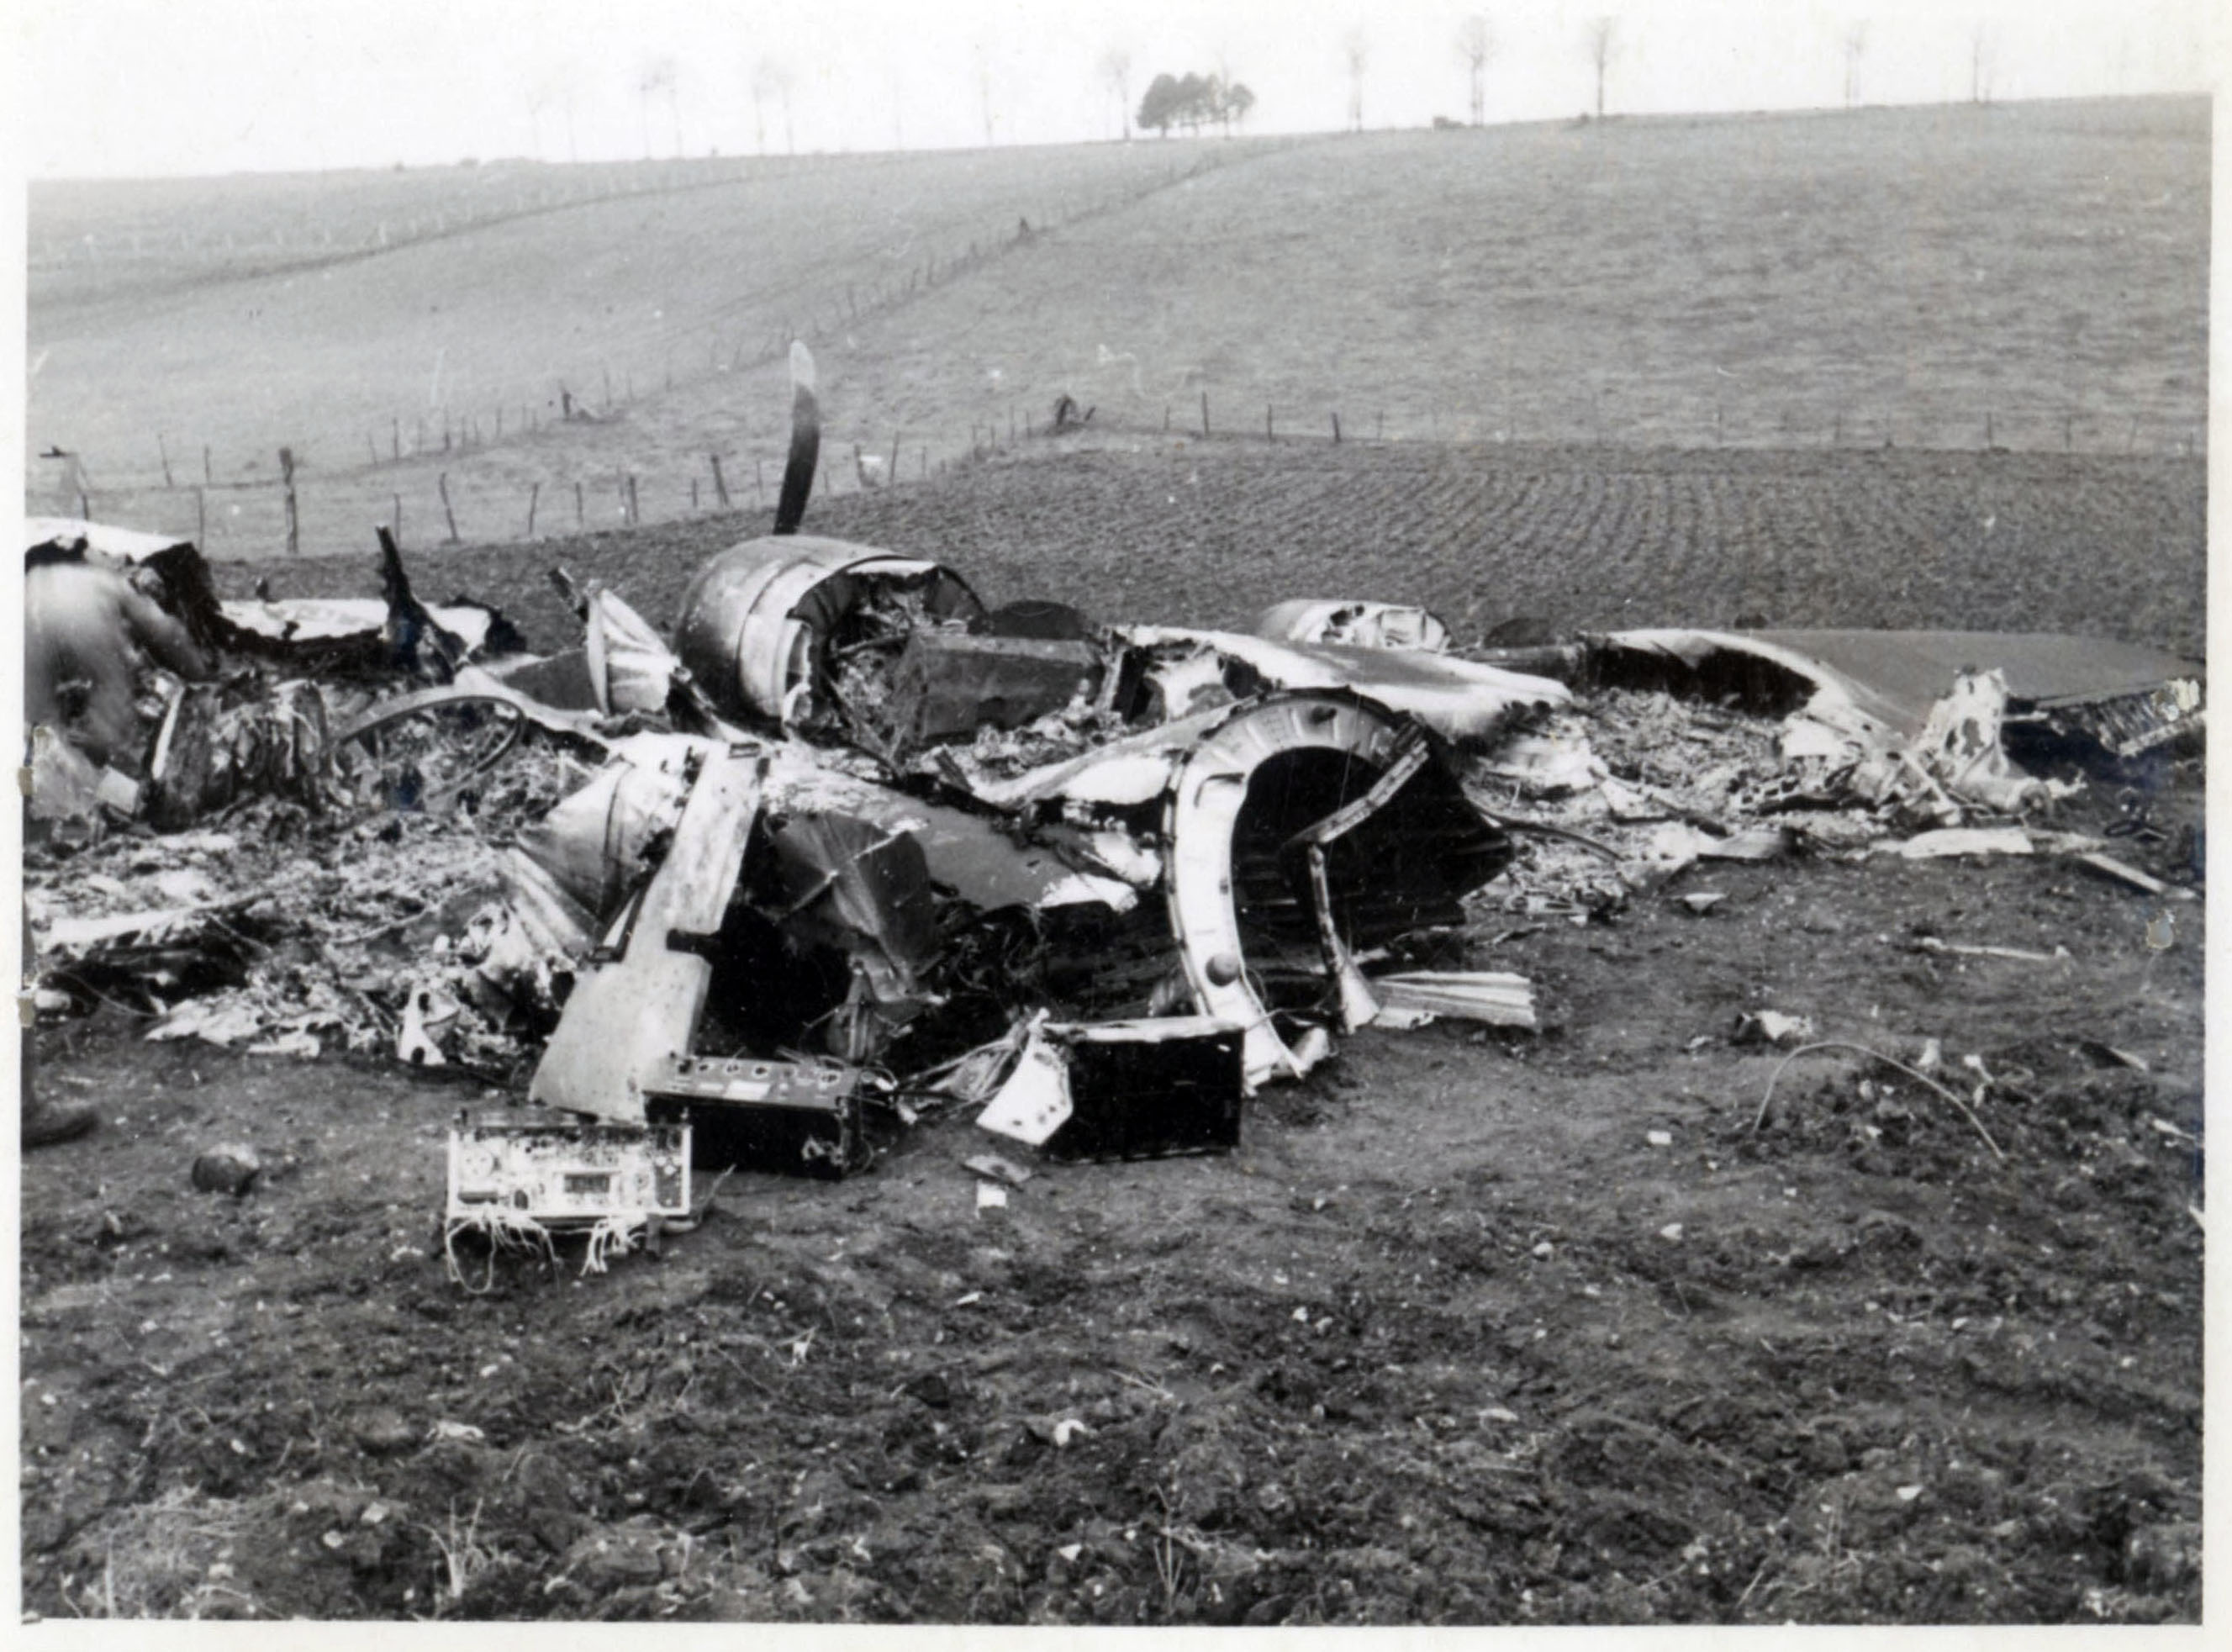
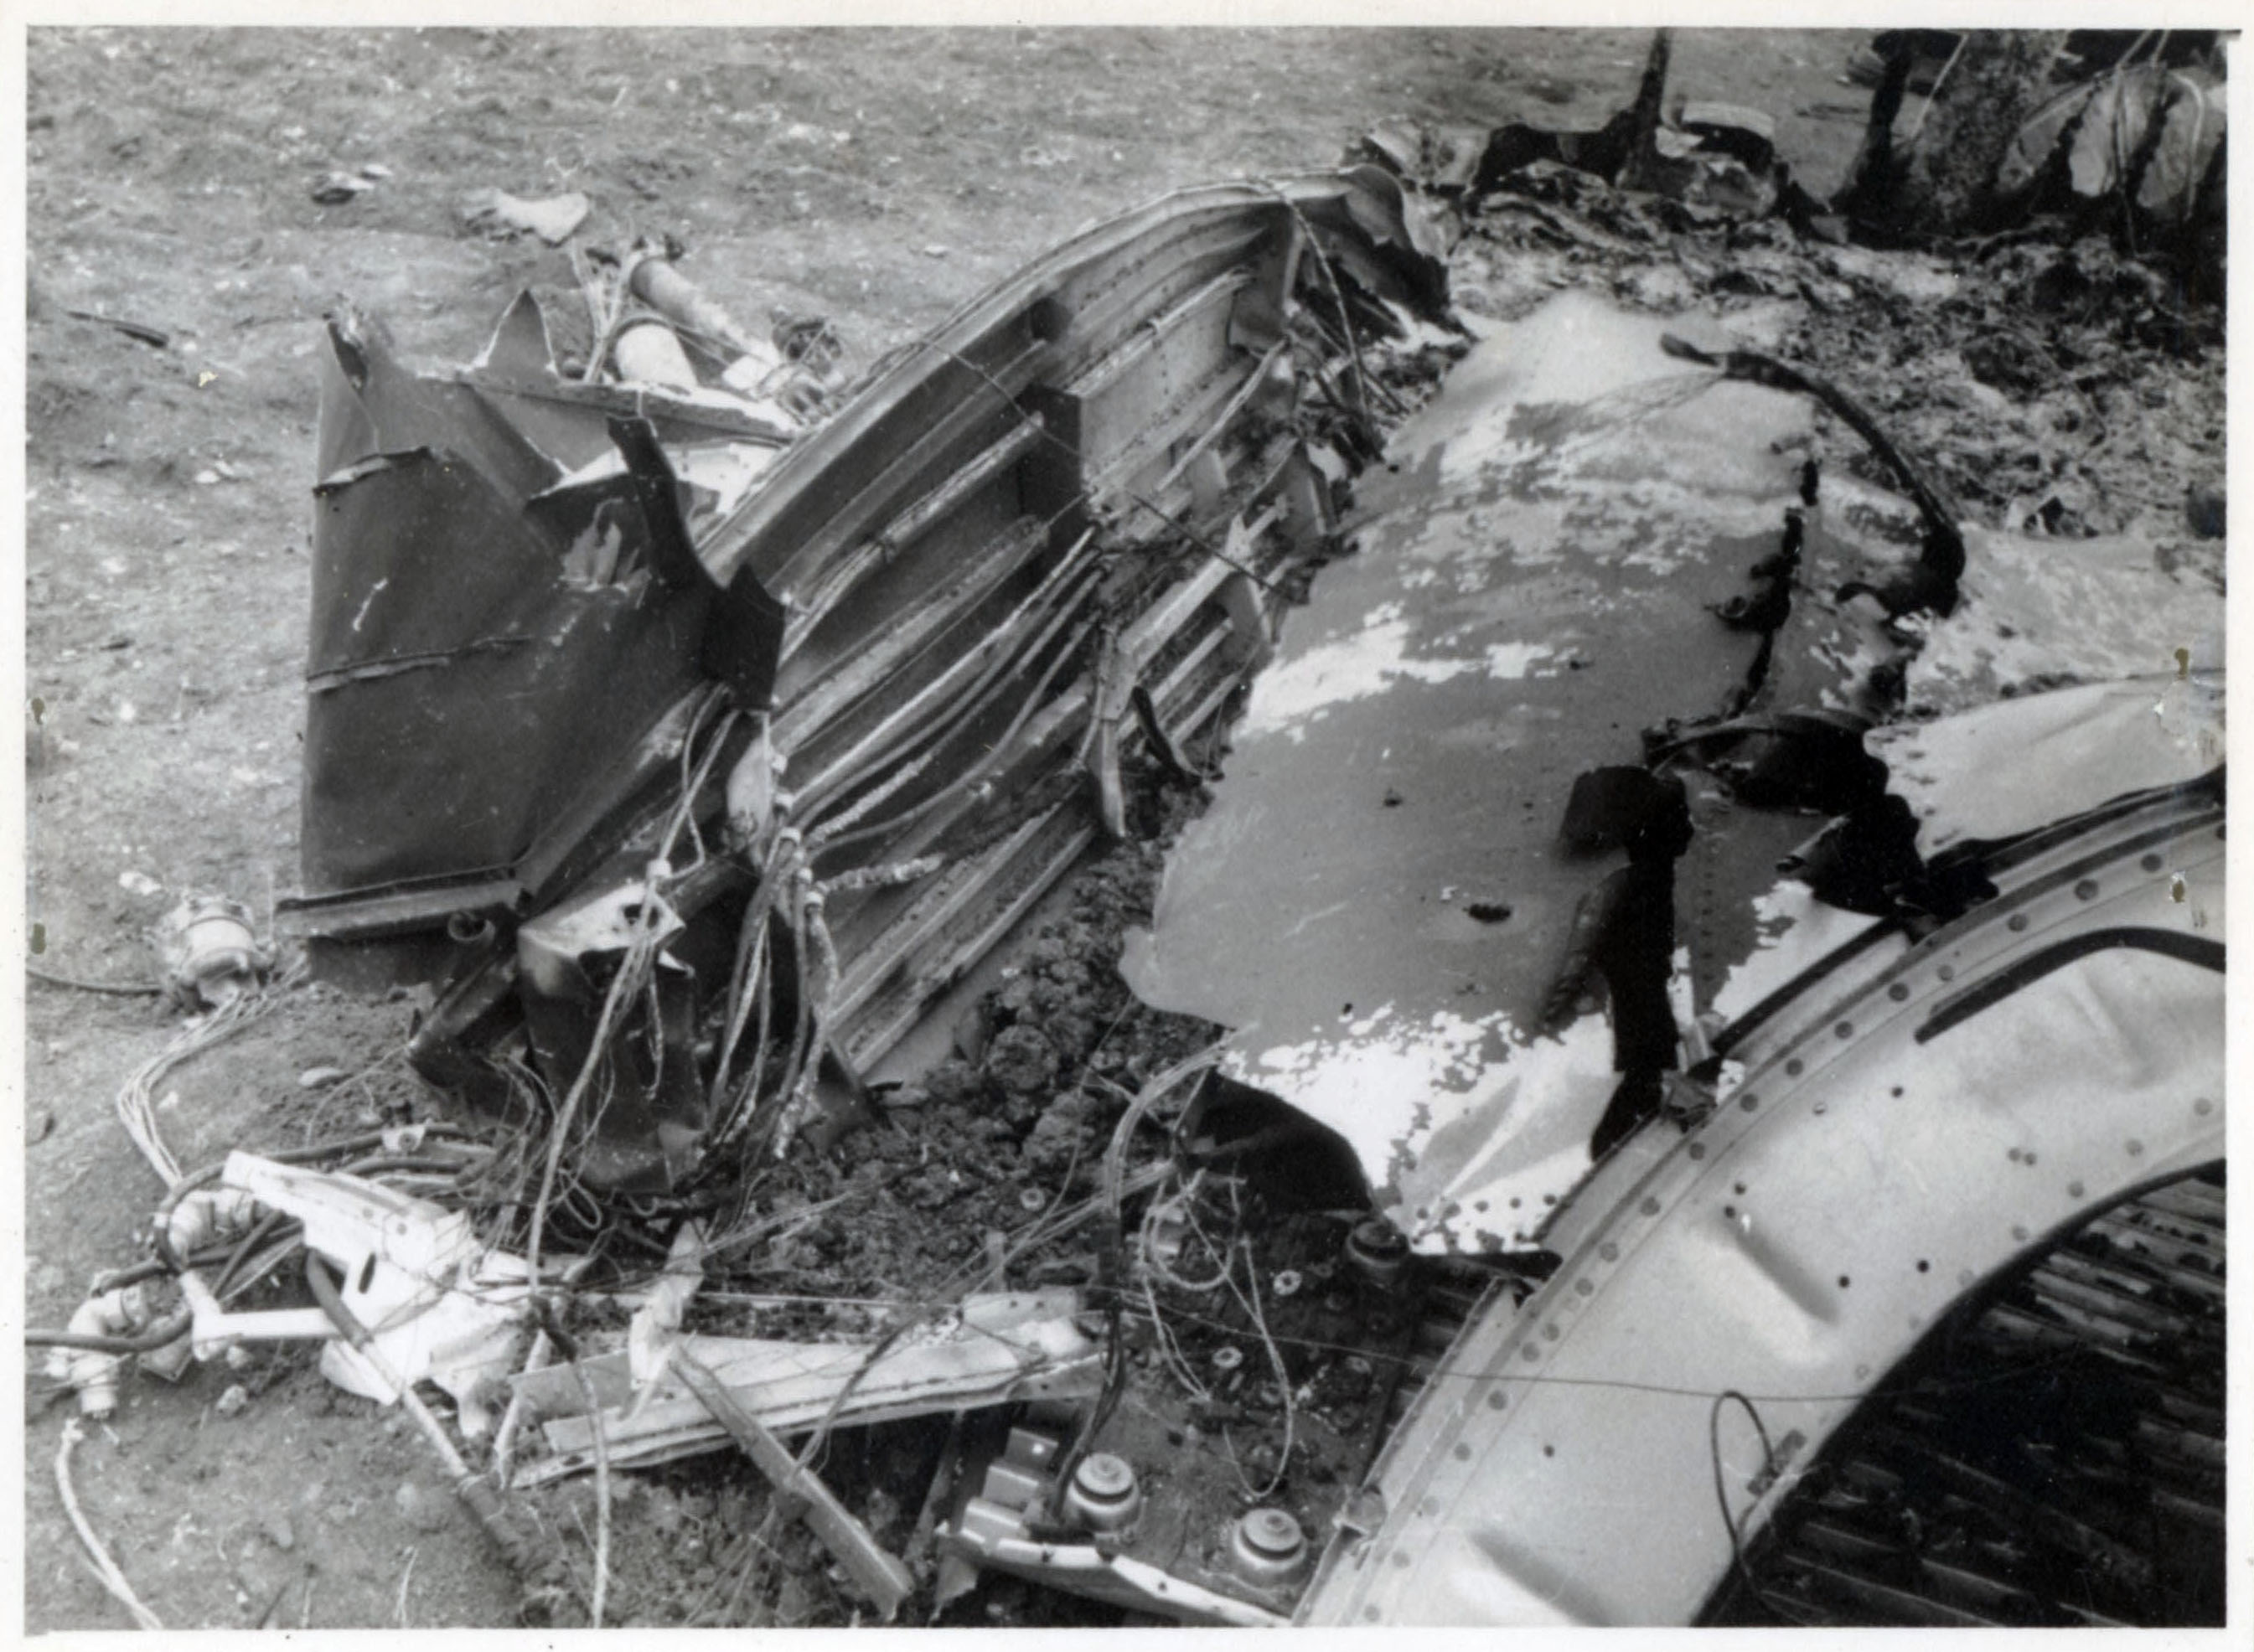
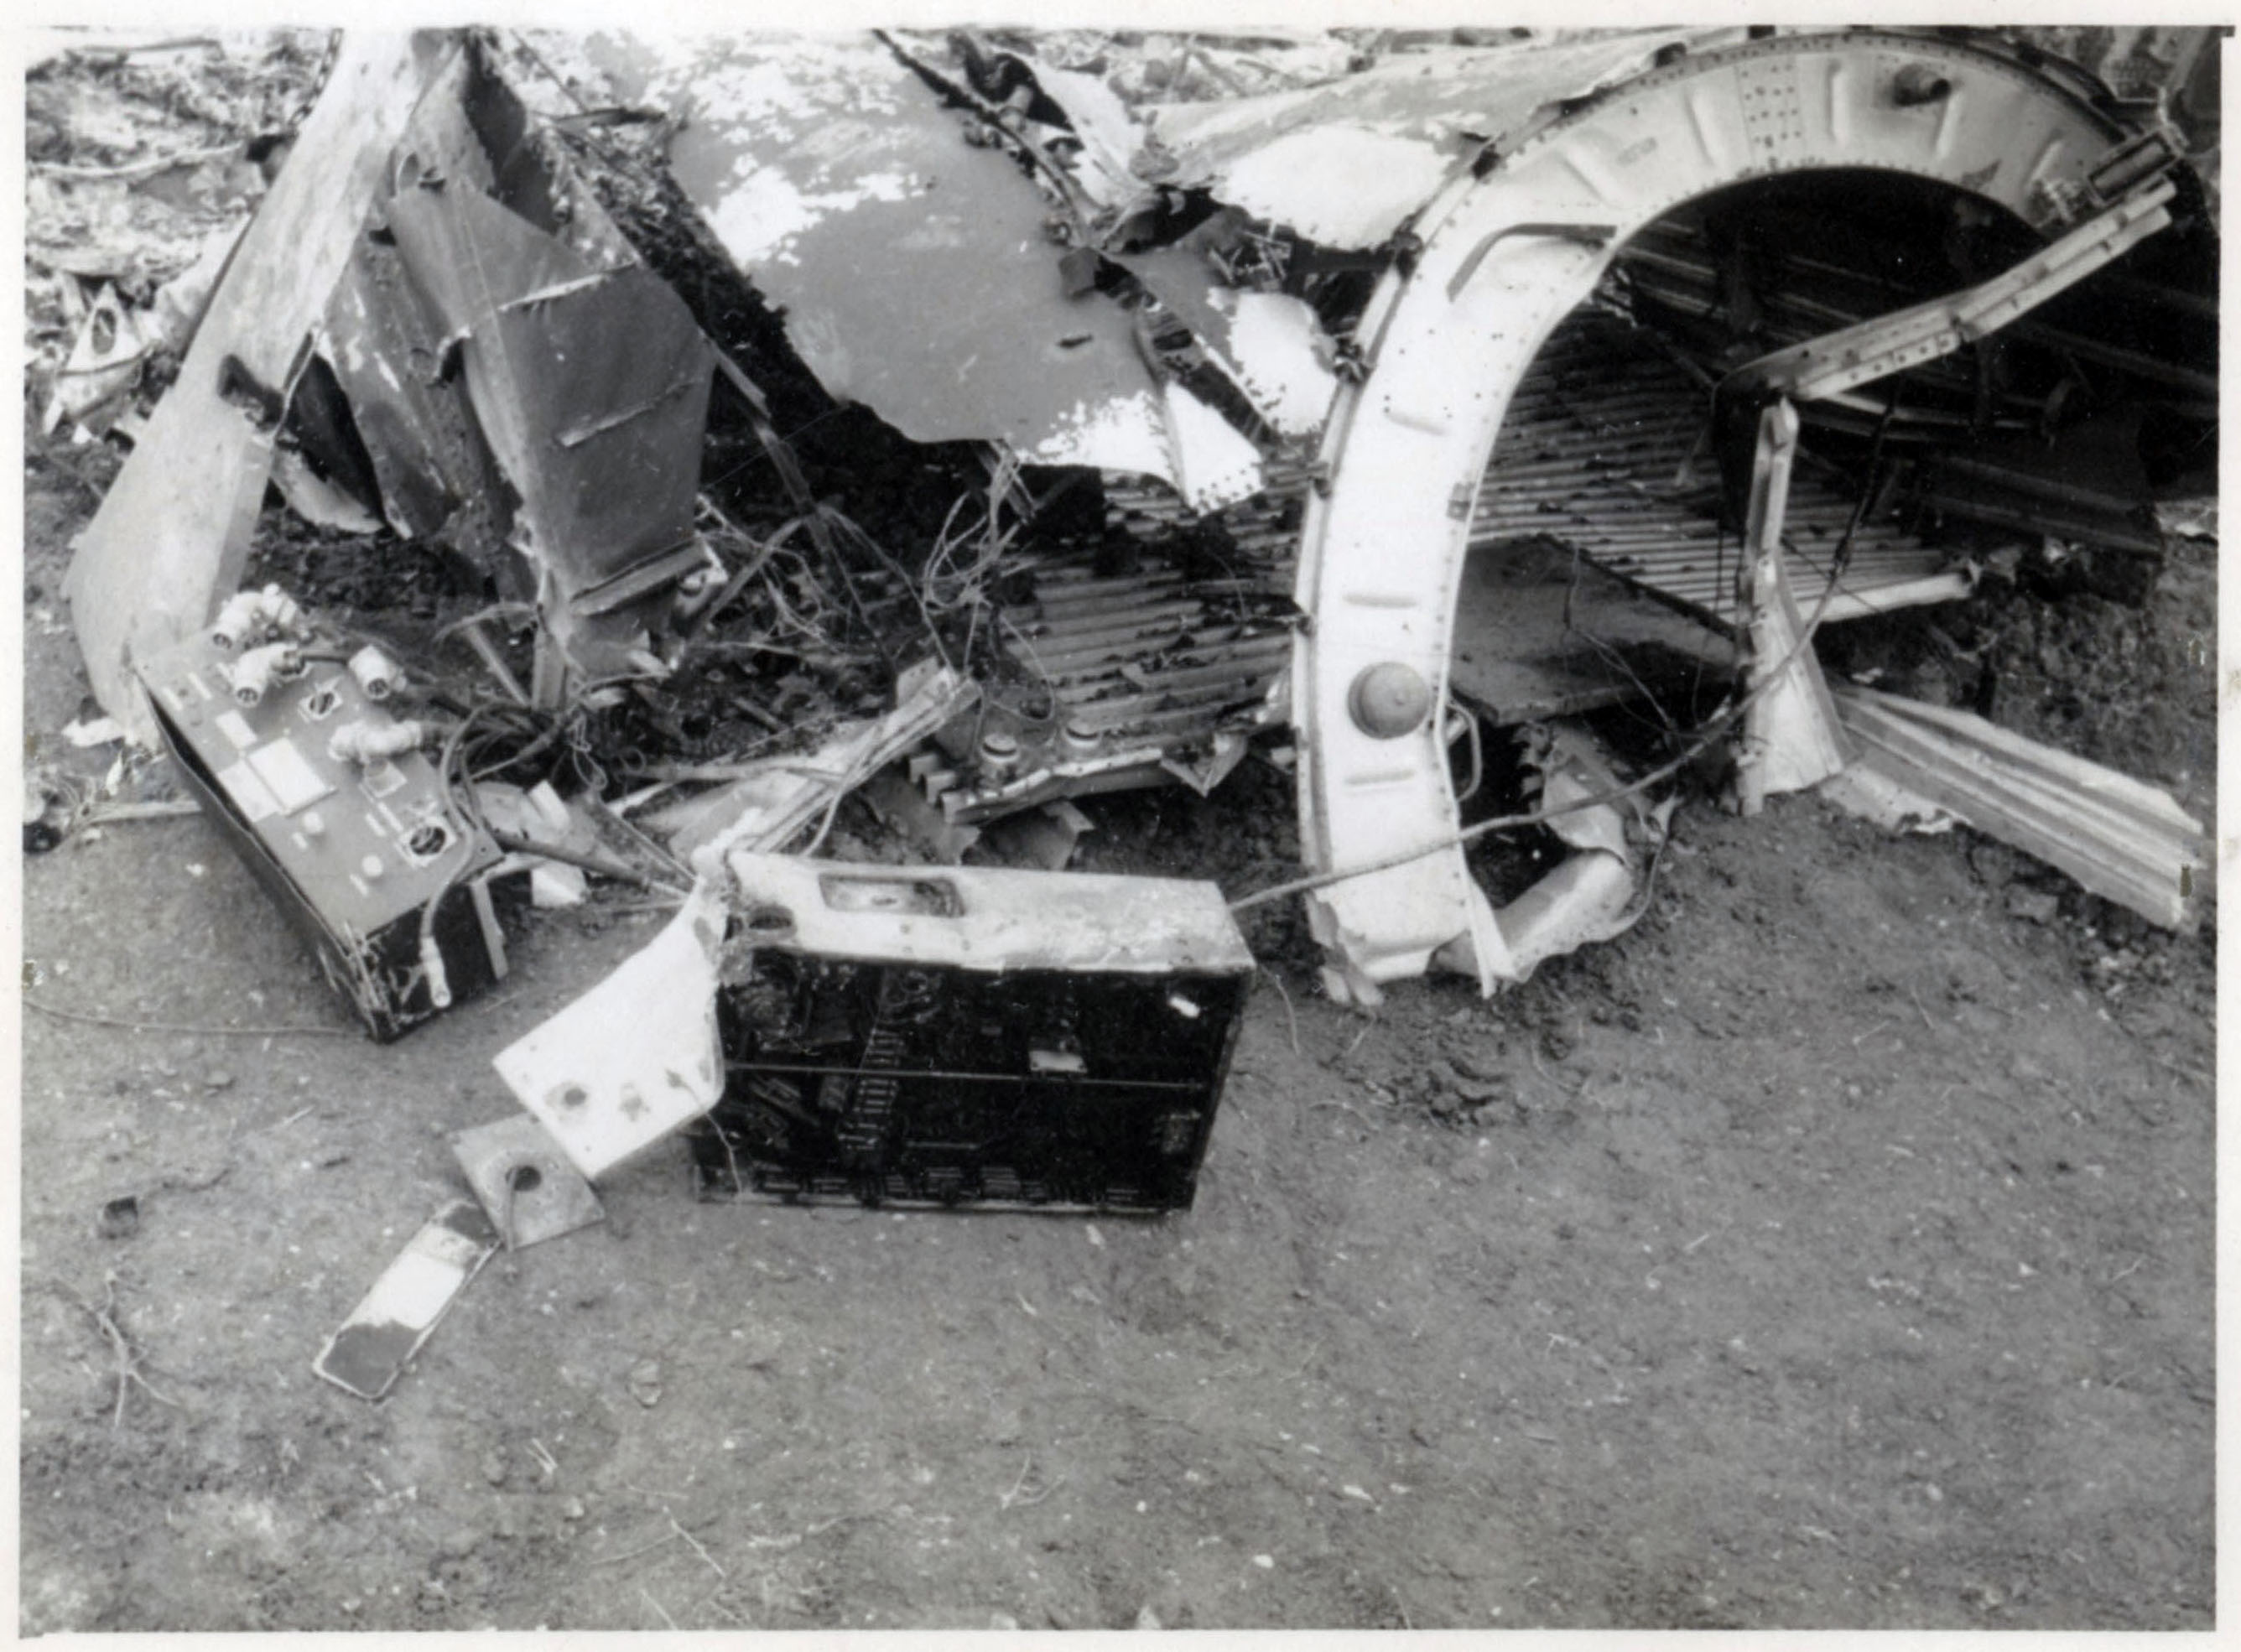
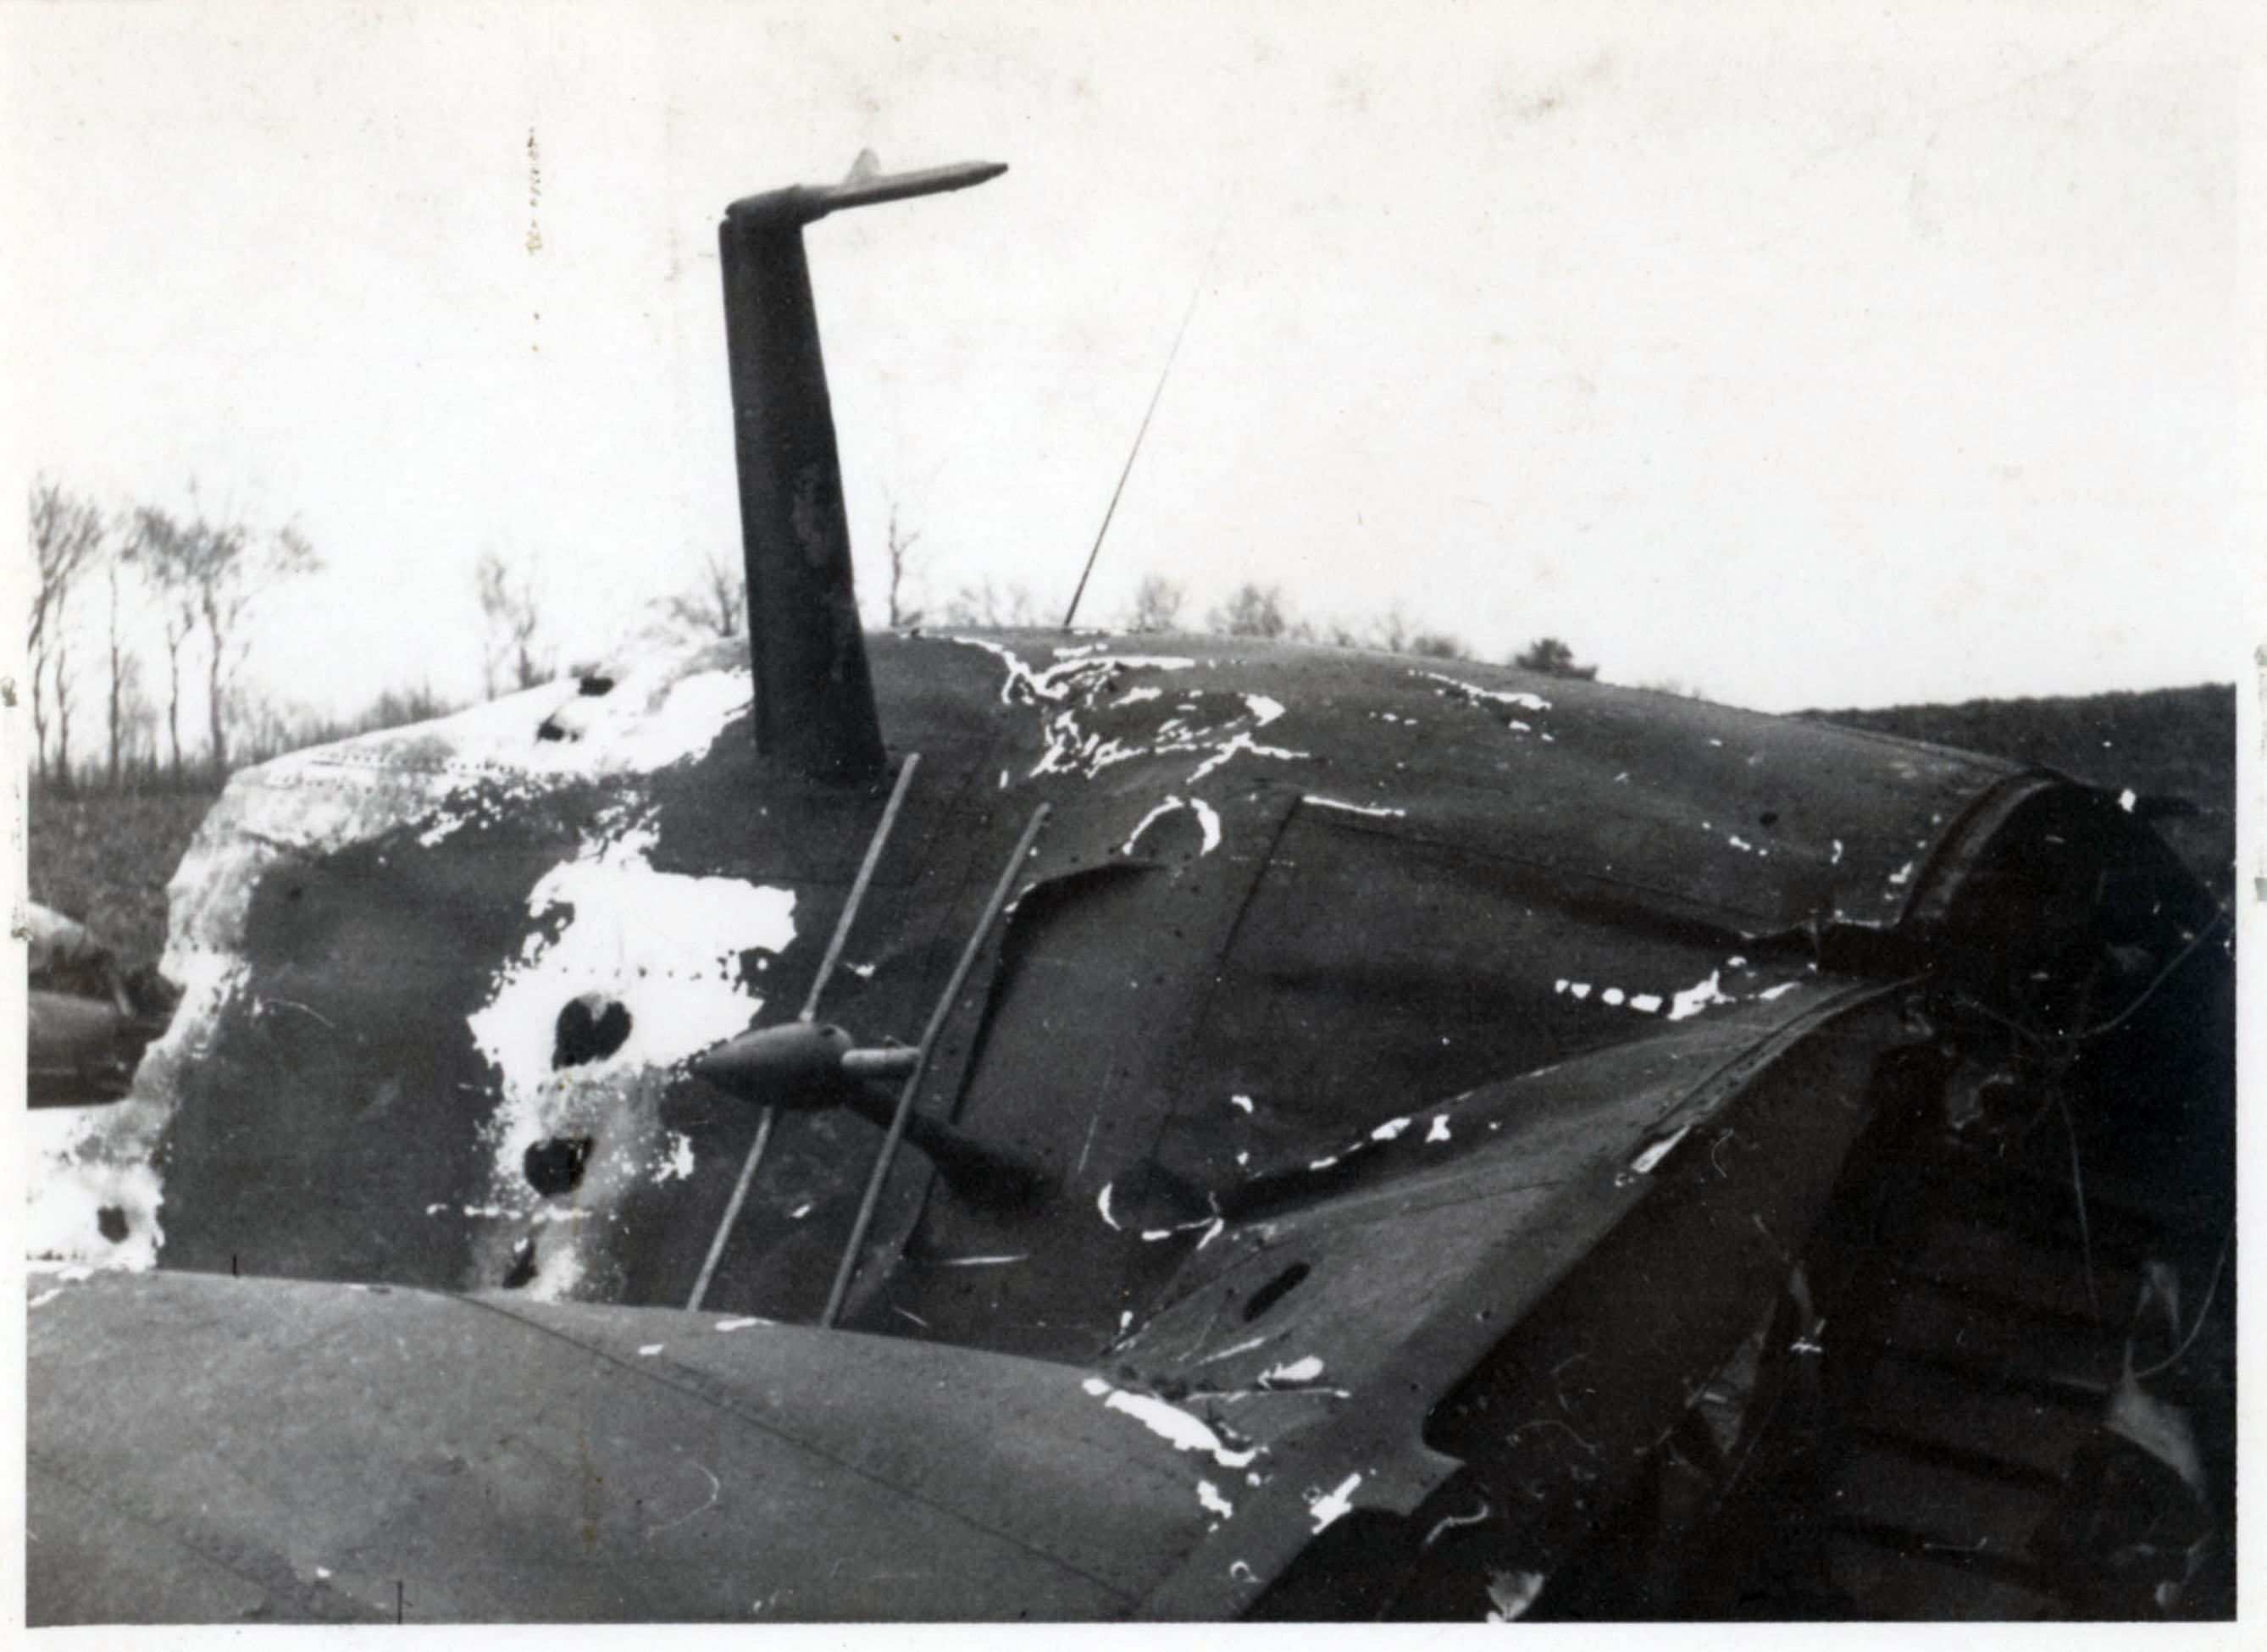
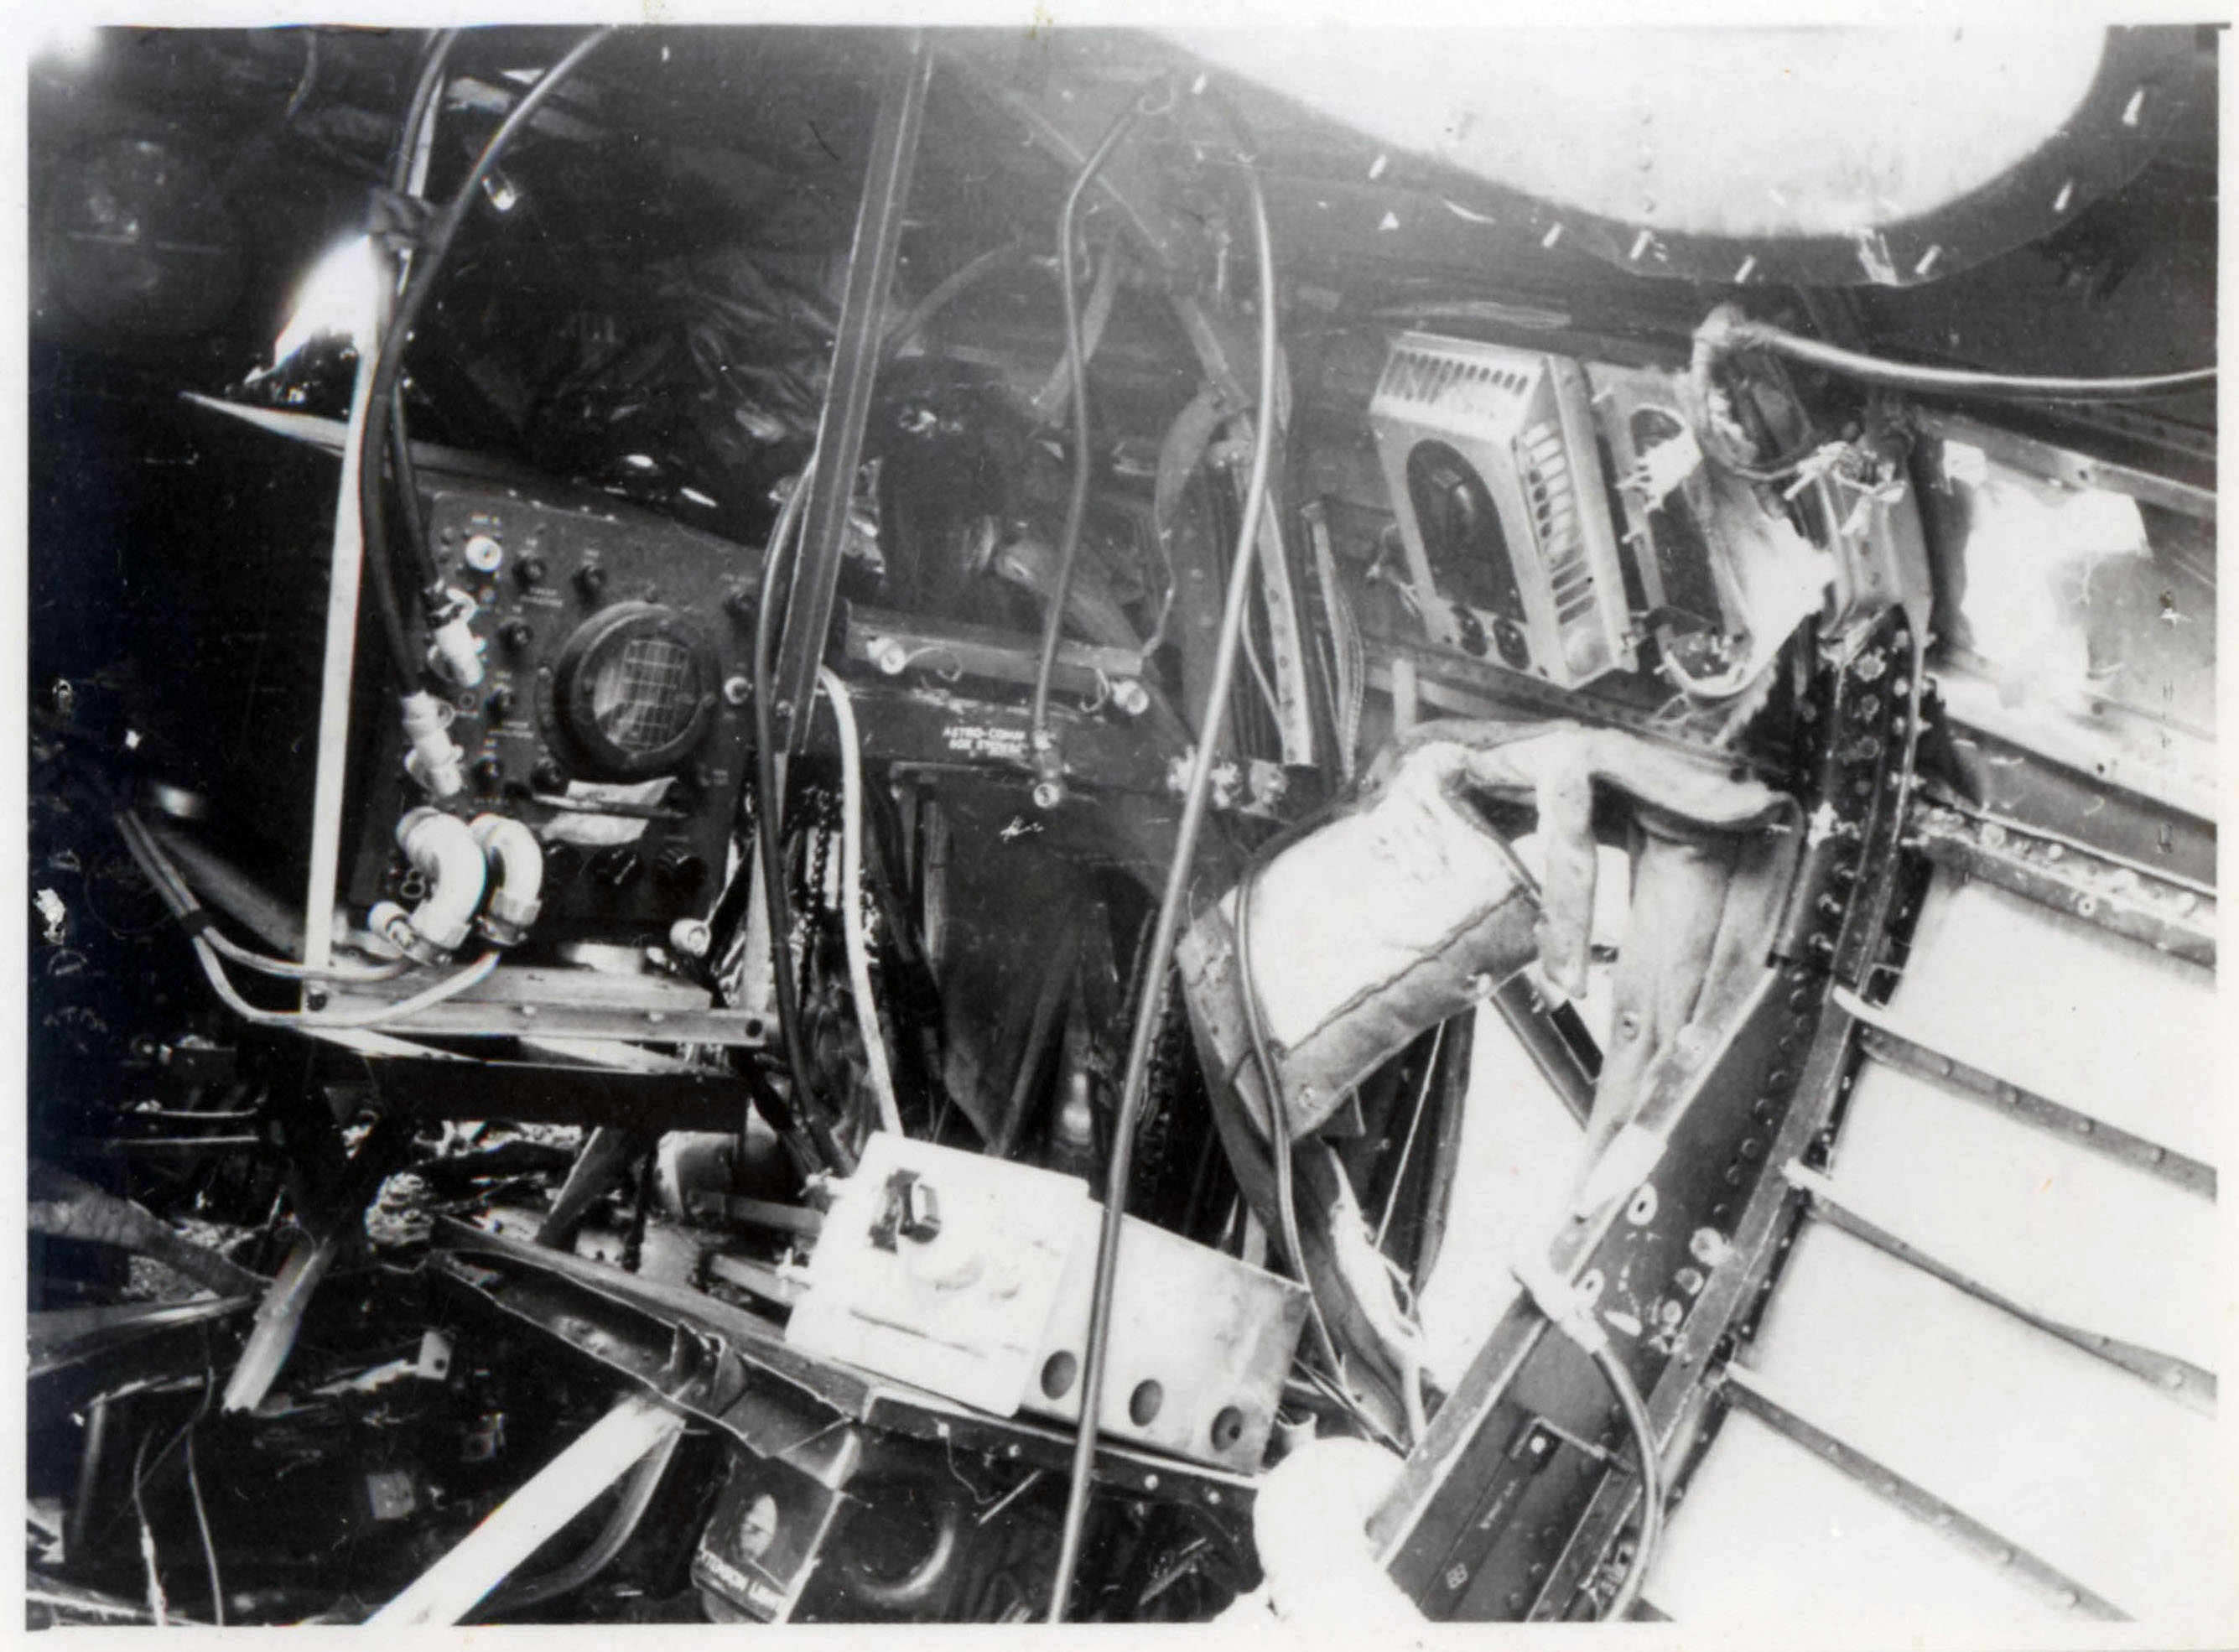
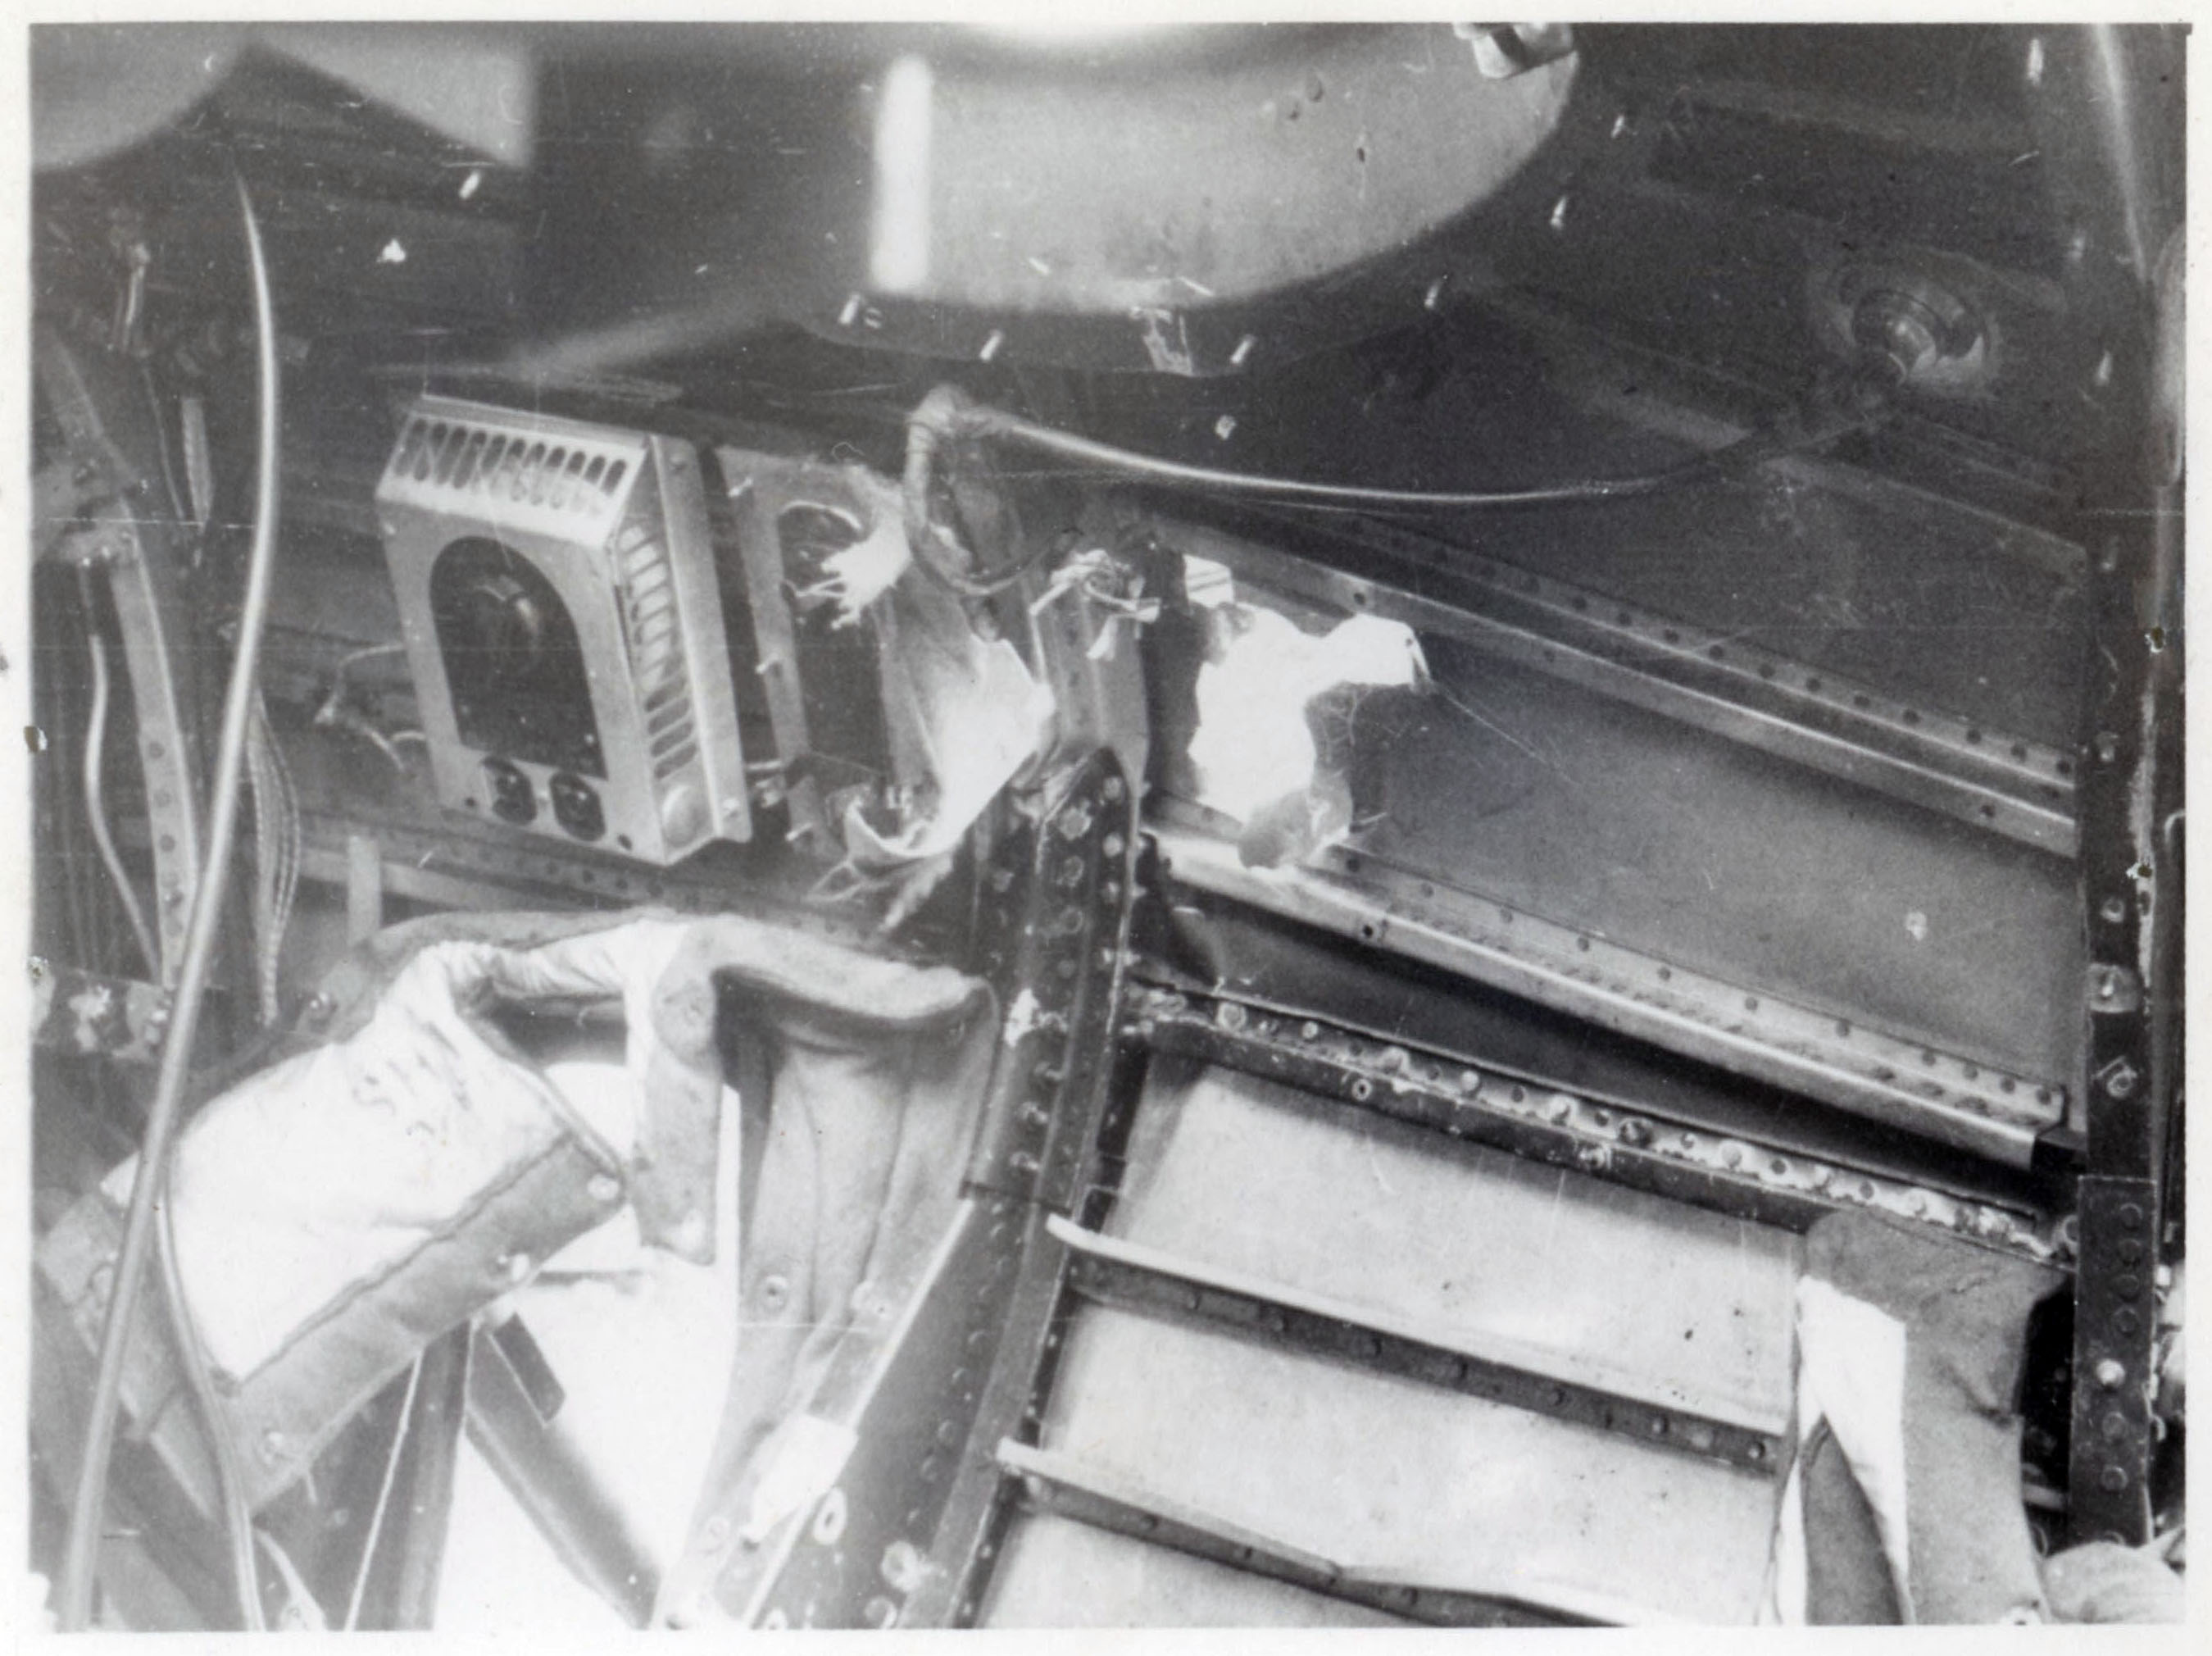
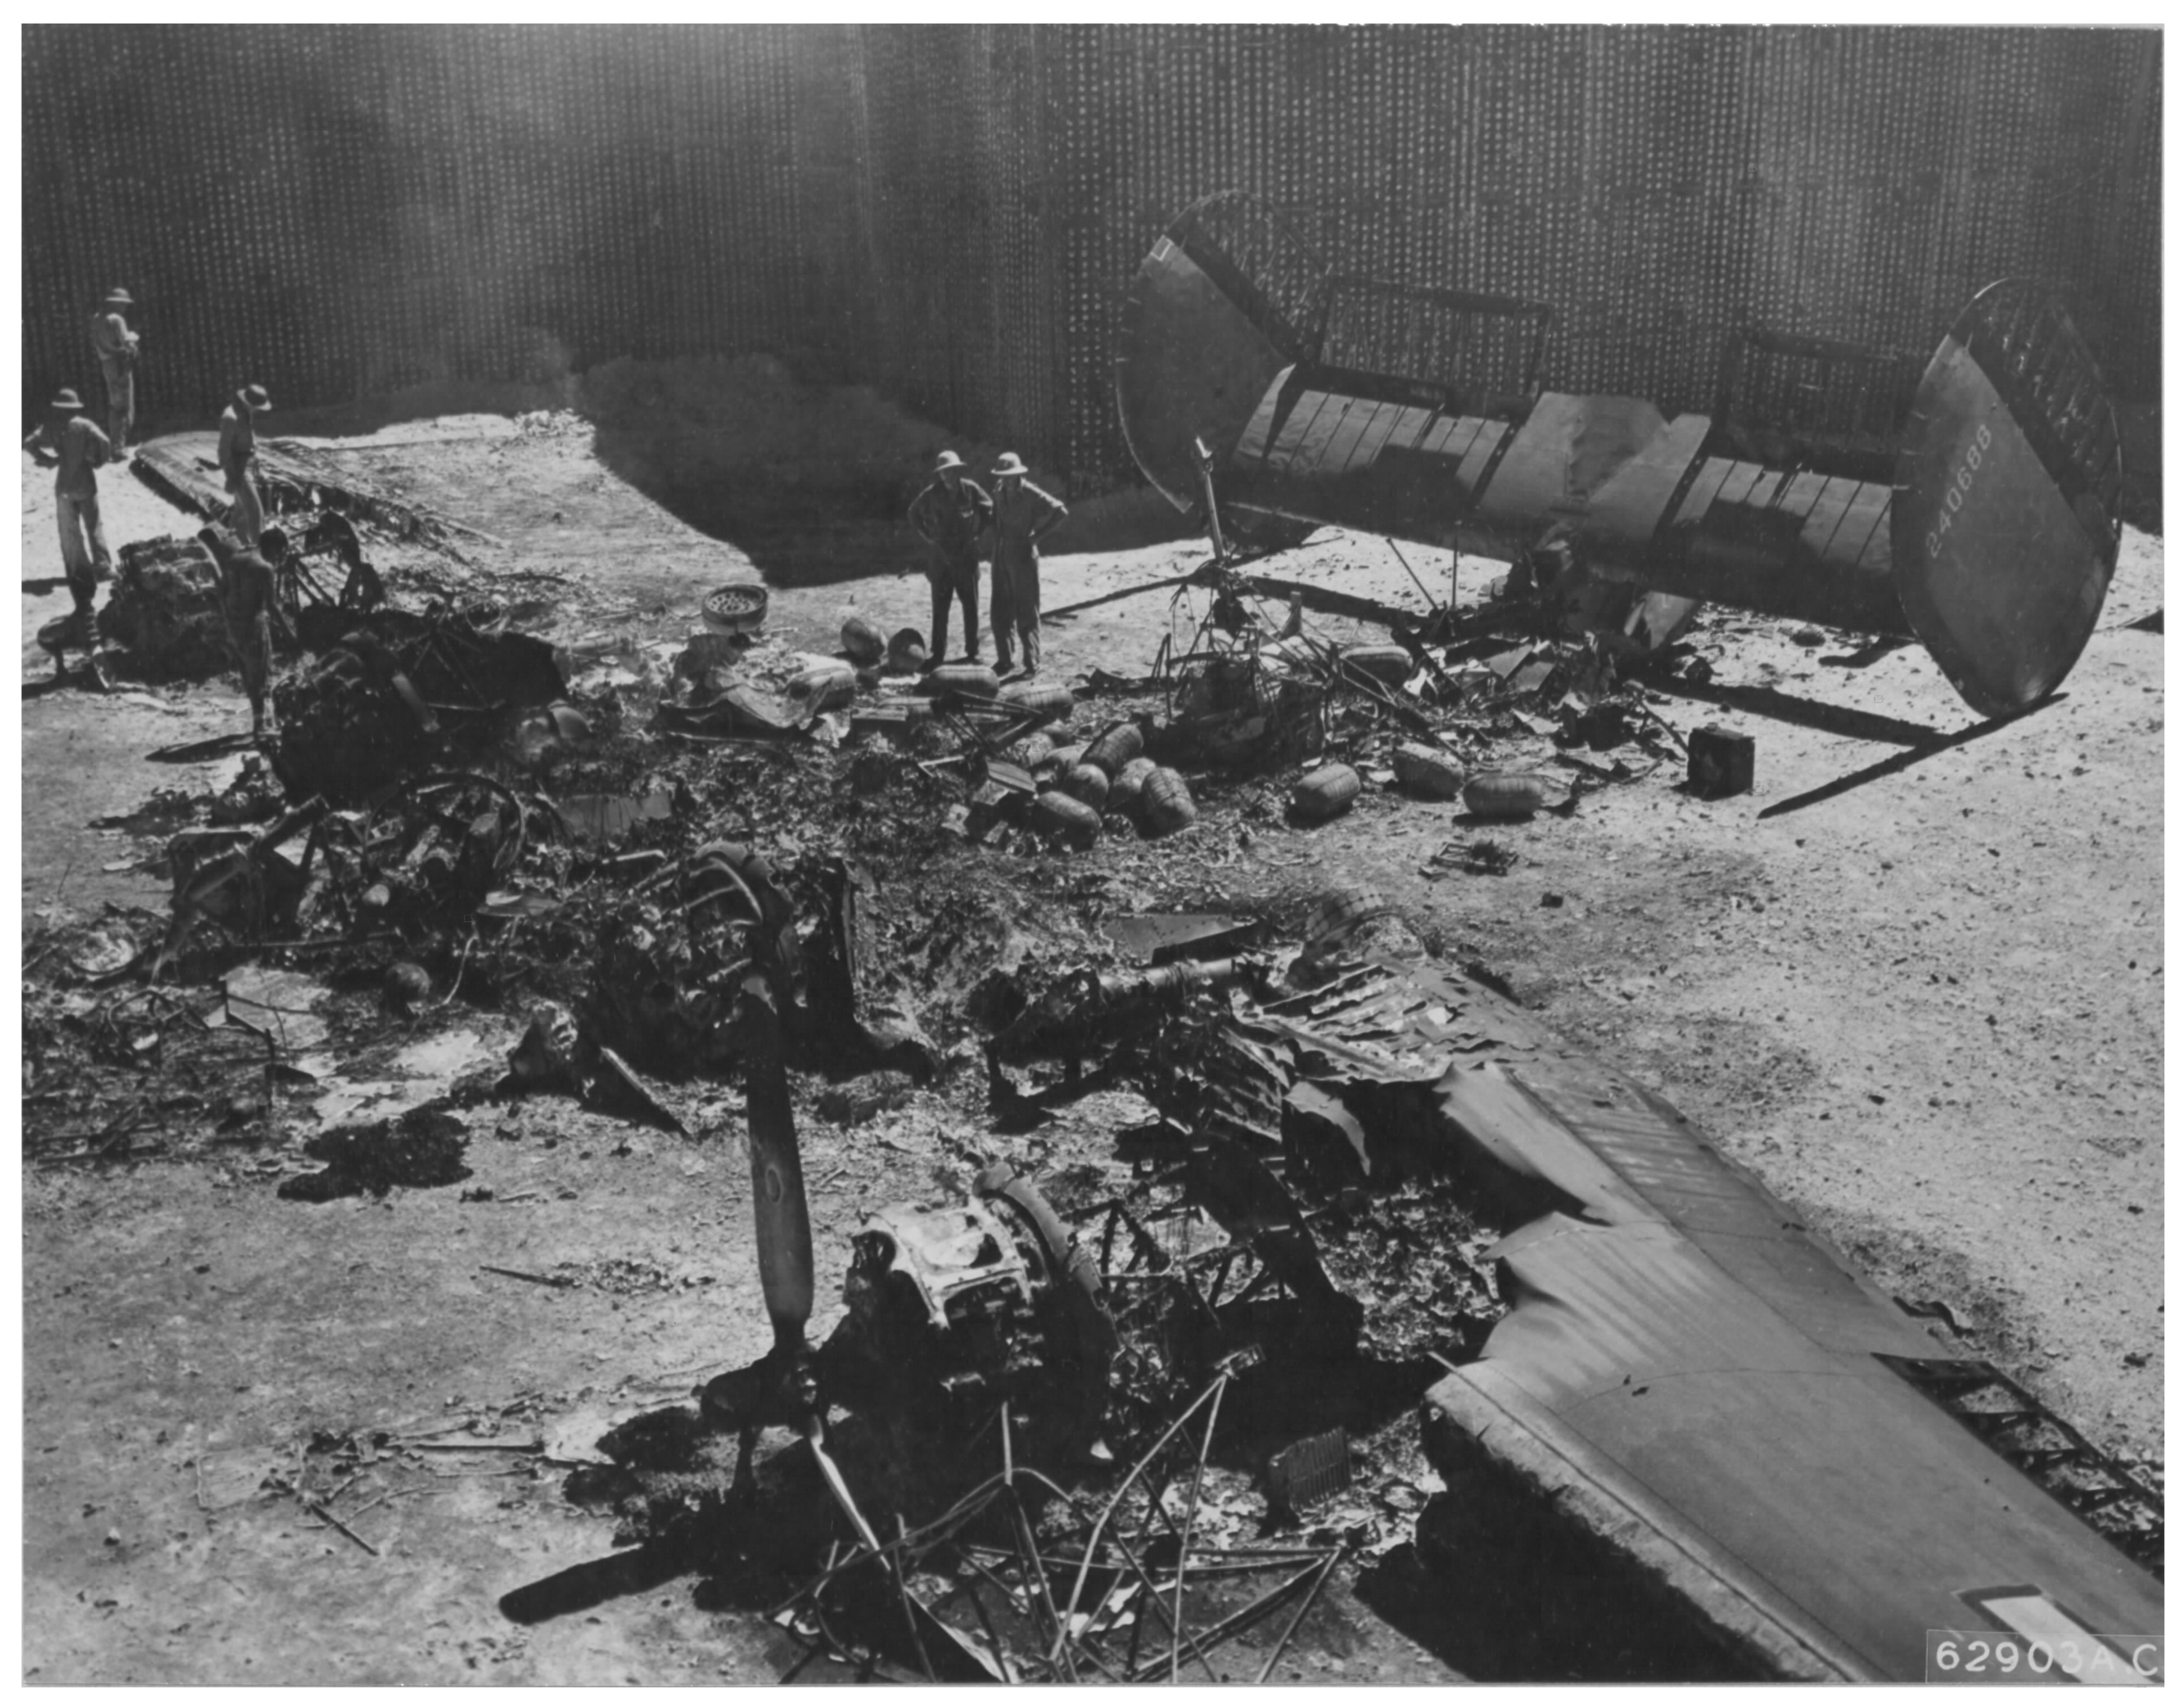
The WITCH was destroyed during a Japanese air raid on Funafuti on November 17, 1943, her incinerated remains being the subject of Army Air Force photos 62903AC / 3A43074 and B-62903AC / A43076, shown below, respectively.  While most of the plane has been reduced to aluminum cinders, some parts, such as engines, oxygen bottles, landing gear wheel hubs, the supporting truss for the Sperry ball turret, machine guns, as well as belts of .50 caliber ammunition, are identifiable.

With the demise of the WITCH, Dick’s crew were assigned to the DOGPATCH EXPRESS, the subject of the two prior posts. 

______________________________

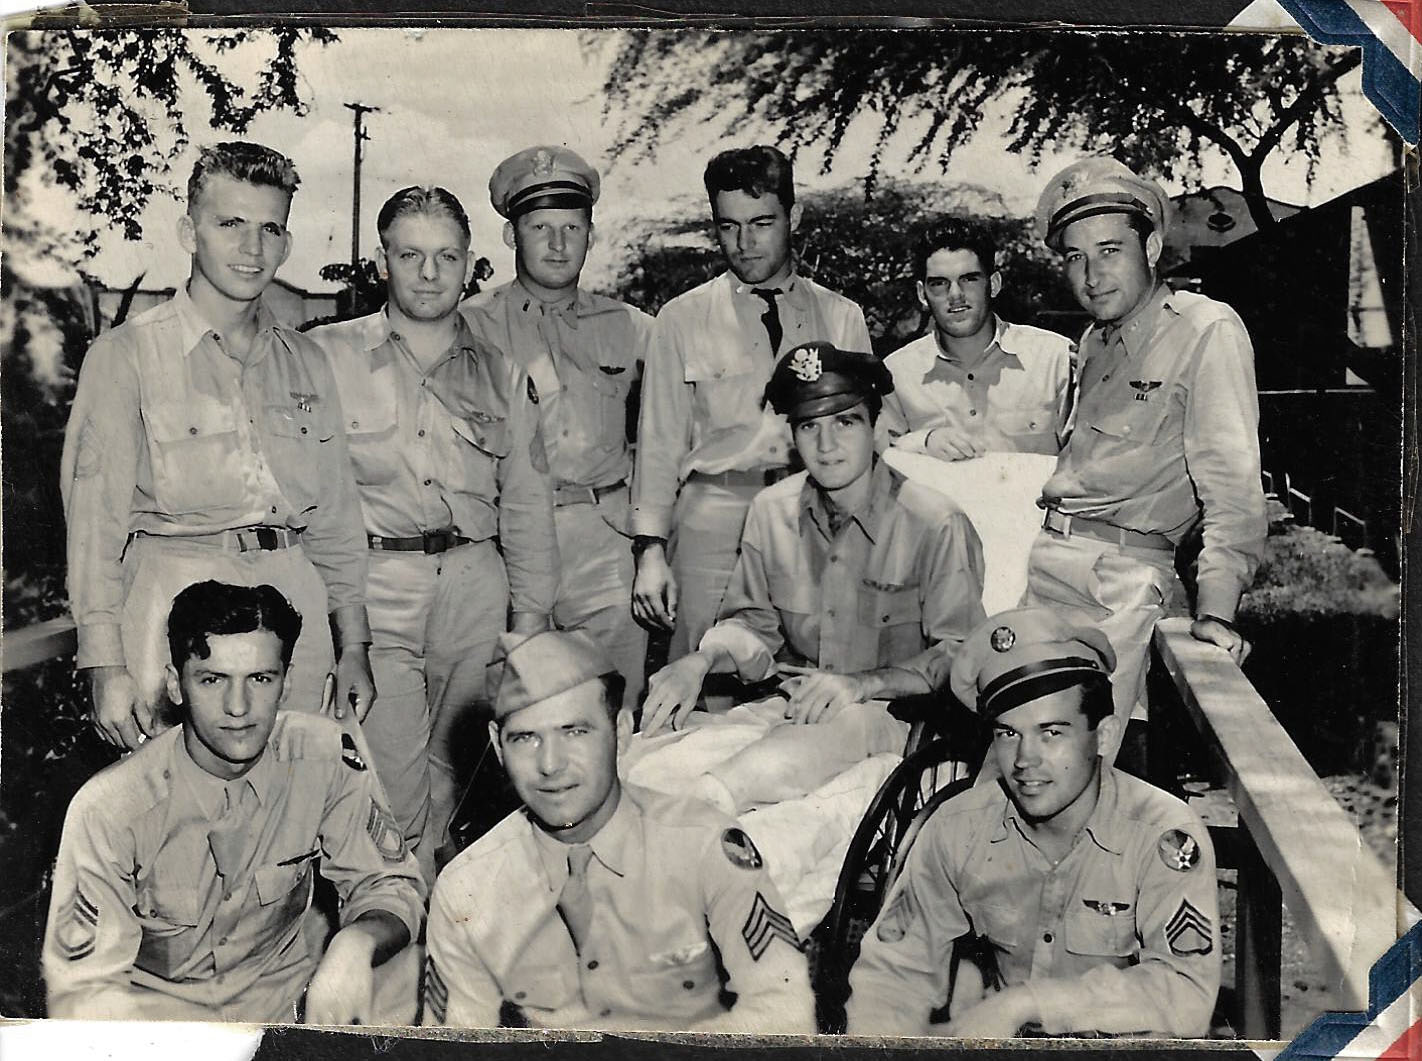
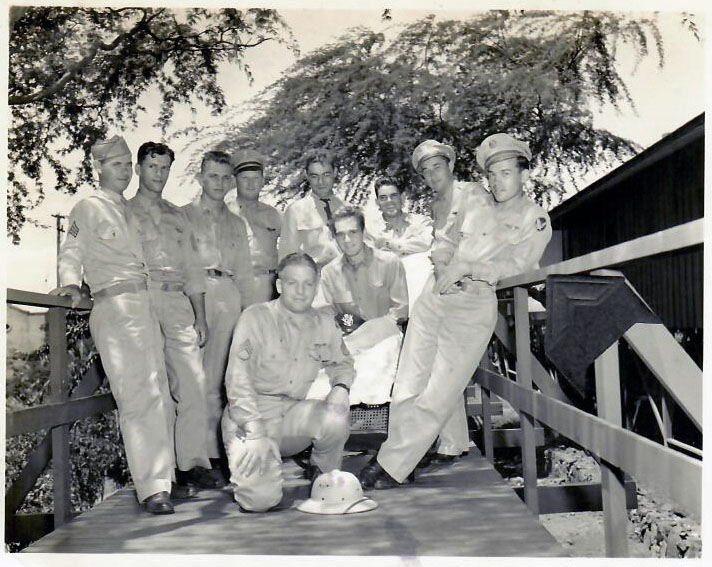
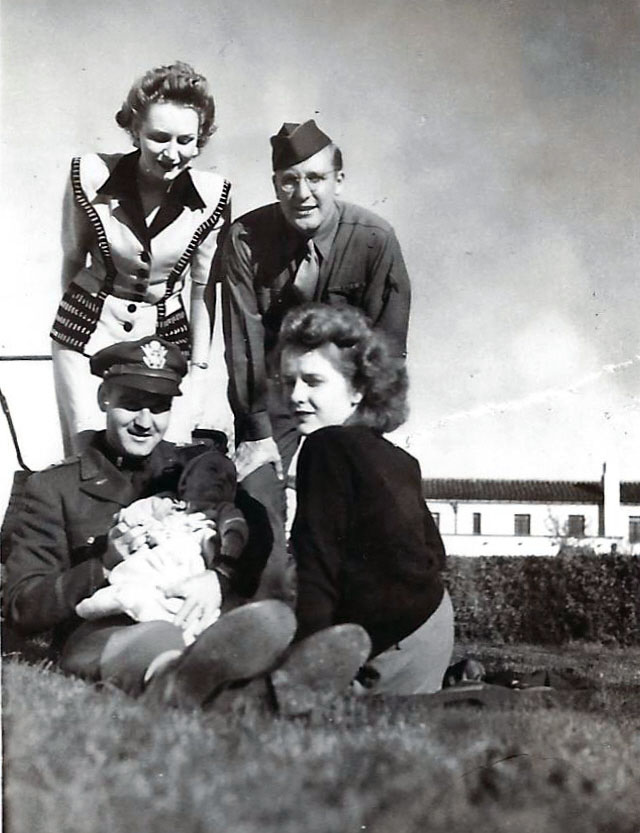
The following three photos, via Rich, show Dick being visited by his crew at Oahu.  The men were identified through communication with Rich, and, a close examination the these images.  Along with Dick, two men in the photo – (Lt. Jim Thrasher, the bombardier, and Sgt. Larson, a gunner) were not aboard the DOGPATCH EXPRESS on December 21.

So, at last and at least, we finally know “who” they are…

______________________________

This “first” picture is identical to the crew photo appearing at Sgt. Roy Gearon’s FindAGrave biographical profile, albeit of much higher resolution.  The men are, left to right:

Front row (kneeling):
T/Sgt. Clarence T. Sopko, gunner
Sgt. Larson (first name unknown) – gunner
S/Sgt. Carl N. Dell – tail gunner
Rear row (standing)
T/Sgt. Roy T. Gearon – Radio Operator
S/Sgt. Earl D. Nielsen – waist gunner
2 Lt. Carl. A. “Mort” Mortenson – navigator
Lt. Jim Thrasher – bombardier
S/Sgt. Arnold J. Paradise – gunner / radio operator
2 Lt. John E. “Jack” Lowry, Jr. – co-pilot

______________________________

In the picture below, the men have shifted positions.   Given that all crew members are visible in the image, the picture must have been taken by an anonymous photographer “behind the camera”, perhaps a member of the hospital staff. 

All are standing behind Dick, while S/Sgt. Earl D. Nielsen is kneeling in the front.  The men are (left to right):

Sgt. Larson
T/Sgt. Clarence T. Sopko
T/Sgt. Roy T. Gearon
2 Lt. Carl. A. “Mort” Mortenson
Lt. Jim Thrasher
S/Sgt. Arnold J. Paradise
2 Lt. John E. “Jack” Lowry, Jr.
S/Sgt. Carl N. Dell

______________________________

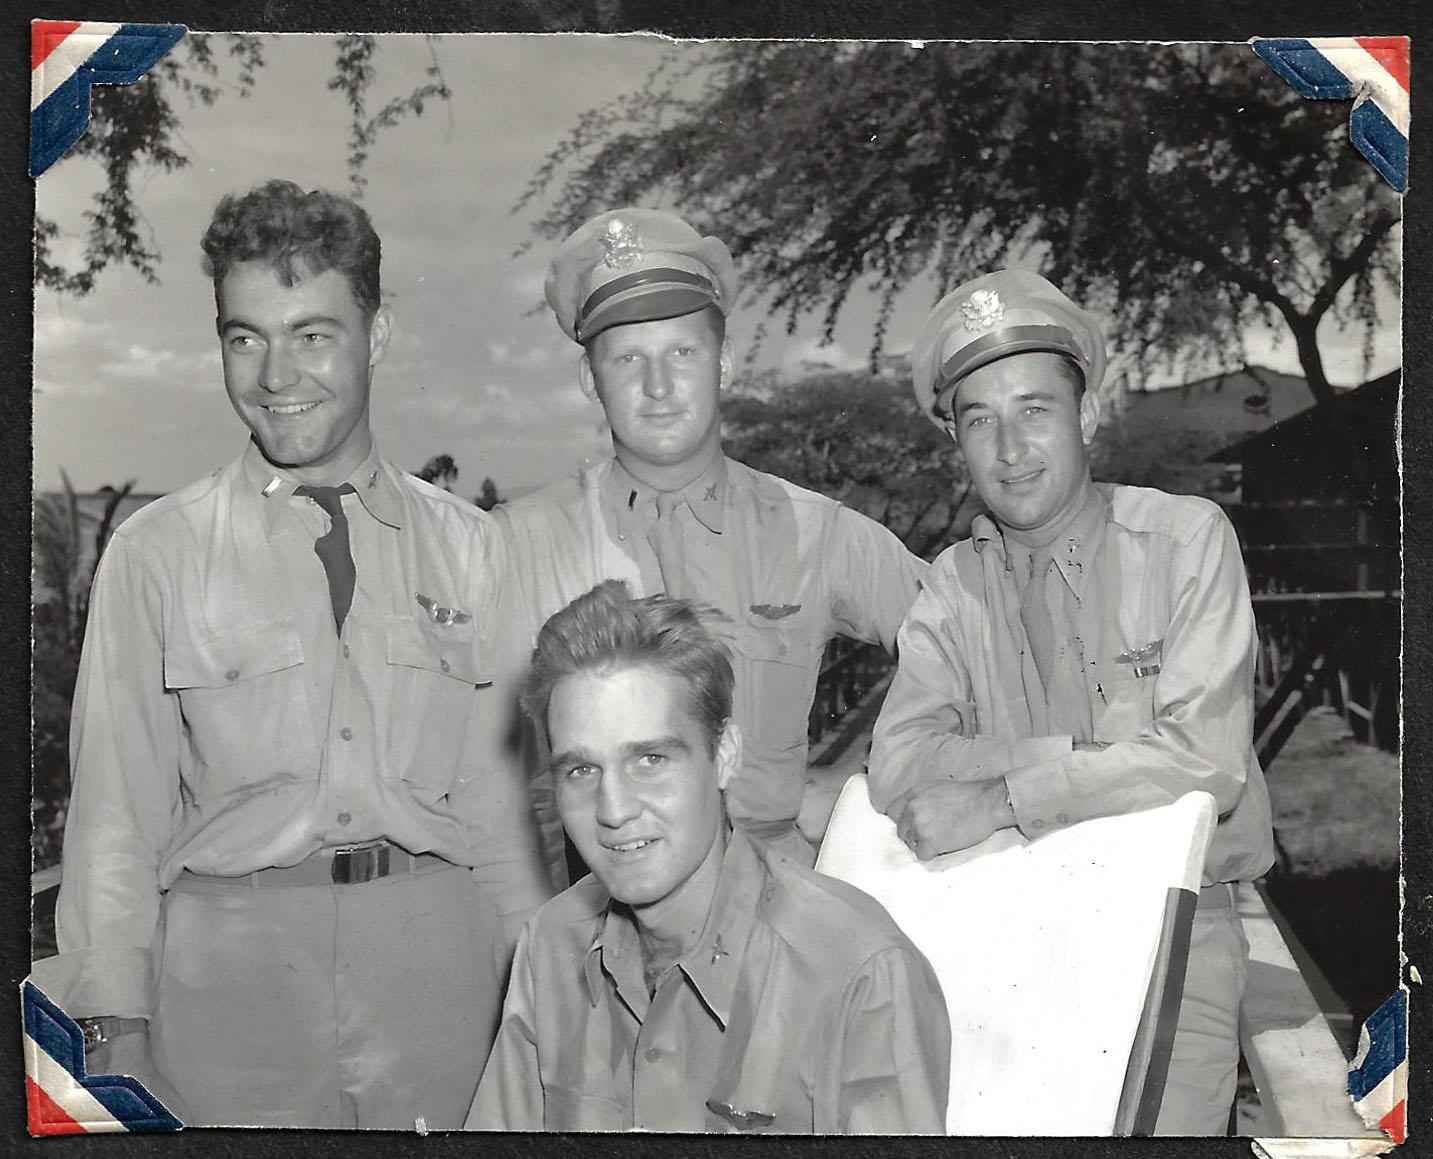
Here’s a superb photo of the crew’s officer’s.  Behind Dick stand:

Lt. Jim Thrasher
(Further information about Lt. Thrasher is unknown)

2 Lt. Carl. A. “Mort” Mortenson, 0-738872,  Navigator
Mr. Harry Walter Mortenson (brother), 1380 Riverside Drive, Lakewood, Oh.

2 Lt. John E. “Jack” Lowry, Jr., 0-800907, Co-Pilot
Mrs. Margaret E. Lowry, Jr. (wife), Spring St., Smyrna, Ga.

Along with the loss of the Cason and Gall crews, Lt. Lipman made note of Dick’s injury, and, Lt. Lowry’s return of the plane to Midway: “Dick Thompson was wounded in the leg at several places and by now he’s probably back at Oahu via an LB-30.  It was only a miracle that Lowry was able to land that one OK and on Midway instead of 200 miles out.”

______________________________

First Lieutenants George W. Smith and Ralph P. Ortiz, the pilot and bombardier of DOGPATCH EXPRESS on December 21, do not appear in these photos.  As such, they were almost certainly shifted from other crews to “fill-in” for Dick and Lt. Jim Thrasher on that date, with Lt. Smith perhaps “taking over” for Dick’s crew after the latter’s July 24 injury.  Smith’s receipt of the Air Medal and Purple Heart, and Ortiz’ receipt of the Air Medal, two Oak Leaf Clusters, and Purple Heart, would suggest that they respectively completed from five to ten, and fifteen to twenty, combat missions, prior to December 21.

However, it is known that Smith had been injured almost six months previously.  As recorded for June 14, 1943, by Lieutenant Lipman, “Well here’s the big story.  Today 3 of our ships were to take off for an important photographic mission in the S.W. Pacific.  All three were terrifically loaded down – the first two used every foot of the runway and barely cleared the trees then came #3 with me right alongside the runway in a jeep.   About half-way down the runway its nose went down and it skidded for about 100 yards till it swerved off onto the highway.  Two of its propellers flying off onto the adjacent beach.  Well I can tell you that I spotted my underwear then and there.  My first thought was to speed over there to see if I could help any of the crew to get out of the plane or to get to the hospital and off I flew in the jeep towards the plane about when I was 50 feet away flames broke out in engine #2 and off I went in the opposite direction only this time twice as fast because the uncomfortable vision of exploding hi-octane gas and exploding ammunition appeared in my mind.

The fire was put out, however, and the only person really hurt was Smith, the pilot, whose arm was quite smashed by a flying propeller.

Man some experience!  I took a lot of pictures but Capt. Peairs of S-2 is going to see them – I hope to get them back.”

______________________________

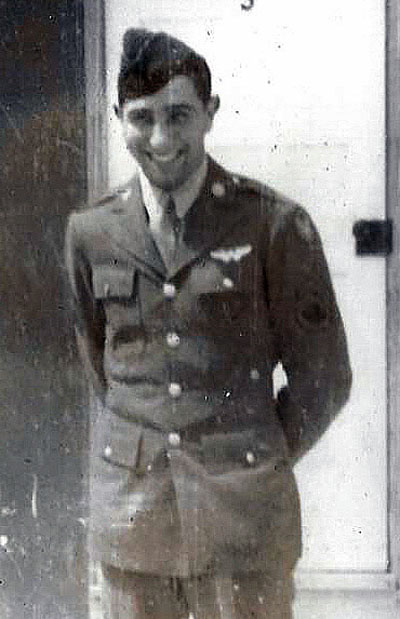
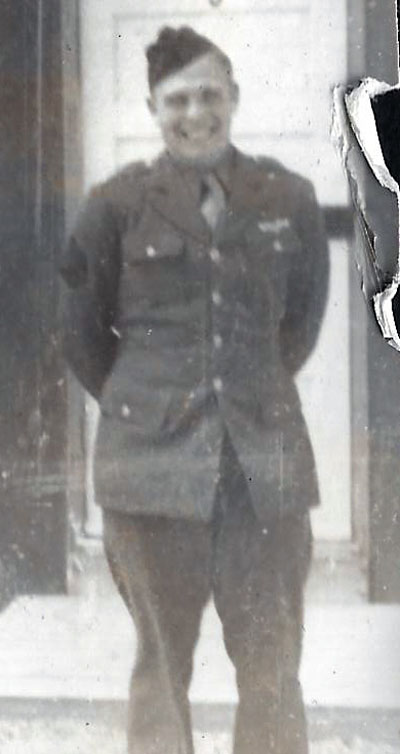
Dick’s wartime scrapbook includes images of his crew’s enlisted men, possibly taken while his crew was undergoing training in the United States.  (Further information may – ?- be forthcoming.)  Fortunately, Dick had the foresight to record the names of each enlisted man below that man’s individual portrait. 

That scrapbook page, which includes a group photo of the enlisted men, is shown below.

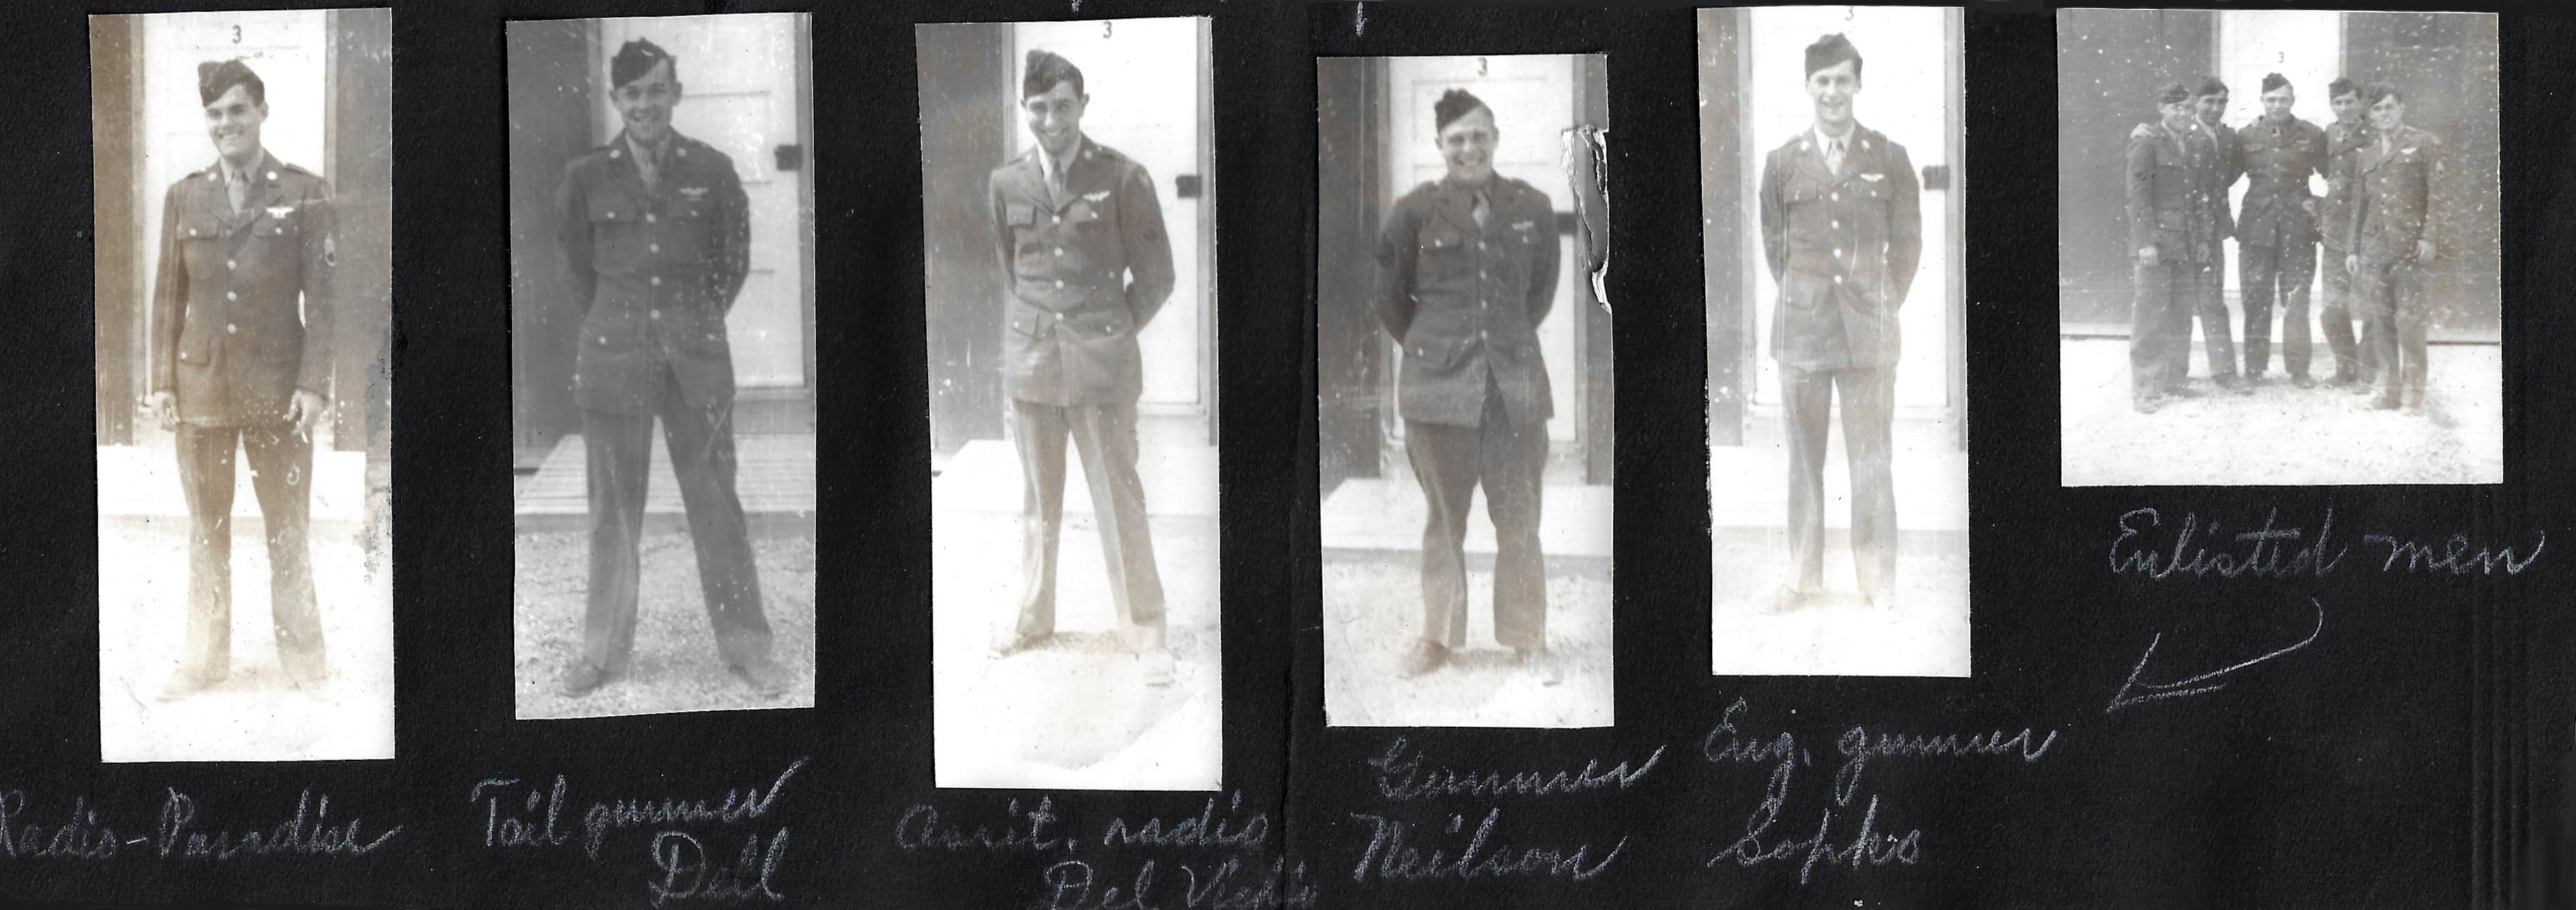
In this group photo, the men are (left to right):
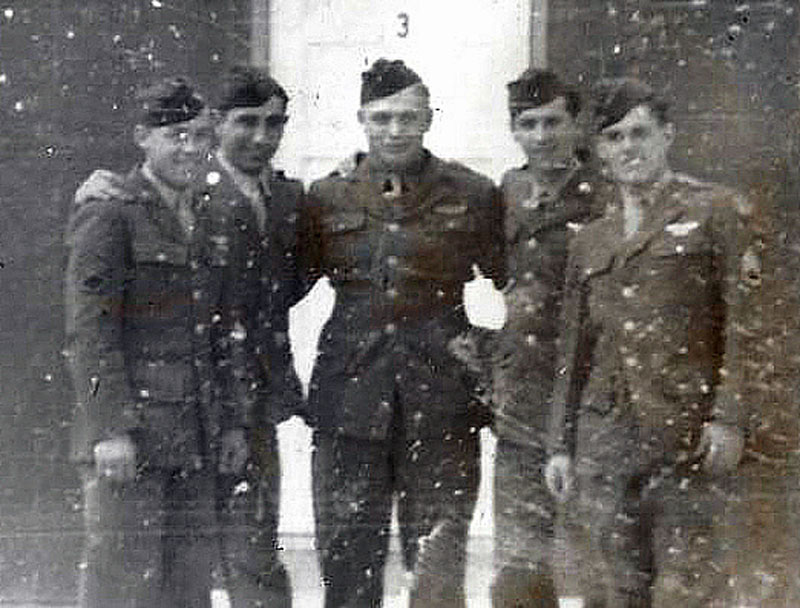
S/Sgt. Carl N. Dell
Sgt. Del Vickio (“Del Vechio” – “Del Vecchio”?)
S/Sgt. Earl D. Neilsen
T/Sgt. Clarence T. Sopko
S/Sgt. Arnold J. Paradise

The men’s individual portraits follow…

______________________________

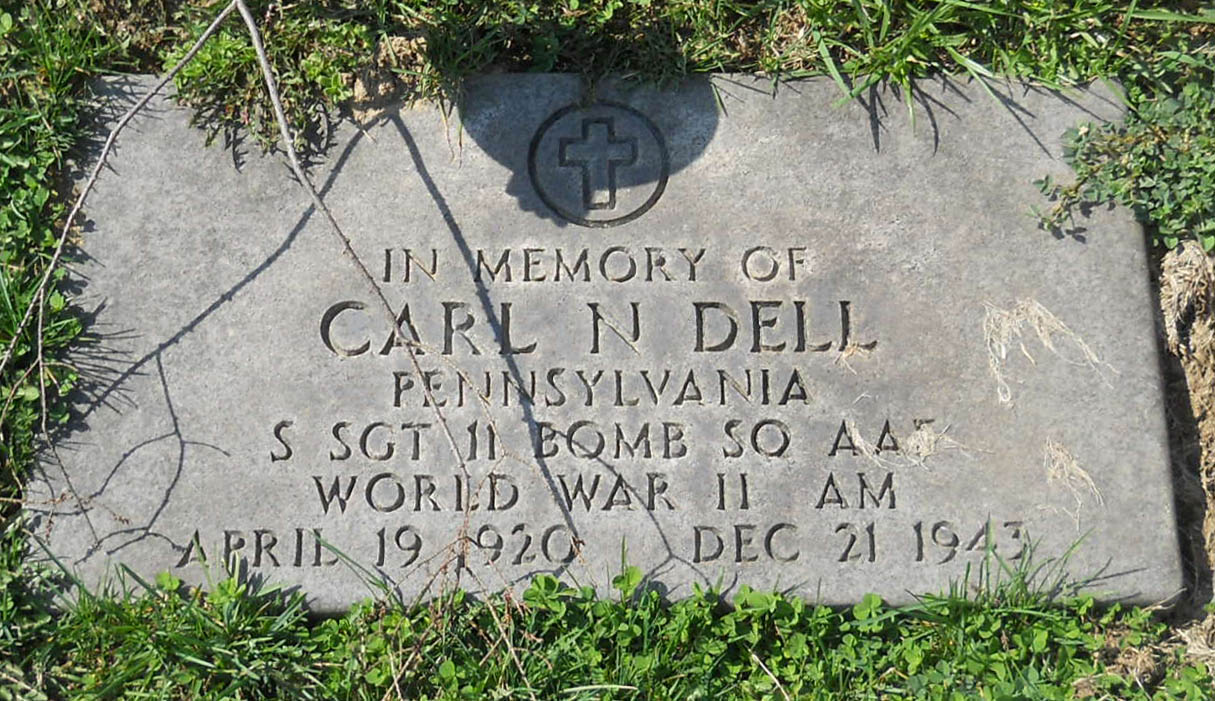
S/Sgt. Carl N. Dell, 13038323, Gunner
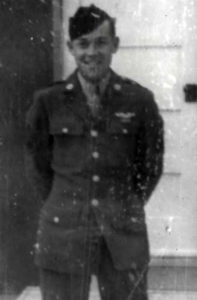
Born 4/19/20
Mr. William J. Dell (father), Route 1, Middle Road, Pittsburgh, Pa.
Memorial Tombstone at Saint Mary’s Cemetery, Pittsburgh, Pa. (Photo by “Genealogy-Detective”)

______________________________

Sgt. Del Vickio (“Del Vechio” – “Del Vecchio”?)

Like Lt. Thrasher and Sgt. Larson, Sgt. Del Vickio was also not a member of the Dogpatch Express crew on December 21. 

______________________________

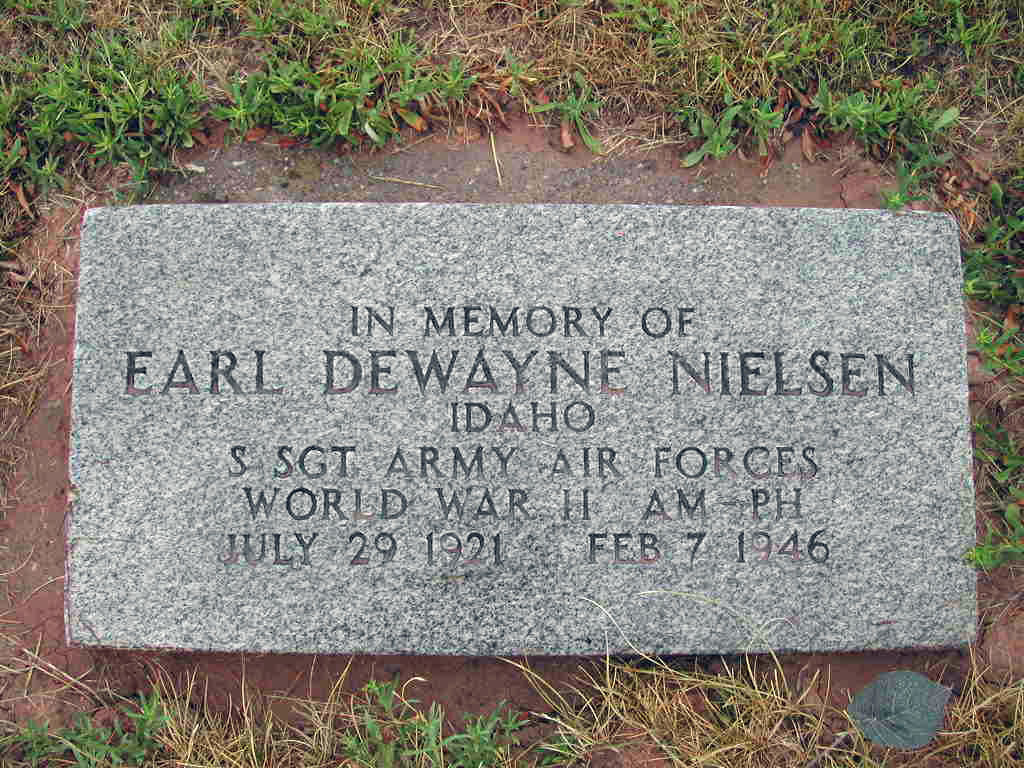
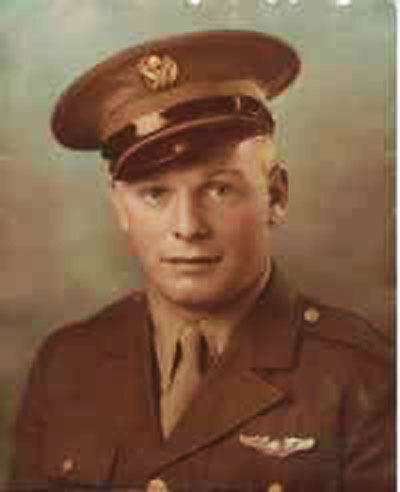
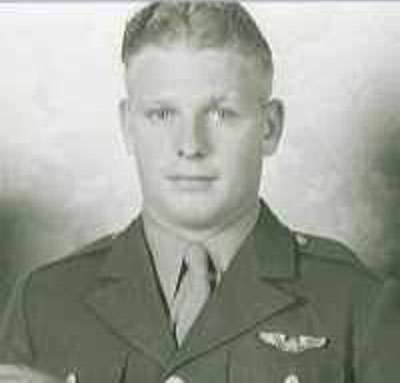
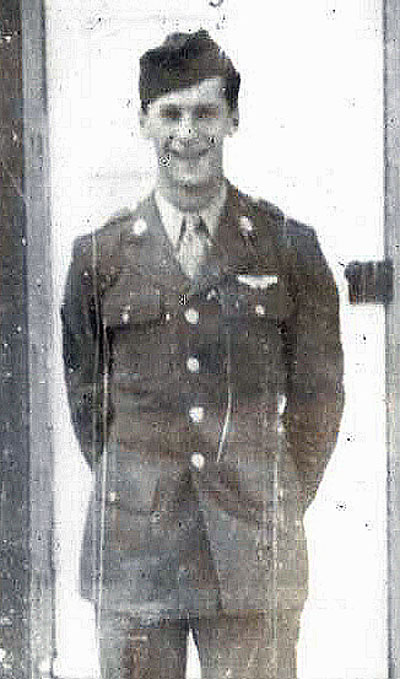
S/Sgt. Earl Dewayne Nielsen, 39831608, Gunner (Tail Gunner?)

Born 7/29/21, Thatcher, Idaho
Mr. and Mrs. Albert (6/5/91 – 2/3/65) and Vera Charlotte (Panter) Nielsen (9/1/97 – 5/11/68) (parents); Albert, Earl, Phyllis, and Wilda (brothers and sisters)
Cleveland, Idaho
Memorial Tombstone at Cleveland Cemetery, Franklin County, Idaho (Photo by Bill E. Doman)  Note that the tombstone does not carry the actual date of his death.  This date, identical to that appearing on the website of the American Battle Monuments Commission, probably represents the date on which he was declared dead for legal purposes, according to Section 5 of Public Law 490.  Such date discrepancies can be found for many servicemen still missing from the Second World War, particularly still-missing airmen and naval personnel who were casualties in the Pacific Theater and Asia.  (And sometimes, Europe as well.)

Here are two portraits of Sgt. Nielsen.  The first, uploaded by Dianne Roberts to his FindAGrave biographical profile, and the second, at the Nielsen family tree, at Ancestors Family Search.

______________________________

T/Sgt. Clarence T. Sopko, 35308715, Flight Engineer
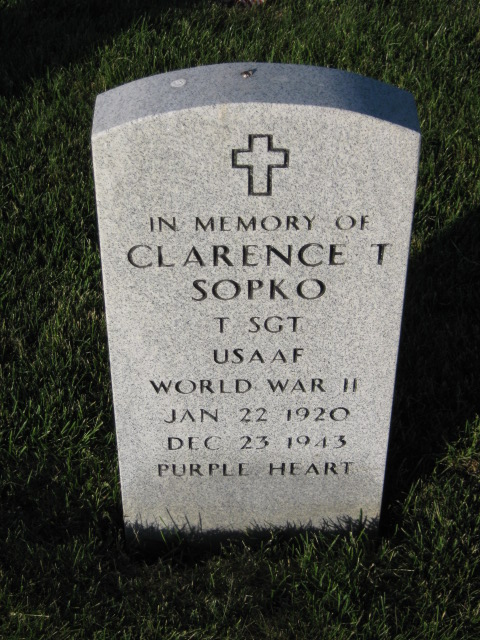
Born 1/22/20
Mrs. Mary S. Sopko (mother), 2138 West 26th St., Cleveland, Oh.
Memorial Tombstone at Ohio Western Reserve National Cemetery – Section M, Plot 6 (Photo by Douglas King)

______________________________

S/Sgt. Arnold J. Paradise, 36264577, Gunner


Mrs. Fern Paradise (mother), Garden Acres, Chippewa Falls, Wi.
WW II Memorial – June Havel (sister)

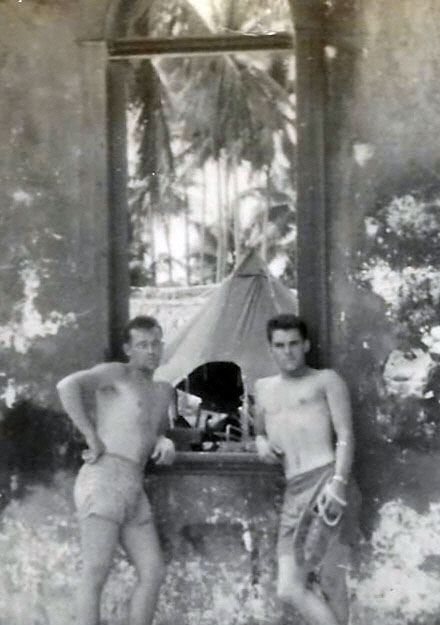
From Dick’s album, here’s a picture of Sergeants Dell and Paradise at the native church on Funafuti, around the time of the 11th’s mission to Makin and Jaluit.  They seem to have “gone native”, like their pilot, Dick.

______________________________

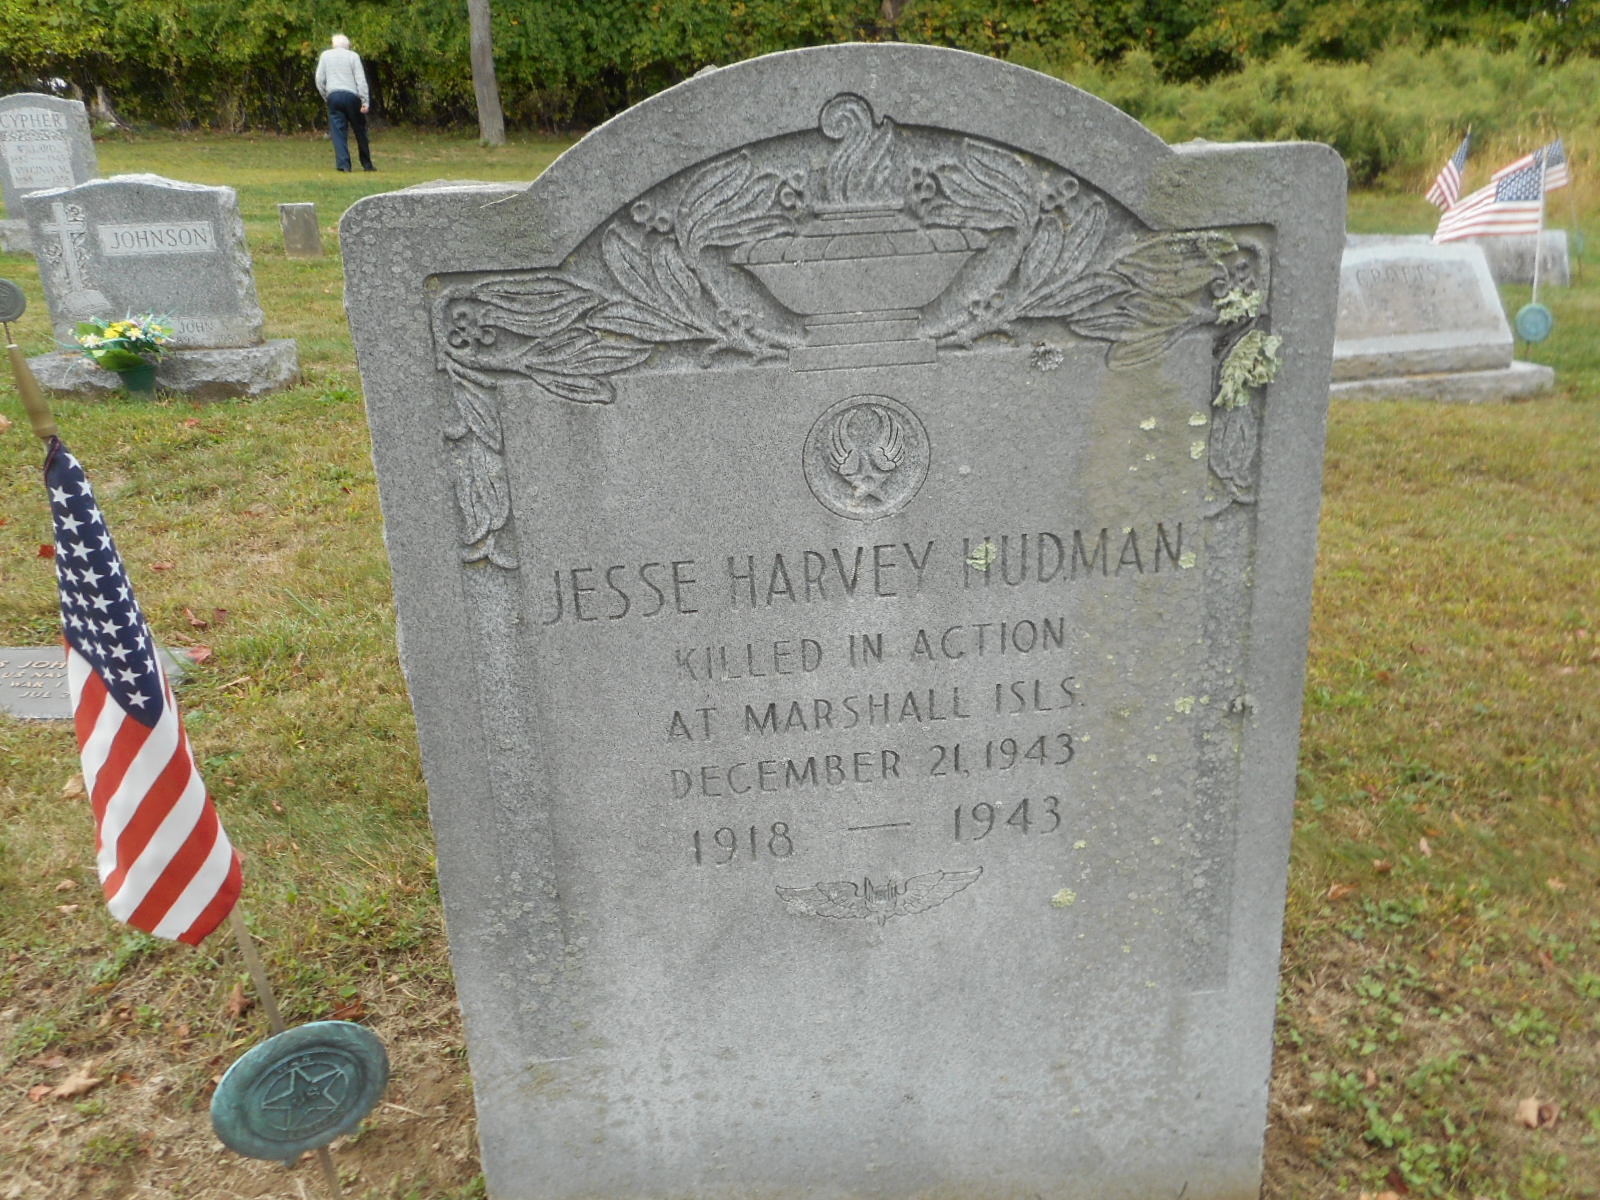
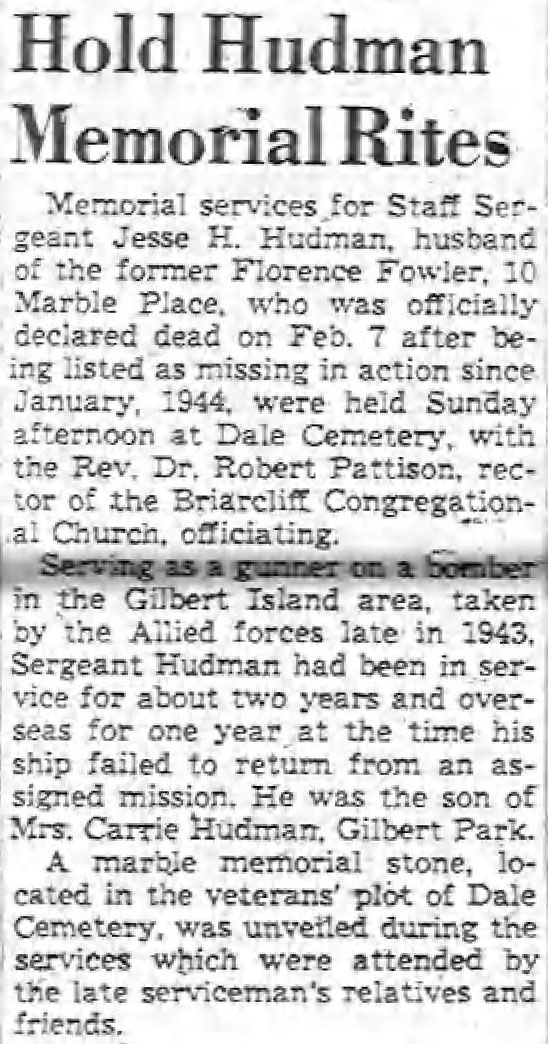
S/Sgt. Jesse Harvey Hudman, S/Sgt., 12146959, Assistant Engineer (Gunner)

S/Sgt. Jesse H. Hudman was evidently not a regular member of the Thompson crew, and does not appear in the above photos.  However, here’s an image of his memorial tombstone, at Dale Cemetery in Ossining, New York, followed by a news item from the Citizen-Register, of Ossining, N.Y., on May 22, 1946, regarding memorial services in his honor, which were held on Sunday, May 20, of that year.


Born 1918
Mrs. Florence L. Hudman (wife), 10 Marble Place, Ossining, N.Y.
Mrs. Carrie Hudman (mother), Gilbert Park, N.Y.
Memorial Tombstone – at Dale Cemetery, Ossining, N.Y. (photo by Jean Sutherland)
Notices about Sgt. Hudman appeared in the Citizen-Register, of Ossining, N.Y., on May 22 (above) and 25, 1946.  His name also appeared in an honor roll of WW I, WW II, and Korean War military casualties from Ossining which was published in the Citizen-Register on February 21, 1952.

______________________________

Due to the severity of his wounds, Rick would fly no more combat missions.  He faced a very lengthy period of recovery.

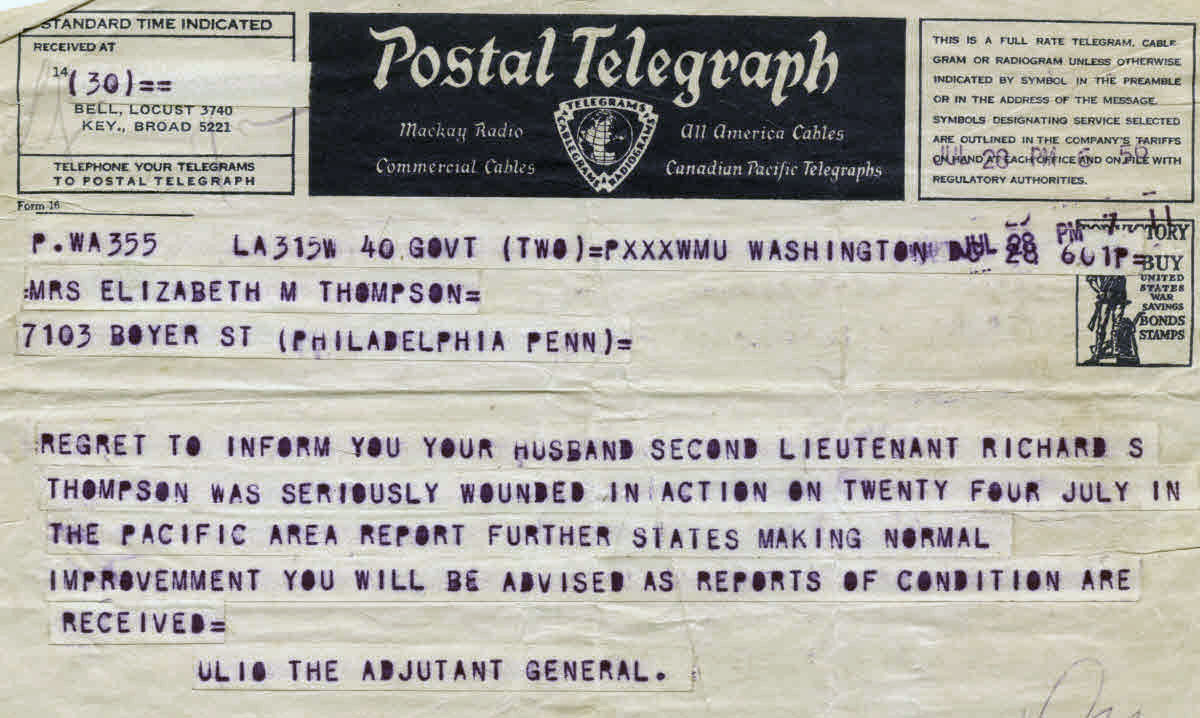
This telegraph to his wife, at her family’s Boyer Street address in Philadelphia, dated July 28, informed Elizabeth Thompson of her husband’s injuries:

REGRET TO INFORM YOU YOUR HUSBAND SECOND LIEUTENANT RICHARD S THOMPSON WAS SERIOUSLY WOUNDED IN ACTION ON TWENTY FOUR JULY IN THE PACIFIC AREA  REPORT FURTHER STATES MAKING NORMAL IMPROVEMENT   YOU WILL BE ADVISED AS REPORTS OF CASUALTIES ARE RECEIVED

ULIO THE ADJUTANT GENERAL

______________________________

Dick’s name appears (top right) in this casualty list published by the Philadelphia Inquirer on August 12, 1943, which represents only a part of the larger, nationwide casualty list released that day by the War Department.

_____________________________

Rich surmises that his father was well enough to travel back to the United States by October of 1943, based on a telegram – from Dick to Elizabeth – dated on the 18th of that month. 

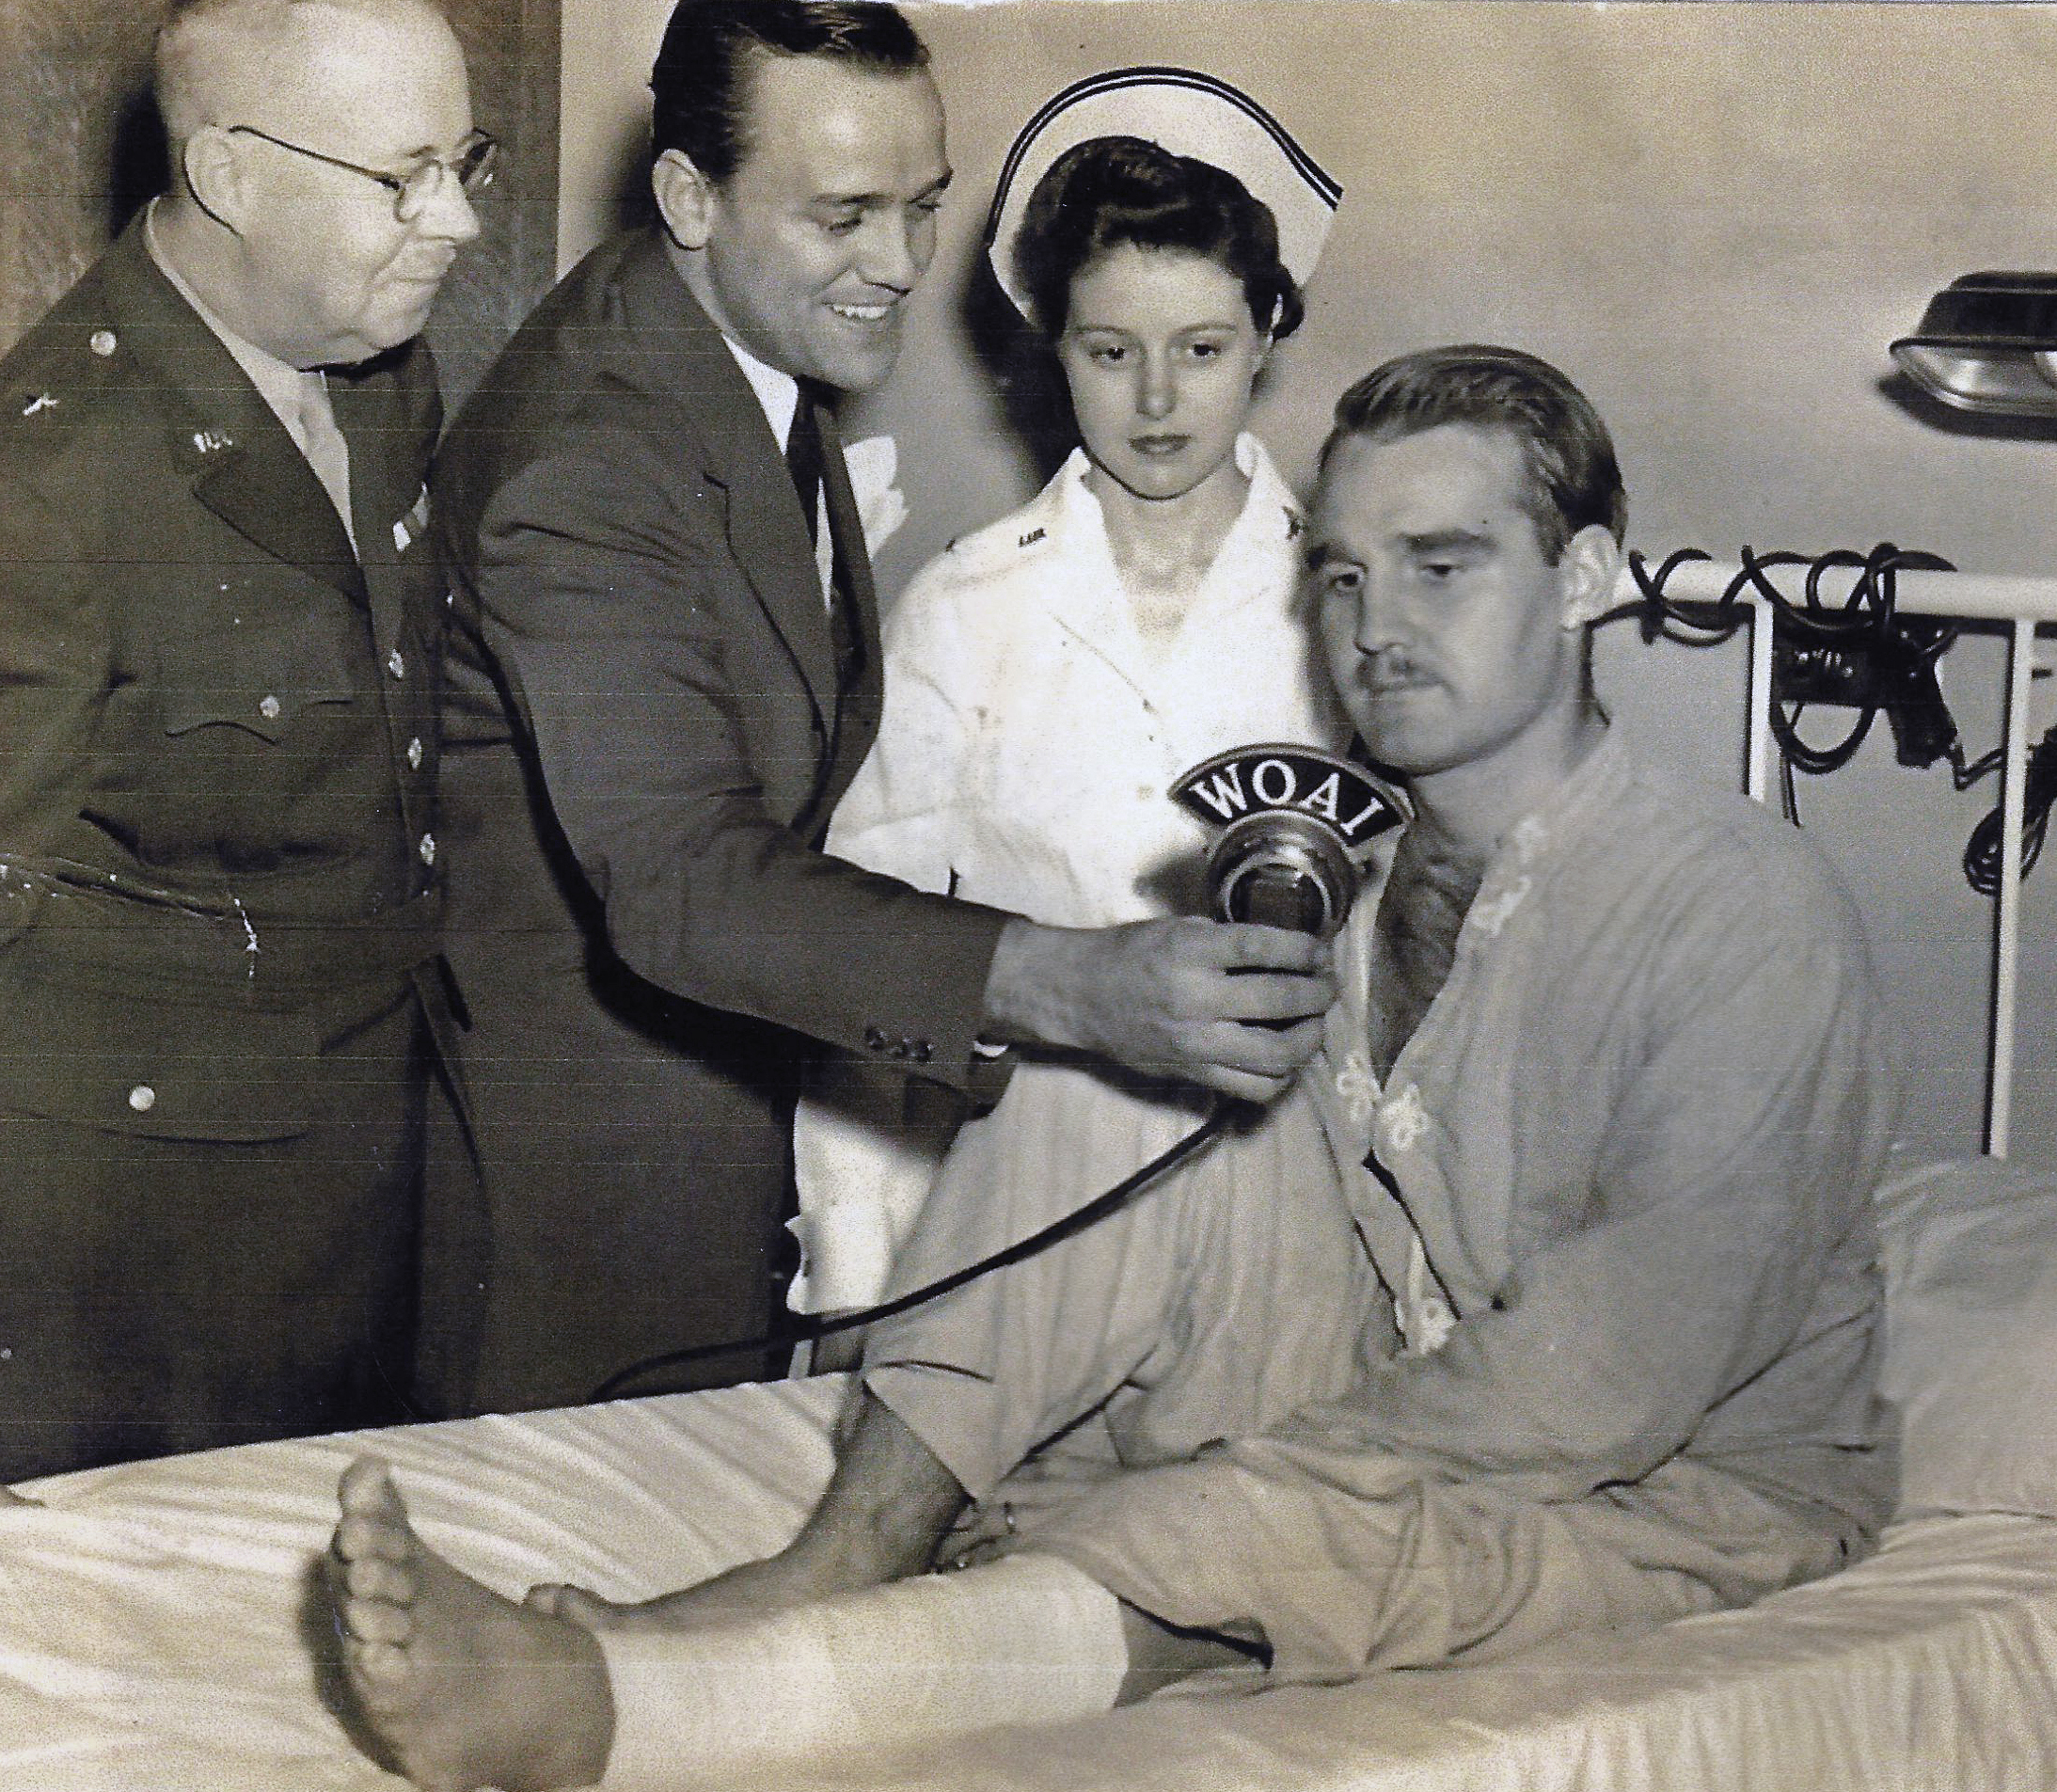
Some time around Christmas, 1943, while recovering at Brooke Army Hospital (now Brooke Army Medical Center) at Fort Sam Houston, Texas, Dick was featured in a broadcast on Armed Forces Radio. 

In the photo below, the civilian holding the microphone is Dick Smith, the officer is Brooke Army Hospital Commander Brigadier General B.C. Beach, and the nurse is 1 Lt. Florence E. Judd, who made a full career as a military nurse, eventually rising to the rank of Major.  According to George E. Omer’s 1957 article in Kansas History (“An Army Hospital: From Horses to Helicopters”), she, “…became the Fort Riley hospital chief nurse following an assignment at Walter Reed Army Hospital. Major Judd earned her R.N. degree in 1934 from Saint Mary’s Hospital in East Saint Louis and her postgraduate studies have earned a B.S. in nursing education from Columbia University and an M.S. in hospital administration from Baylor University.”

An excerpt of this interview follows this image of Dick, who appears to have an understandably pensive expression.  Note especially the text…

[Dick cut this part out: It’s a pretty sight, that flack, red and green fire bursting in the air around you.],” which presumably was never broadcast. 

…and…

SMITH:  That must have been a wonderful crew you had.

THOMPSON:  They were swell.  And I have been pretty upset about the latest news I’ve had about them.  I got shipped home with this leg but they – they stayed in the fight.  I’ve been told recently the plane is missing and that means all of the crew too.

Well, there are some events for which the fewer words, the better. 

The transcript of the broadcast follows…

SMITH:  Wherever our forces go, the Army Nurses Corps follows.  Wherever the fighting is, they are near by – and these boys in this hospital can tell you it is a wonderful thing to have them.  When a man is wounded, it is comforting indeed, to know they are present, to be in their capable, responsible hands.  Many of the nurses here in Brooke General Hospital have seen duty overseas.  For instance, here is First Lieutenant Florence E. Judd.  She put in a year’s service in a base hospital in the Fiji Islands.  It was a magnificent job you nurses did there, Lt. Judd.  I spent some time in that hospital you were in – and I say thank you.

JUDD:  You needn’t thank me or any other Nurse.  I often think the hard work we did there, night and day, was its own reward.  The lives we saved in those hospitals were worth all the work – and we felt that we were actually doing something in this fight for freedom everybody is always talking about.

SMITH:  You had to work hard in those hospitals.

JUDD:  Yes – everything was difficult because at that time we were starting from scratch.  We were rushed there immediately after Pearl Harbor and had with us only such equipment as could be carried quickly.  It was a rush job but I’m proud to say that it was also a good job.  Some facilities were not comparable to those here at home, but we had the best equipment, best doctors, the best trained corpsmen – and it was amazing to see how rapidly the boys recovered from their injuries.

SMITH:  You want to be sent overseas again?

JUDD:  Definitely.  Once you have seen the war at close hand, you feel strange in the ordinary, peaceful atmosphere of home again.  You keep recalling all the suffering you have seen.  You want to get back into it to see that you can do to lessen it.  You feel guilty enjoying anything when you know how miserable, how dreadful are the things our men must face.  Maybe what you do is very little, but at least, you are in it.

SMITH:  Don’t you feel you are in it here, serving in this hospital which is receiving overseas casualties?

JUDD:  Of course, I do.  But this is home.  Over there the men are far from home.  It is a terrible thing to be wounded far from home.

SMITH:  It must be.

JUDD:  But we never heard the boys complain.  They were the best patients I ever worked with.  They were appreciative of even the- least attention.

THOMPSON: And they should have been.  They had the best nurses in the world to give them attention.

JUDD:  Thank you, sir.

THOMPSON:  I’m Lieutenant Richard S. Thompson, Mr. Smith.  I want to say a thing or two on this broadcast, if I may.

SMITH:  Of course, you may.

THOMPSON:  Just something I’ve had on my chest.

SMITH:  Go ahead.

THOMPSON: I was in the Air Force, pilot of a bomber on patrols out of Hawaii.

SMITH:  Is that where you were wounded?

THOMPSON:  Oh, no.  I got mine, flying in a nuisance raid over Wake Island.

SMITH:  Tell us about that.

THOMPSON:  Well, you know Wake is a pretty small island –

SMITH:  But a famous one.

THOMPSON:  That’s right.  It cost the Japs plenty to take it from our Marines, and they have it well defended today.  They mean to make it cost us when we take it back.  We went over on our raid one day about noon.  And we were very lucky.  We caught twenty Japanese Zero planus on the ground.  I’m pleased to report our aim was good and we put all of them out of commission.  But we didn’t get away scot free – at least I didn’t.

SMITH:  What happened?

THOMPSON:  Well, there were thirty Zeros which weren’t on the ground – and they weren’t out of commission either.  They settled on us like hornets.  The flack was bad, too[Dick cut this part out: It’s a pretty sight, that flack, red and green fire bursting in the air around you.]  And it scares the devil out of you.  It’s meant for you.  Just a few more feet in your direction – and it is yours forever.

SMITH:  Was it flack which wounded you?

THOMPSON:  No – gun fire from one of the Zeros.  Ripped right through my leg.  I passed out: so I missed most of the excitement.  The co-pilot later told me they downed nine of those thirty Zeros.

SMITH:  That must have been a wonderful crew you had.

THOMPSON:  They were swell.  And I have been pretty upset about the latest news I’ve had about them.  I got shipped home with this leg but they – they stayed in the fight.  I’ve been told recently the plane is missing and that means all of the crew too.

SMITH:  That’s not very good news.

THOMPSON:  But that isn’t what I had on my mind to say.  I’ve get a baby boy, three months old.at home, and I’ve never seen him.

SMITH:  Surely you’ll get to see him soon.

THOMPSON:  Yes, right away.  But think of the thousands of other American men overseas who won’t get to see their children soon – even for a year or so, maybe never.  Millions of men, average American fellows like the boys you have talked with tonight, are spending the best years of their life away from the people they love, away from the opportunities they had planned to take advantage of.  We all know it’s got to be that way.  And you don’t hear those men complaining, though I can tell you they get pretty burned up sometimes at the softness and blindness of certain people back home, people whom the war has never touched and who don’t know what it is like to fight an enemy who isn’t playing a game with you but means to kill you for keeps.  Yeah, I’ve got an injured leg, but at that I came out light.  Those boys who talked to you a little while ago didn’t tell you all the things they know about that jungle warfare going on – right this minute – in the South Pacific.  They talked about foxholes.  You know what those foxholes are like?  They’re not nice, clean holes in the earth.  They are holes that the jungle rains fill with water and mud – and yet those boys have to stay in them.  Sometimes they fill up with blood and you are in that, too.  Those filthy, muddy holes become a man’s home.  And that jungle they talk about.  It is as bad as an enemy; it’s no pretty green land of palms and flowers.  It is a matted mass of vines and trees and at times the ground beneath your feet is not ground but mud up to your knees and up to your thighs.  And worst of all it hides an enemy you can’t see – all around you, sniping at you from a tree top or hiding on the ground right under you.  And that enemy – the boys didn’t tell you all they know about him either.  They didn’t tell you about those wounded men the Japs had found and slashed to shreds before our medical corpsmen could get them back to the aid stations.  I listen to the radio and read the newspapers and they talk about what a good investment War Bonds are and how if you buy them you’re keeping down inflation.  Frankly, I don’t get it.  Does the government have to beg you to buy War Bonds?  If you had seen sore of the things we’ve seen, you’d jump at the chance to get ammunition and other supplies to the men overseas.  What is all this begging you to buy War Bonds anyhow?  I know a lot of people are buying plenty of War Bonds, but what’s wrong with the rest of you?  I don’t get it.

SIIITH:  We return you now to our downtown studio.

______________________________

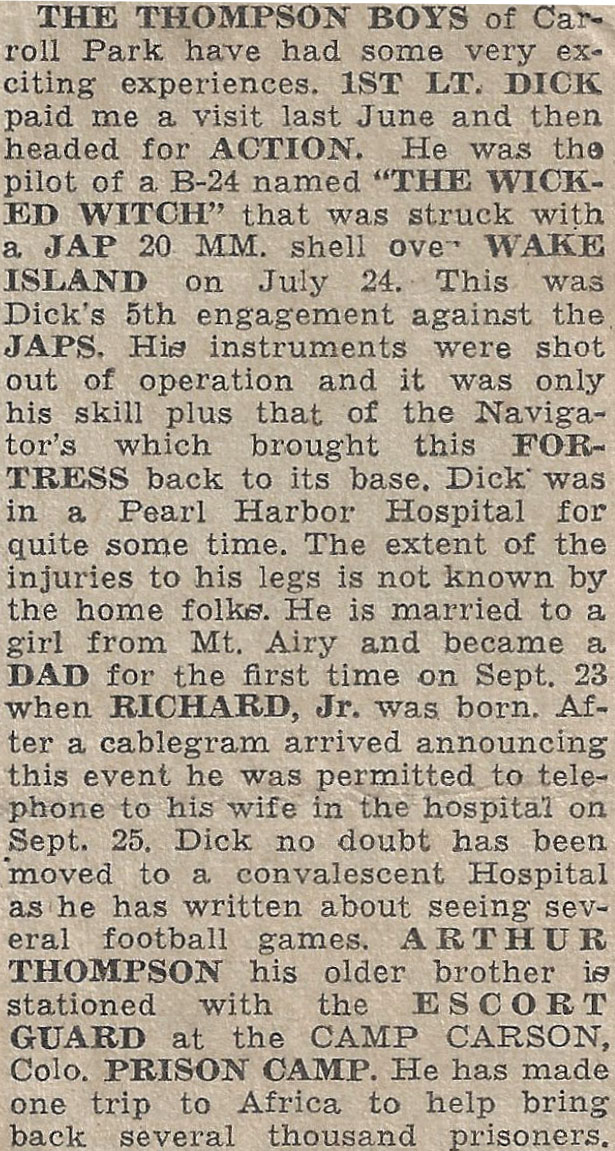
Here’s a wartime article from an un-named (probably Philadelphia-area) neighborhood newspaper, covering the experiences of Dick and his brother Arthur.  Note that the story mentions Dick having piloted a “Fortress” (!) back to Funafuti, when the aircraft was actually (!) a B-24, and Lieutenant Lowry took control of the plane.

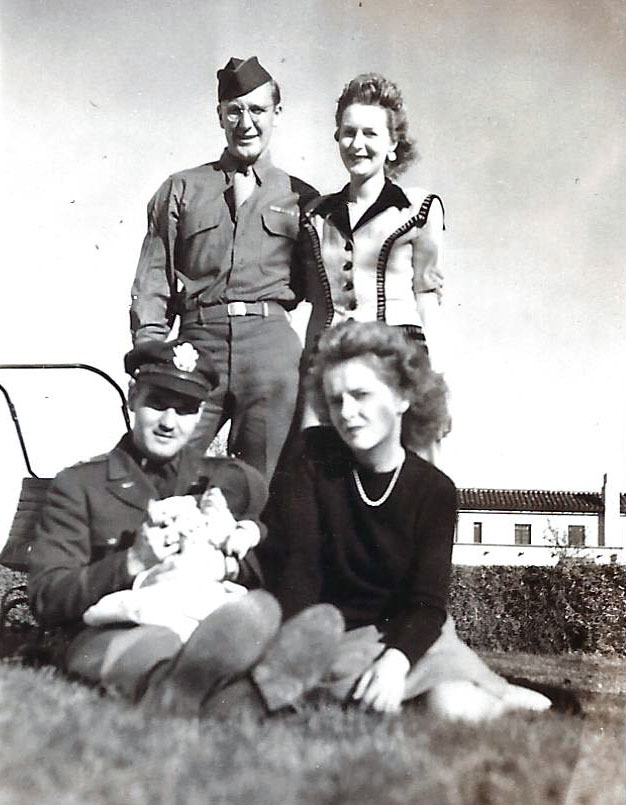
And, here are two photos of the Thompson family, at Brooke Army Hospital.  Brother Art and his wife Kay stand at rear, while Dick, Betty, and baby son Richard, Jr. (born in September, 1943) in foreground. 

Unfortunately, Dick’s leg would never completely heal.  It was amputated in 1946, with Dick being medically retired from the military.  

______________________________

Life moves forward. 

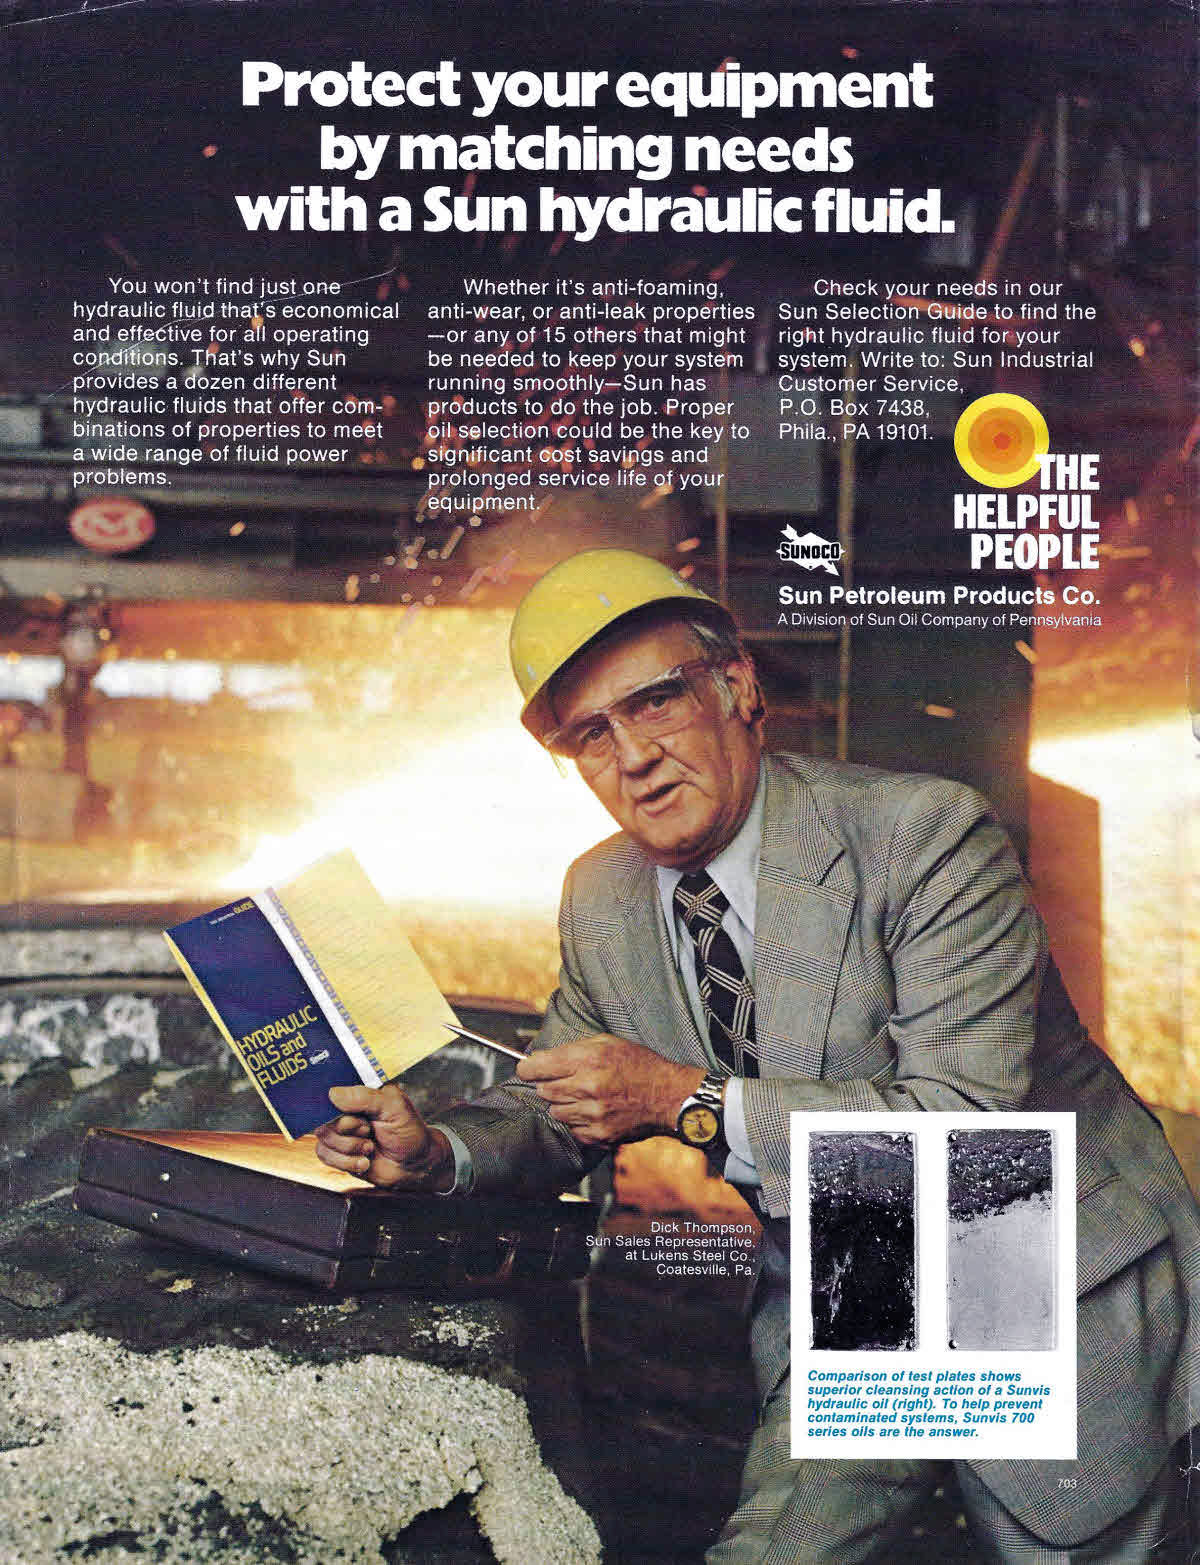
Here’s a picture of Dick in a 1974 advertisement for the Sun Petroleum Company.  However, there’s no actual recollection of how he came to work for Sun.  As remembered by Rich, his grandfather [Dick’s father], “…Everett sold Cabot paints so being around a salesman must have turned him into one.  His brother Art had a paint store in Long Beach, CA so that sort of thing was in their DNA.  …  It’s easy for me to say he was very good at it as he was chosen to appear in trade magazines representing Sunoco.   …He enjoyed working for Sun for at least most of his career.  I seem to remember however, that towards the end of his career, it was like they were trying to push out the good old boys and their way of doing business over 3 martini lunches – but that’s just my take.  I think he was about ready for more golf, flying to Myrtle Beach for more golf, visiting his brother in CA and doing things not possible while raising a family.”

This image, from the late 1970s, was taken at Pearson Airport, Vancouver, Washington.  Rich, “lived on the hill behind the airport in late ‘70s and dad really liked being able to sit in the house or porch and look across the field at “Joliet” (“four niner J”) while he was having a martini.”

Though the Second World War changed Dick’s life, it did not dominate it.  For example, though letters were naturally exchanged with his family after his wound in 1943, he did not keep a diary.  According to Dick, “He didn’t have any really bad / negative things to say about his situation or the enemy (e.g. I have one letter where his mother makes mention of “those dirty japs”!)”

Similarly, Dick’s discussions of and attitude about the war remained “light”.  Rich remembers, “…photos of him shortly after the amputation of him showing off his “stump” at family gatherings and waving it like his arm at folks that were there.

“While growing up, I remember waking up one night when the folks had an adult poker party going and his prostheses was in the center of the table to cover a bet.

“I took him to a party here in Oregon while he was visiting where there was a pool in the back yard.  One of the smart-asses among the guests … took the liberty of pushing him into the pool – fully dressed.  He could swim like a fish and came back over to the edge of the pool where the ‘perp’ was standing, took off his leg and threw it up in the deck and said – ‘Now look what you’ve done!’  One of the few times I’ve ever known that guest to be speechless.

But, he did seem to have been particularly close to co-pilot, John Lowry, in whose memory he was proud to have named his second son, John.  In time, John Thompson attended college in Atlanta, and became friends (“…he was given V.I.P. treatment…”) with Lowry’s wife Margaret, who had remarried and had twin daughters and lived in Smyrna.

As remembered by John, “There were two family ‘reunions’ with Margaret Lowry / Mellon.  The first was in 1966 when Mom came down to pick me up after my first year at college.  There was a relationship between the two wives which indicates that they were together during some part (training)? of Dad and Jack’s early military career.  The second and last reunion … was in 1969 when my parents … drove down for my graduation.”

______________________________

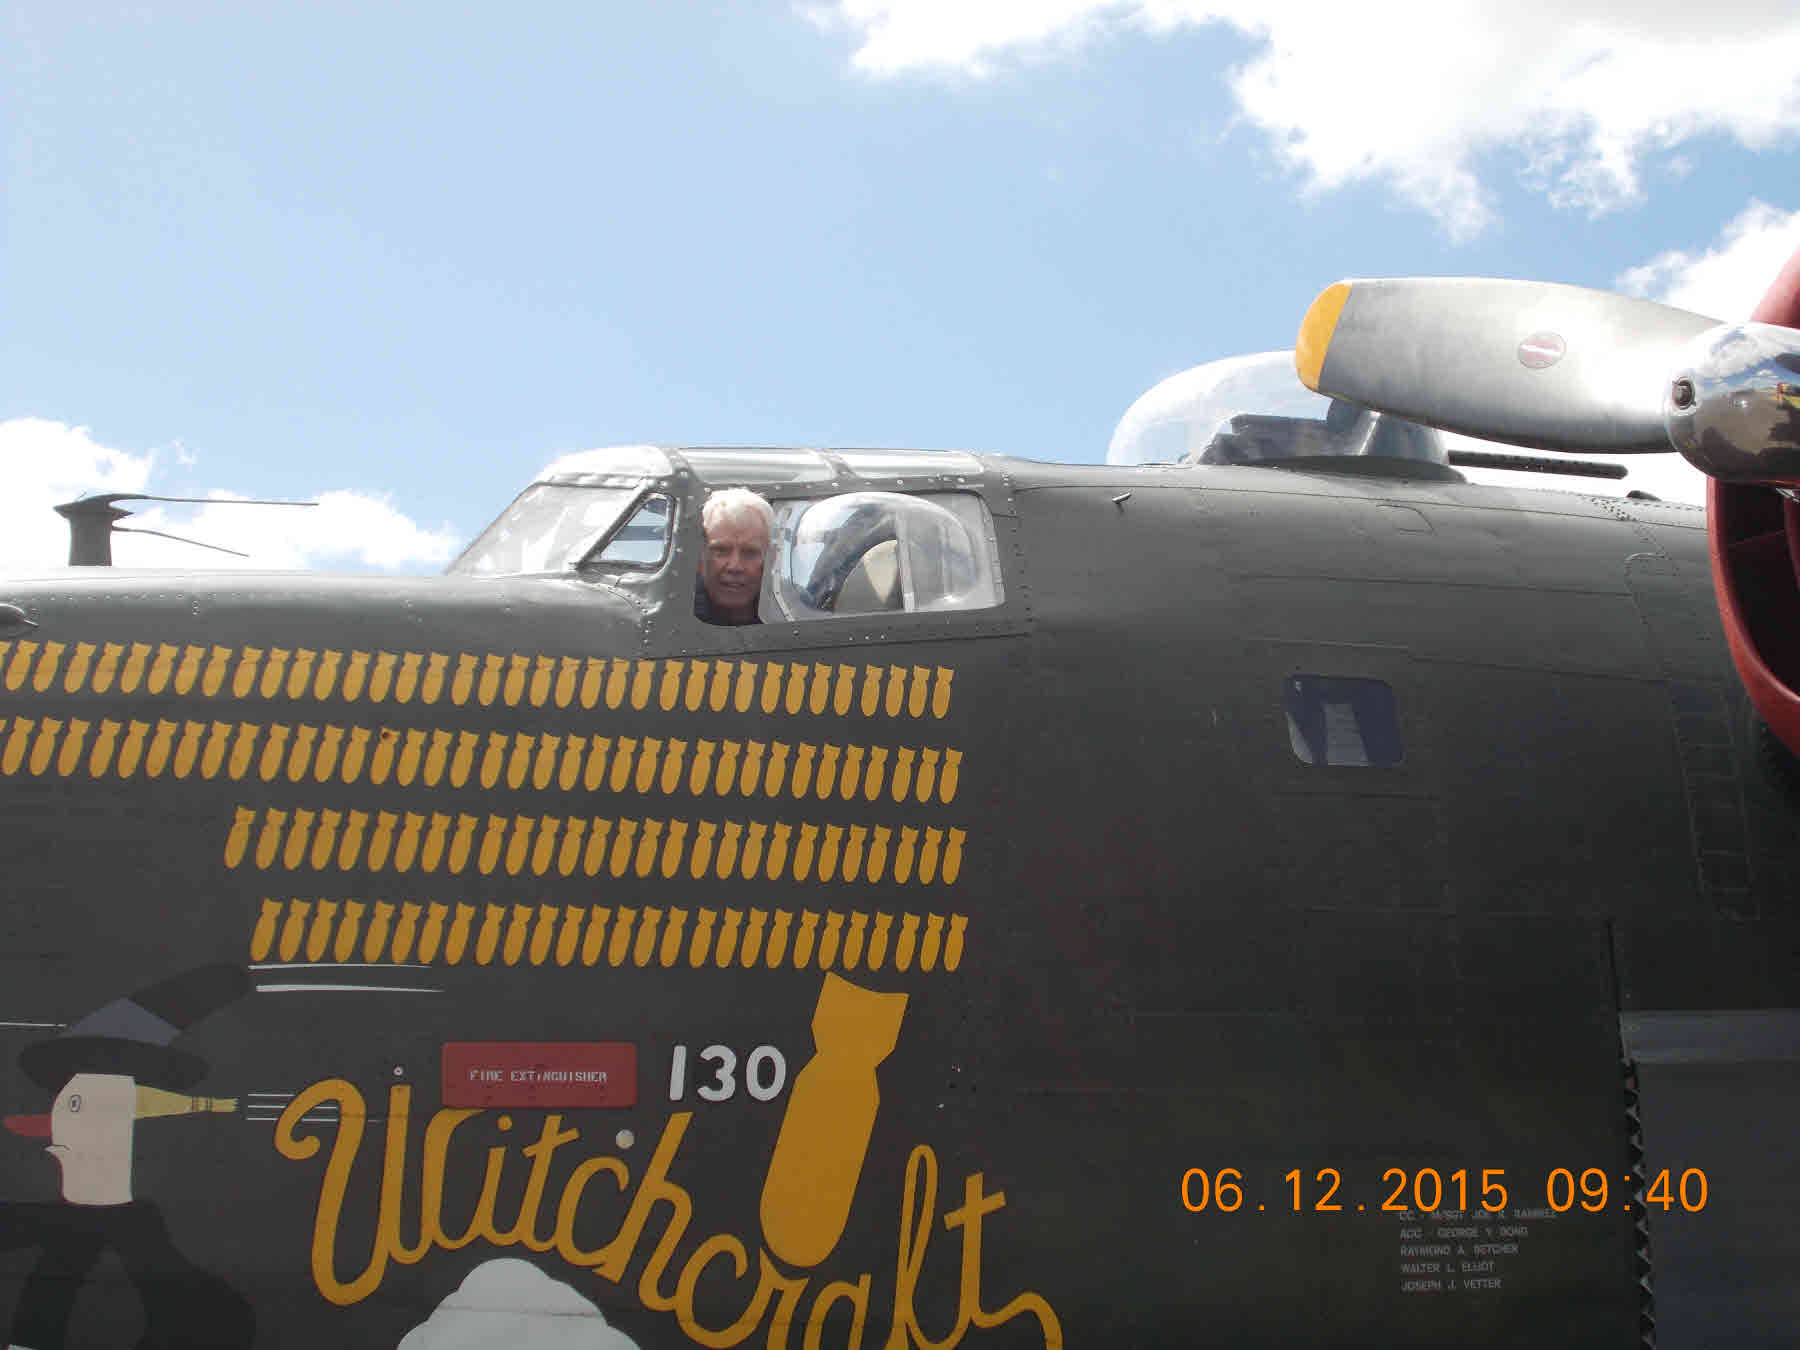
The past remains within the present.  In June of 2015, this took the form of a visit by the Collings Foundation Wings of Freedom Tour to Portland, Oregon.  Rich, “…got there Sunday afternoon and didn’t even get to see the planes in the air but vowed to return at next opportunity and participate in what they call a “flight experience” and actually take a ride in the B-24 WITCHCRAFT.  

“During the visit, the flight engineer found me and three other people up on the flight deck.  He wanted us out of there and apologized that they forget to put the ‘NO ENTRY’ rope across the opening.  While talking with one of the people – an elderly gentleman accompanied by his family – the engineer learned that this fellow flew B-24s during WW II training pilots, and became very cordial, telling the old pilot, have a seat, stay as long as he liked, and insisted he leave a note and sign his log book. 

Then I saw my chance and dug out an old photo of dad with his head out the pilot’s window on the WICKED WITCH.  He asked “Who is this”?  I said, “My Father”.  His jaw dropped to the floor!  Once recomposed, he squatted down and looked down the bomb bay catwalk, now crowded with people and told them he had a pilot and the son of another pilot on the flight deck and asked for their patience while we finished up.

I met the engineer later and showed him the photos you’ve been looking at and gave him a big THANK YOU.

Great day!”

The memory of that 2015 day – full circle from July of 1943 – is shown below. 

______________________________

Looking back, Rich’s father, “…was always quick to relate how lucky he was to have only lost his leg and that the whole crew went out on the next mission and ended up missing in action.” 

And that brings us to a story that, whether true or apocryphal, is deep with meaning, carrying a message universal and perhaps eternal.  Curiously, it is a very old Chinese Taoist story about a simple farmer in a poor country village. 

While such a tale nature appears – on first reading – to be completely unrelated to aviation and military history, on contemplation, it actually encompasses both, and much more. 

For, it is a tale about the nature of life.

______________________________

He [the farmer] was considered very well-to-do, because he owned a horse which he used for plowing and for transportation.

One day his horse ran away.
All the neighbors exclaimed how terrible this was, but the farmer simply said,

“Maybe.”

A few days later the horse returned and brought two wild horses with it.

The neighbors all rejoiced at his good fortune, but the farmer just said,

“Maybe.”

The next day the farmer’s son tried to ride one of the wild horses; the horse threw him and broke his leg.

The neighbors all offered their sympathy for his misfortune, but the farmer again said,

“Maybe.”

The next week conscription officers came to the village to take young men for the army.

They rejected the farmer’s son because of his broken leg.

When the neighbors told him how lucky he was, the farmer replied,

“Maybe.”

(Maybe.)

– February, 2019

Acknowledgements

I’d like to extend my deep appreciation to Rich Thompson and his brother and sister, for sharing the photographs, documents, and information that have made this blog post possible. 

References and Suggested Readings

Bell, Dana, Air Force Colors – Pacific and Home Front, 1942-47, Squadron / Signal Publications, Carrollton, Tx., 1997

Birdsall, Steve, B-24 Liberator in Action – Aircraft Number 21, Squadron / Signal Publications Inc., Warren, Mi., 1975

Blue, Allan G., The B-24 Liberator – A Pictorial History, Charles Scribner’s Sons, New York, N.Y., 1975

Cleveland, W.M., Grey Geese Calling : Pacific Air War History of the 11th Bombardment Group (H), 1940-1945, Portsmouth, N.H., 1992

Davis, Larry, B-24 Liberator in Action – Aircraft Number 80, Squadron / Signal Publications Inc., Carrollton, Tx., 1987

Forman, Wallace R., B-24 Nose Art Name Directory – Includes Group, Squadron and Aircraft Serial Numbers and Photo Availability, Specialty Press, North Branch, Mn., 1996

Howard, Clive and Whitley, Joe, One Damned Island After Another, The University of North Carolina Press, Chapel Hill, N.C., 1946

Livingstone, Bob, Under the Southern Cross: The B-24 Liberator in the South Pacific, Turner Publishing Company, Paducah, Ky., 1998

Rust, Kenn C., Seventh Air Force Story, Historical Aviation Album, Temple City, Ca., 1979

Rust, Kenn C. and Bell, Dana, Thirteenth Air Force Story, Historical Aviation Album, Temple City, Ca., 1981 (The Grey Geese were assigned to the 13th AF from January through May of 1943.  Subsequently, they were part of the 7th AF.)

A B-24 Liberator, Up Close and Personal: German Photographs of a Downed B-24 in Holland – II

This page presents the 15 pictures of Tell Me More in Luftgaukommando Report KU 1679.

By scrolling down the post from top to bottom, you’ll first see images of the two pages in the KU Report listing the captions of the photos. 

This is followed by verbatim transcriptions of the entire block of text on those two pages.  Each German-language caption is followed by its English-language equivalent, in italics

Then, scrolling down through all the pictures you’ll see that each photo has its pertinent caption – in both German and English – beneath it.  The English-language translations are presented in italics. 

Importantly, the images and their captions are not presented in the same numerical order as in the KU Report.  Instead, I’ve arranged them to appear as if you were walking along and moving through the plane, from front to rear.  I’ve also added some comments below the German-English paired translations. 

____________________

KU Report Photo Caption Pages

Bild 1     Ansicht der Maschine von Vorn.
Picture 1     View of the machine from the front.

Bild 2     Ansicht der Maschine von hinten.  Man beachte das weggeknickte Fahrwerk.
Picture 2     View of the machine from behind. Note the bent landing gear.

Bild 3     Rumpfende mit Leiwerk und Staffelkenner.
Picture 3     Fuselage tail with body work and [squadron signal light].

Bild 4     Rumpfvorderteil:
a) Staurohr
b) Blister für Navigator beidseitig
c) Abtriftmesser
d) mit den Bewegungen der Waffen gekoppelte Panzerblickscheibe
e) Panzerplatten aussenbords, links und rechts
Picture 4     Fuselage front:
a) Pitot tube
b) Blisters for navigator on both sides
c) Drift [meter?]
d) Armored sighting window, coupled with the movement of the weapons
e) External armor plate, left and right

Bild 5     Linker Flügel mit Triebwerken.
Picture 5     Left wing with engines.

Bild 6     Blick über Waffenstand Rumpfoberseite, Antennenanordnung nach dem Leitwerk:
a) Rückspiegel für Schützen auf Rumpfoberseite
b) Revi N 6 A
Picture 6     View of the weapon stand [dorsal turret] top of the fuselage, antenna arrangement according to the control unit:
a) Rear-view mirror for gunner on fuselage top
b) Revi N 6A

Bild 7     Blick auf Führerstand:
a), b), c), d), Panzerglasscheiben
e) Panzerplatte
Picture 7     View of pilot’s seat:
a), b), c), d), armored glass panes
e) Armor plate

Bild 8     Ausgefahrener Notsporn
Picture 8     Extended emergency skid

Bild 9     Bugturm mit Panzerglasscheibe und Antrieb.
Picture 9     Nose spire [sic] with armored glass pane and drive.

Bild 10     Plexiglasverkleidung des Bugturmes mit aufgemalter
a) Sprung des Plexiglasses wurde durch beidseitige Lochung der Plexiglashälften und durch Einziehen eines Drahtes zickzackförmig verbunden.
Picture 10     Plexiglass covering of the nose spire [sic] with painted [markings]
a) Crack of the plexiglass was zigzagged by bilateral perforation of the plexiglass halves and by pulling in a wire.

Bild 11     Blick in rückwärtigen Kabinenabschnitt mit MK-Kugel und Rumpfseitenständen.
Picture 11     View in the rear cabin section with machine-gun bullets and trunk sides.

Bild 12     Unterbringung der Munitionskästen für Heckstand an der rechten Bordwand hinter dem rechten Fenster.  Darüber Seenotsender mit Zubehöirbehälter.
a) Ausstiegklappe für Besatzung als auch Agenten und Sabotagebehältern.
Picture 12     Accommodation of the ammunition boxes for the rear deck on the right side of the vehicle
behind the right window.  Above that, distress transmitter with accessory container.
a) The exit flap for crew as well as agents and sabotage containers.

Bild 13     Blick auf ferngesteuerte FT-Geräte
a) BC – 966 – A
b) Stromversorgungsgerät für TR 5043
c) Modulator Unit BC – 456 – E
d) Radio Transmitter Unit BC – 433 – G
e) TR 5043
Picture 13     View of remote controlled FT devices
a) BC – 966 – A
b) Power device for TR 5043
c) Modulator unit BC – 456 – E
d) Radio transmitter unit BC – 433 – G
e) TR 5043

Bild 14     Die schwenkbaren Rumpfseitenwaffen mit Kreiskornvisier ohne Rücklaufbremse.
Picture 14     The swivel[ing] fuselage side weapons with a circular horn sight without a return brake.

Bild 15     Hydraulicbrett an der rechten Bordwand vor Heckstand.
Picture 15     Hydraulic board on the right side of the vehicle in front of the tail.

Bild 16     Servomotor für Seiten- und Höhenruder der Kurssteurerg A 5. Sitz des Gerätes in Flugrichtung hinter der Trennwand des Heckraumes.
Picture 16     Servomotor for side and height control of the steering wheel A 5.  Seat of the device in the direction of flight behind the partition of the rear compartment.

______________________________

THE PHOTOGRAPHS

Bild 1     Ansicht der Maschine von Vorn.

Picture 1     View of the machine from the front.

Comments: Note that none of the props appear to have been feathered, and the lower blades of two starboard props appear to be bent.  The landing gear has been lowered. 

______________________________

Bild 7     Blick auf Führerstand:
a), b), c), d), Panzerglasscheiben
e) Panzerplatte

Picture 7     View of pilot’s seat:
a), b), c), d), armored glass panes
e) Armor plate

Comments: The skin of the forward fuselage is crumpled.  Armored glass and pilot’s compartment exterior side armor – of obvious of interest to the photographer – are clearly visible.

______________________________

Bild 5     Linker Flügel mit Triebwerken.

Picture 5     Left wing with engines.

______________________________

Bild 4     Rumpfvorderteil:
a) Staurohr
b) Blister für Navigator beidseitig
c) Abtriftmesser
d) mit den Bewegungen der Waffen gekoppelte Panzerblickscheibe
e) Panzerplatten aussenbords, links und rechts

Picture 4     Fuselage front:
a) Pitot tube
b) Blisters for navigator on both sides
c) Drift [meter?]
d) Armored sighting window, coupled with the movement of the weapons
e) External armor plate, left and right

Comments: Note the attention to co-pilot’s exterior side armor, and crumpled skin of the front fuselage. 

______________________________


Bild 6     Blick über Waffenstand Rumpfoberseite, Antennenanordnung nach dem Leitwerk:
a) Rückspiegel für Schützen auf Rumpfoberseite
b) Revi N 6 A

Picture 6     View of the weapon stand [dorsal turret] top of the fuselage, antenna arrangement according to the control unit:
a) Rear-view mirror for gunner on fuselage top
b) Revi N 6A

Comments:  An excellent view of the top of the rear fuselage.  Note the furrows created by the impact of the starboard landing gear tire and fuselage bottom.  These extend only a very short distance behind the aircraft into the adjoining field, implying a very abrupt stop.  

The dorsal turret is probably the Martin A-3C version as opposed to A-3D, the latter of which commenced with Block H-25 Liberators.  Ironically, the German technical analyst referred to the turret gunsight as a “Revi N 6 A”.  (Revi?!) 

More intriguingly – at least, as described in the caption – are two circular rear-view mirrors mounted within opposite sides of the turret, each located between the .50 caliber machine gun and turret bubble.  The starboard inner turret mirror is also visible in photograph number 7.   

Notice that the cover of the starboard emergency life raft compartment has been detached from the fuselage.

______________________________

TO RELEASE & INFLATE LIFE RAFTS
PULL RELEASE HANDLE HARD

PULL RELEASE HANDLE AS FAR AS
POSSIBLE WHICH RELEASES DOORS

PULL INSIDE RELEASE HANDLE…

Comments: This is an 800 dpi scan from the previous photo, showing instructions concerning release of the B-24’s life-rafts.

______________________________

Bild 10     Plexiglasverkleidung des Bugturmes mit aufgemalter
a) Sprung des Plexiglasses wurde durch beidseitige Lochung der Plexiglashälften und durch Einziehen eines Drahtes zickzackförmig verbunden.

Picture 10     Plexiglass covering of the nose spire [sic] with painted [markings]
a) Crack of the plexiglass was zigzagged by bilateral perforation of the plexiglass halves and by pulling in a wire.

Comments: Here’s a different way of looking at things: The photographer stood atop the front fuselage of Tell Me More, and pointing his camera down, photographed the top of the “dome” of the Emerson A-15 nose turret.  Immediately apparent are numbers denoting the rotational azimuth of the turret – in gradations of 15 degrees relative to the fuselage center line – engraved or etched into the plexiglass.  The overwhelming majority of photographs of the Emerson A-15 turret, where the turret is seen from the side, naturally don’t show this feature. 

(Did the turret dome of the CAC / Motor Products tail turret have a similar azimuth scale?)

______________________________

Bild 9     Bugturm mit Panzerglasscheibe und Antrieb.

Picture 9     Nose spire [sic] with armored glass pane and drive.

Comments: Another view of the A-15 turret.  Immediately apparent are the pane of armored glass and elevation drives for the guns.  There’s a small mystery here:  How was the turret dome shattered?  Flak?  Fighters?  During the plane’s landing?

______________________________

Comments: An excellent side view of an Emerson A-15 turret, albeit not from the KU Report.  Instead, from Air Force Photo 53584AC / A12599.  This picture illustrates an interesting aspect of the general design of the A-15, as opposed to the structure of dorsal aircraft turrets:  The guns are located well below the gunner’s head and torso.

Caption: “ENGLAND – S/Sgt. Edward J. Mickey, a B-24 nose turret gunner, of Kingston, Pa., has 30 missions to his credit and holds the Distinguished Flying Cross and the Air Medal with 3 Oak Leaf Clusters. (53584AC / A12599)”

Here’s an interesting video (at the website of Hugh Fenlon) of an Emerson A-15 in operation, albeit not (!) in a B-24.

______________________________

Bild 11     Blick in rückwärtigen Kabinenabschnitt mit MK-Kugel und Rumpfseitenständen.

Picture 11     View in the rear cabin section with machine-gun bullets and [trunk] sides

Comments:  Fuselage interior, looking forward.  This image provides an excellent view of the waist gun opening covers in their stowed positions, and, the location of oxygen bottles.  The wind blast deflector for the port gun can be seen just ahead of the open waist window.  These are the original “open” style B-24 waist gun positions that are neither staggered nor enclosed.  According to Alan Blue’s book, that modification only commenced with Block H-20 Liberators. 

______________________________

Bild 13     Blick auf ferngesteuerte FT-Geräte
a) BC – 966 – A
b) Stromversorgungsgerät für TR 5043
c) Modulator Unit BC – 456 – E
d) Radio Transmitter Unit BC – 433 – G
e) TR 5043

Picture 13     View of remote controlled FT devices
a) BC – 966 – A
b) Power device for TR 5043
c) Modulator unit BC – 456 – E
d) Radio transmitter unit BC – 433 – G
e) TR 504

______________________________

Bild 14     Die schwenkbaren Rumpfseitenwaffen mit Kreiskornvisier ohne Rücklaufbremse.

Picture 14     The swivel[ing] fuselage side weapons with a circular horn sight without a return brake.

Comments:  The simple circular ring-and-bead gunsight mounted atop the waist machine guns.

______________________________

Bild 12     Unterbringung der Munitionskästen für Heckstand an der rechten Bordwand hinter dem rechten Fenster.  Darüber Seenotsender mit Zubehöirbehälter.
a) Ausstiegklappe für Besatzung als auch Agenten und Sabotagebehältern.

Picture 12     Accommodation of the ammunition boxes for the rear deck on the right side of the vehicle behind the right window.  Above that, distress transmitter with accessory container.
a) The exit flap for crew as well as agents and sabotage containers.

Comments:  Tail turret ammunition storage box, and ventral entry / escape hatch in open (stowed) position. 

______________________________

Bild 15     Hydraulicbrett an der rechten Bordwand vor Heckstand.

Picture 15     Hydraulic board on the right side of the vehicle in front of the tail.

______________________________

Bild 16     Servomotor für Seiten- und Höhenruder der Kurssteurerg A 5. Sitz des Gerätes in Flugrichtung hinter der Trennwand des Heckraumes.

Picture 16     Servomotor for side and height control of the steering wheel A 5.  Seat of the device in the direction of flight behind the partition of the rear compartment.

______________________________

Bild 8     Ausgefahrener Notsporn

Picture 8     Extended emergency skid

______________________________

Bild 2     Ansicht der Maschine von hinten.  Man beachte das weggeknickte Fahrwerk.

Picture 2     View of the machine from behind. Note the bent landing gear.

Bild 3     Rumpfende mit Leiwerk und Staffelkenner.

Picture 3     Fuselage tail with body work and [squadron signal light].

______________________________

There ends the tail – literally (ahem! – pardon the pun!), and figuratively – of Tell Me More.  The photos tell the story of a single B-24 Liberator – of very, very many – that was lost in the air war against Germany in the Second World War. 

Certainly every man in the plane’s crew certainly had his own, much more human story, as well:  Of attempted evasion, eventual capture, and ultimately liberation and freedom.  I have no way of knowing if in the decades since 1945 those stories were recorded and preserved – especially as suggested by the inscription on the tombstone of Lt. Robert Willson – but it would be nice to think they have been. 

So, let this collection of photos stand as a symbol of a past that should not be forgotten.

______________________________

References

The B-24 Liberator

Birdsall, Steve, B-24 Liberator in Action (Aircraft No. 21), (Illustrated by Don Greer), Squadron/Signal Publications, Inc., Carrollton, Tx., 1975

Blue, Allan G., The B-24 Liberator – A Pictorial History, Charles Scribner’s Sons, New York, N.Y., 1975

Davis, Larry  B-24 Liberator in Action (Aircraft No. 80), (Illustrated by Perry Manley), Squadron/Signal Publications, Inc., Carrollton, Tx., 1987

Joe Baugher’s list of B-24 serial numbers, at JoeBaugher.com

B-24H 41-28754

American Air Museum in England

8th Air Force Historical Society

Luftgaukommando Report KU 1680

United States National Archives – Collection of Foreign Record Seized – Record Group 242: “Records of Luftgaukommandos: German Reports of Downed Allied Fighters and Other Aircraft – KU Reports”

Report KU 1680 at NARA: (In) Records Group 242, Entry 1022, Shelf Location 190 / 14 / 9-12 / 1-5, Box 231

Demonstration of Emerson A-15 Turret

Hugh Fenlon’s website

Modelling the B-24H Liberator

US-Aircraft.com History-Modelling-Forum

IPMS USA

Captive Technology: German Photographs of Electronic Equipment in a Downed Special Operations Squadron B-24 Liberator – III

This page presents the other pictures in Luftgaukommando Report 1054, in a format akin to the prior blog post.

____________________ 

DESCRIPTION OF AIRCRAFT 42-63792, AND PHOTO CAPTIONS

Feindgerät-Untersuchungsstelle 5
RLM GL C-Rü                                                                                                O.U. den 23.4.44
Feldpostnummer: L 50825 FW, Lgp. Brüssel.

Untersuchungsbericht Nr. 5/2021:

Am. 2.3.44 um 23.30 Uhr wurde in Fienvillers (8 km s.w. Doullens) eine Liberator durch Flak abgeschossen.  Von der Besatzung wurden 2 Mann gefangen genommen.

Das Flugzeug war als Sabotagematerialträger eingesetzt und sehr stark zerstört.

Die Typenbezeichnung des Flugzeuges lautete: B 24 D, Ser. 42-63792.  Bemerkenswert an diesem Flugzeug war die FT-Ausrüstung.  Es befanden sich beiderseits des Rumpfbuges die im Bild 1 u. 2 dargestellten Antennen.  Ferner befanden such nachfolgende FT-Geräte an Bord, die grösstenteils bereits durch Kurier nach dem RLM GL C-Rü gesandt wurden:

1.     RT-3 / APN-1
27 Volt
D.C. N.X.S. – 2424
1341 C.R.V.

2.    T-7 / APN-1
110 DB / 25
N.X. – 23763
1237 C.R.V.

3.    Anzeigegerät mit Braun’scher Röhre, vermutlich Suchgerät (Bild 12, 13, 14, 15 u. 16). –
4.    BC-433-C, Ser. Nr. 14506
5.    BC-966-A, Ser. Nr. 45327
6.    BC-454-A, Ser. Nr. 140
7.    BC-455-B, Ser. Nr. 20162
8.    BC-445-B, Ser. Nr. 52370
9.    BC-929-A

Trotzdem bei diesem Flugzeug verschiedene neue Geräte dabiei waren, waren sämtliche FT-Geräte von der Funkmeisterei des Fl.H. Rosiéres weggenommen worden.  Die FT-Geräte mussten erst dort abgeholt und zur Entnahme der Stecker und Kabel wieder in das Flugzeug eingesetzt werden. –

Ferner wurden mehrere Agenten-Empfänger des Musters Miniature Communications Receiver (M.C.R.1.) festgestellt.

Als Anlage zum Bericht werden 18 Fotos übersandt.

Erläutering zu den Bildern:

Bild 1 u. 2:     Antennen an beiden Seiten des Rumpfbuges
Bild 3:           Gerät mit Braun’scher Röhre.  Rechte oben im Bild ist die Kabeleinführung der im Bild 1 u. 2 gezeigten Antennen ersichtlich.
Bild 4:          Kabeleinführung in grösserem Masstab.
Bild 5, 6, 7:  zeigt den Lageert der Geräte RT-7 / APN-1
Bild 8, 9, 10: RT-7 / APN-1
Bild 11:         RT-3 / APN-1
Bild 12, 13, 14, 15, 16: Suchgerät mit Braun’scher Röhre.
Bild 17, 18:   zeigt den Agenten-Kleinempfänger.

Engelhard
Stabsing. Und
Sondering. GL

____________________

Enemy equipment investigation center 5                                             KU 1154
Ministry of the Air Force GL C-Rue                  Local Quarters, 23 April 1944
Field postal No L 50825 FW
Air District Post Office Brussels

Investigation Report No 5 / 2021

On 2 March 1944 at 2330 a Liberator had been shot down by anti-aircraft over Fienvillers (8 km southwest of Doullens).  Two members of the crew had been captured.  The plane was equipped as sabotage material-carrier and therefore very seriously damaged.

The type markings of the plane were as follows: B 24 D, Serial No. 42-63792.  This plane was equipped with remarkable radio equipment.  There were aerials on both sides of the front of the fuselage as pictures 1 and 2 show.  Further, there was the following radio equipment on board, the greatest part of which has been sent by messenger to the Ministry of the Air Dorces GL C-Rue.

1.     RT-3 / APN-1
27 Volt
D.C. N.X.S. – 2424
1341 C.R.V.

2.    RT-7 / APN-1
110 DB / 25
N.X. – 23763
1237 C.R.V.

3.    Indicator-set with Bruan’scher tube, probably search-equipment (see picture 12, 13, 14, 15 and 16)
4.    BC-433-C, Ser. No. 14506
5.    BC-966-A, Ser. No. 45327
6.    BC-454-A, Ser. No. 140
7.    BC-455-B, Ser. No. 20162
8.    BC-445-B, Ser. No. 52370
9.    BC-929-A

Though this plane was equipped with different kinds of new radio equipment, all radio equipment had been taken out by the radio office of the Air-base Rosieres.  The radio equipment had to be obtained from that office, and for the purpose of the removal of the plugs and cables had to be installed again into the plane.  Also, several agent receivers of the type “Miniature Communications Receiver (M.C.R. 1)” were found.

Enclosed in this report 18 photographs.

Photo explanation.

Picture 1 and 2:     Antenna on both sides of the front of the fuselage.
3:     Equipment with Bruan’scher tube.  In the right upper corner of the picture the cable installation of the antenna (shown in picture 1 and 2) can be seen.
4:     Cable installation on larger scale.
5, 6, 7:     shows the location of the equipment RT-7 / APN-1
8, 9, 10:   RT-7 / APN-1
11:            RT-3 / APN-1
12, 13, 14, 15, and 16     Search equipment with Braun’scher tube.
17 and 18:     Shows the Miniature-Communications-Receiver.

Enclosures:

Instructions for the
“Miniature Communications Receiver”
and 18 photographs.

Signed: Engelhard
Staff-Engineer and Special Engineer

____________________

PHOTOS: APN-1 Radar Altimeter and M.C.R.-1 Miniature Communications Receiver

____________________

Bild 8, 9, 10: RT-7 / APN-1

Pictures 8, 9, 10:   RT-7 / APN-1

Bild 8, 9, 10: RT-7 / APN-1

Pictures 8, 9, 10:   RT-7 / APN-1

Bild 8, 9, 10: RT-7 / APN-1

Pictures 8, 9, 10:   RT-7 / APN-1

Bild 11:         RT-3 / APN-1

Picture 11:            RT-3 / APN-1

Comments:  Here are several views of the APN-1 radar altimeter.  The case has been damaged and the front cable sockets removed, but the interior of the unit – chassis and attached components – is completely intact. 

A video description of the APN-1, created by the infoagemuseum (Wall, New Jersey – in Monmouth County) and narrated by Mr. Ray Chase, describes the operation of the unit.  A beautiful set of illustrations of a (quite intact!) APN-1 is available at the website of Aces, Contrails and Unsung Heroes, while the schematic diagram of the APN-1 can be found at this link to the Waverley Amateur Radio Society

____________________

Bild 17, 18:   zeigt den Agenten-Kleinempfänger.

Pictures 17 and 18:     Shows the Miniature-Communications-Receiver.

Bild 17, 18:   zeigt den Agenten-Kleinempfänger.

Pictures 17 and 18:     Shows the Miniature-Communications-Receiver.

Bild 17, 18:   zeigt den Agenten-Kleinempfänger.

Pictures 17 and 18:     Shows the Miniature-Communications-Receiver.

Comments for Photos 17 and 18: One aspect of the crew’s intended mission is evidenced by the subject of these images:  A Miniature Communications Receiver – 1 (“M.C.R.-1”).  The M.C.R.-1, a portable, tube-based miniature receiver unit, was designed for use by S.O.E. (Special Operations Executive) Agents, Special Forces, and Resistance Groups.    

An M.C.R.-1 unit with its associated components is seen lying on a table.  Three power packs (one of which is connected to the unit by a short cable) are present, while on the right are three “Frequency Plug-In” coil packs, each of a different frequency range (2.5 MHz – 4.5 MHz, 4.5 MHz – 8 MHz, and 8 MHz – 15 MHz), which extend the receiver’s length. 

A thorough description of the M.C.R.-1 (with very nice color photographs) is available at the CryptoMuseum website.  The operating manual for the receiver – in which it’s dubbed a “Midget Communications Receiver” – can be found here, while the schematic diagram of the unit (via the Waverley Amateur Radio Society) can be found here

The Luftgaukommando Report includes a small and fascinating bonus:  It contains a very actual – quite original – very genuine – surviving remnant of the McDonald crew’s last mission: a placard of operating instructions for an M.C.R.-1. 

A superb set of images of an M.C.R.-1 and its associated components (including interior views of both the receiver and its power supply) as well as instructions covering its installation and use, is available at Jan Poortman’s PA3ESY Vintage Radio Collection website

____________________

References

Harrington Museum – Carpetbagger Planes (compiled by Roy Tebbutt)

Harrington Museum  (Aircraft of the 801st / 492nd Bomb Groups, and 406th NLS, compiled by Roy Tebbutt)

Harrington Museum (List of Allied Aircraft lost on Special Duty Operations, compiled by Roy Tebbutt)

Frank G. McDonald Crew

USAAF Special Operations – 801 BG – 492 BG Carpetbaggers (McDonald Crew History)

USAAF Special Operations – 801 BG – 492 BG Carpetbaggers (McDonald Crew Orders)

USAAF Special Operations – 801 BG – 492 BG Carpetbaggers (McDonald Mission Reports – zip file)

Escape & Evasion Report 669 (Lt. Frederick C. Kelly)

NARA Escape & Evasion Report search portal

NARA Escape & Evasion Report search portal (Escape & Evasion Report 669, for Frederick C. Kelly)

WW II Escape and Evasion Information Exchange (Directory of MIS-X Report Numbers for members of US Army Air Forces, and, US Army Ground Forces) – An extraordinarily comprehensive website! 

BC-929A “Rebecca” Radar Interrogator

Smithsonian National Air and Space Museum (general description)

AeroAntique.com (general description of BC-929A “Rebecca” Radar Interrogator)

QSL.net (“Connecting Hams Around the World”) (brief description)

Wikipedia Entry for Rebecca Radar Interrogator

Walt Gromov’s Radio Museum – Communications in WW I and WW II:
Graphic Survey of Radio and Radar Equipment Used by the Army Air Forces – Radio Navigation Equipment – 1 July 1945” (BC-929 and APN-1 illustrated in document)

Braun’scher Tube

The Inventors.org

APN-1 Radar Altimeter

Waverley Amateur Radio Society

Waverley Amateur Radio Society (APN-1 schematic diagram (this ain’t no Heathkit!))

HyperWar (Use of the APN-1)

Inforagemuseum (Video about APN-1)

VMARS (Vintage and Military Amateur Radio Society) Manuals (APN-1 Manual
Handbook Maintenance Instructions for Radio Set AN / APN-2  –  AN APN-2Y  –  AN / APN-2B (1945 09 25) (Technical Order 12P-5 – 2APN-2“)

Miniature Communications Receiver M.C.R.-1

Crypto Museum (Description of M.C.R.-1)

Crypto Museum (Detailed instruction manual for M.C.R.-1)

Imperial War Museum (Photographs of M.C.R.-1)

Waverley Amateur Radio Society (M.C.R.-1 schematic diagram)

Jan Poortman’s Vintage Radio Website (Illustrations of M.C.R.-1)

A Book…

Freeman, Roger, The Mighty Eighth – A History of the U.S. 8th Army Air Force, Doubleday and Company, Inc., Garden City, N.Y., 1970 (Special Operations Group – Carpetbagger history summarized on p. 263)

Captive Technology: German Photographs of Electronic Equipment in a Downed Special Operations Squadron B-24 Liberator – II

This – and the next – page present the 19 pictures in Luftgaukommando Report 1054, for B-24D 42-63792.  The format is identical to that followed in the blog post covering the Luftgaukommando Report for B-24H Liberator Tell Me More:

By scrolling “down” the post from top to bottom, you’ll see images of the two pages in the Report listing the captions of the photos. 

This is followed by a verbatim transcription of the block of the German text in those two pages.  The German text is followed by its English-language translation (in italics) which I transcribed from the MACR.

Then, moving “down” through all the pictures…

Each photo has its caption – in both German and English – below it.  The English-language translations are presented in italics. 

The images and their captions aren’t presented in the same numerical order as in the KU Report.  They’re arranged as if you were moving along the plane (or, er, uh…in this case, what’s left of the plane…) from front to rear.  I’ve also added comments below some captions.

____________________ 

DESCRIPTION OF AIRCRAFT 42-63792, AND PHOTO CAPTIONS

Feindgerät-Untersuchungsstelle 5
RLM GL C-Rü                                                                                                O.U. den 23.4.44
Feldpostnummer: L 50825 FW, Lgp. Brüssel.

Untersuchungsbericht Nr. 5/2021:

Am. 2.3.44 um 23.30 Uhr wurde in Fienvillers (8 km s.w. Doullens) eine Liberator durch Flak abgeschossen.  Von der Besatzung wurden 2 Mann gefangen genommen.

Das Flugzeug war als Sabotagematerialträger eingesetzt und sehr stark zerstört.

Die Typenbezeichnung des Flugzeuges lautete: B 24 D, Ser. 42-63792.  Bemerkenswert an diesem Flugzeug war die FT-Ausrüstung.  Es befanden sich beiderseits des Rumpfbuges die im Bild 1 u. 2 dargestellten Antennen.  Ferner befanden such nachfolgende FT-Geräte an Bord, die grösstenteils bereits durch Kurier nach dem RLM GL C-Rü gesandt wurden:

1.     RT-3 / APN-1
27 Volt
D.C. N.X.S. – 2424
1341 C.R.V.

2.    T-7 / APN-1
110 DB / 25
N.X. – 23763
1237 C.R.V.

3.    Anzeigegerät mit Braun’scher Röhre, vermutlich Suchgerät (Bild 12, 13, 14, 15 u. 16). –
4.    BC-433-C, Ser. Nr. 14506
5.    BC-966-A, Ser. Nr. 45327
6.    BC-454-A, Ser. Nr. 140
7.    BC-455-B, Ser. Nr. 20162
8.    BC-445-B, Ser. Nr. 52370
9.    BC-929-A

Trotzdem bei diesem Flugzeug verschiedene neue Geräte dabiei waren, waren sämtliche FT-Geräte von der Funkmeisterei des Fl.H. Rosiéres weggenommen worden.  Die FT-Geräte mussten erst dort abgeholt und zur Entnahme der Stecker und Kabel wieder in das Flugzeug eingesetzt werden. –

Ferner wurden mehrere Agenten-Empfänger des Musters Miniature Communications Receiver (M.C.R.1.) festgestellt.

Als Anlage zum Bericht werden 18 Fotos übersandt.

Erläutering zu den Bildern:

Bild 1 u. 2:     Antennen an beiden Seiten des Rumpfbuges
Bild 3:           Gerät mit Braun’scher Röhre.  Rechte oben im Bild ist die Kabeleinführung der im Bild 1 u. 2 gezeigten Antennen ersichtlich.
Bild 4:          Kabeleinführung in grösserem Masstab.
Bild 5, 6, 7:  zeigt den Lageert der Geräte RT-7 / APN-1
Bild 8, 9, 10: RT-7 / APN-1
Bild 11:         RT-3 / APN-1
Bild 12, 13, 14, 15, 16: Suchgerät mit Braun’scher Röhre.
Bild 17, 18:   zeigt den Agenten-Kleinempfänger.

Engelhard
Stabsing. Und
Sondering. GL

____________________

Enemy equipment investigation center 5                                             KU 1154
Ministry of the Air Force GL C-Rue                  Local Quarters, 23 April 1944
Field postal No L 50825 FW
Air District Post Office Brussels

Investigation Report No 5 / 2021

On 2 March 1944 at 2330 a Liberator had been shot down by anti-aircraft over Fienvillers (8 km southwest of Doullens).  Two members of the crew had been captured.  The plane was equipped as sabotage material-carrier and therefore very seriously damaged.

The type markings of the plane were as follows: B 24 D, Serial No. 42-63792.  This plane was equipped with remarkable radio equipment.  There were aerials on both sides of the front of the fuselage as pictures 1 and 2 show.  Further, there was the following radio equipment on board, the greatest part of which has been sent by messenger to the Ministry of the Air Dorces GL C-Rue.

1.     RT-3 / APN-1
27 Volt
D.C. N.X.S. – 2424
1341 C.R.V.

2.    RT-7 / APN-1
110 DB / 25
N.X. – 23763
1237 C.R.V.

3.    Indicator-set with Bruan’scher tube, probably search-equipment (see picture 12, 13, 14, 15 and 16)
4.    BC-433-C, Ser. No. 14506
5.    BC-966-A, Ser. No. 45327
6.    BC-454-A, Ser. No. 140
7.    BC-455-B, Ser. No. 20162
8.    BC-445-B, Ser. No. 52370
9.    BC-929-A

Though this plane was equipped with different kinds of new radio equipment, all radio equipment had been taken out by the radio office of the Air-base Rosieres.  The radio equipment had to be obtained from that office, and for the purpose of the removal of the plugs and cables had to be installed again into the plane.  Also, several agent receivers of the type “Miniature Communications Receiver (M.C.R. 1)” were found.

Enclosed in this report 18 photographs.

Photo explanation.

Picture 1 and 2:     Antenna on both sides of the front of the fuselage.
3:     Equipment with Bruan’scher tube.  In the right upper corner of the picture the cable installation of the antenna (shown in picture 1 and 2) can be seen.
4:     Cable installation on larger scale.
5, 6, 7:     shows the location of the equipment RT-7 / APN-1
8, 9, 10:   RT-7 /APN-1
11:            RT-3 / APN-1
12, 13, 14, 15, and 16     Search equipment with Braun’scher tube.
17 and 18:     Shows the Miniature-Communications-Receiver.

Enclosures:

Instructions for the
“Miniature Communications Receiver”
and 18 photographs.

Signed: Engelhard
Staff-Engineer and Special Engineer

____________________

Photos: Crash Site, APN-1 Antenna, and BC-929-A “Rebecca” Radar Interrogator Unit

____________________

These three un-numbered images show the scope and scene of the plane’s crash.  Most of the airframe and wings have been destroyed (the tail and left wing broke off during the crash) but ironically, several components of the plane’s special electronic equipment, situated in the central fuselage and nose, survived relatively or completely intact.  These have been extracted from the fuselage and placed in front of the wreckage. 

____________________

Bild 1 u. 2:     Antennen an beiden Seiten des Rumpfbuges

Picture 1 and 2:     Antenna on both sides of the front of the fuselage.

Bild 1 u. 2:     Antennen an beiden Seiten des Rumpfbuges

Picture 1 and 2:     Antenna on both sides of the front of the fuselage.

Bild 3:           Gerät mit Braun’scher Röhre.  Rechte oben im Bild ist die Kabeleinführung der im Bild 1 u. 2 gezeigten Antennen ersichtlich.

Picture  3:     Equipment with Bruan’scher tube.  In the right upper corner of the picture the cable installation of the antenna (shown in picture 1 and 2) can be seen.

Bild 4:          Kabeleinführung in grösserem Masstab.

Picture 4:     Cable installation on larger scale.

Comments for Photos 1, 2, 3, and 4: Close-ups of nose-mounted external receiving antenna associated with the APN-1 radar altimeter, and, the interior electrical connection of an APN-1 antenna within the fuselage.  Notably, the nose-mounted BC-929-A “Rebecca” Radar Interrogator unit and its attached cables (in photo 3) are completely intact. 

____________________

Bild 12, 13, 14, 15, 16: Suchgerät mit Braun’scher Röhre.

Pictures 12, 13, 14, 15, and 16: Search equipment with Braun’scher tube.

Bild 12, 13, 14, 15, 16: Suchgerät mit Braun’scher Röhre.

Pictures 12, 13, 14, 15, and 16: Search equipment with Braun’scher tube.

Bild 12, 13, 14, 15, 16: Suchgerät mit Braun’scher Röhre.

Pictures 12, 13, 14, 15, and 16: Search equipment with Braun’scher tube.

Bild 12, 13, 14, 15, 16: Suchgerät mit Braun’scher Röhre.

Pictures 12, 13, 14, 15, and 16: Search equipment with Braun’scher tube.

Bild 12, 13, 14, 15, 16: Suchgerät mit Braun’scher Röhre.

Pictures 12, 13, 14, 15, and 16: Search equipment with Braun’scher tube.

Comments for photos 12, 13, 14, 15, and 16:  These are external and internal views of the BC-929-A Rebecca Radar Interrogator.  The phrase “Braun’scher Röhre” (Braun’scher tube) is German for “cathode ray tube”, the first such device having been invented by a Dr. Karl Ferdinand Braun in 1897. 

The remaining photographs are presented on the next blog post…

A B-24 Liberator, Up Close and Personal: German Photographs of a Downed B-24 in Holland – I

In September of 2016, this blog commenced with a post about Luftgaukommando Reports – documents created by the Germans to record information about aircraft and aircrews of the United States and British Commonwealth air forces shot down over German-occupied Europe and Germany itself, during the Second World War.  Also known as KU (Kampflugzeug Unterlagen – “Downed Allied Aircraft”) Reports, these documents are part of Records Group 242 (Collection of Foreign Records Seized, 1675-1983) in the United States National Archives. 

By nature, Luftgaukommando Reports comprise records compiled by the Germans, and not uncommonly, include documents (personal and otherwise) and other items, such as V-Mail and hand-written correspondence, carried or worn (dog tags) by air crewmen. 

That “first” post (a multitude of keystrokes ago…!) focused on Luftgaukommando Report J 2525, which covers “Chicago’s Own”, a P-51D Mustang (44-41010) of the 353rd Fighter Squadron of the 354th Fighter Group, which was piloted by Captain Gordon T. McEachron, and served to introduce and describe general aspects of Luftgaukommando Reports. 

What makes Luftgaukommando Report J 2525 noteworthy is the presence of several excellent photographs of the downed and mostly intact – albeit no longer quite flyable! – Mustang. 

Report J2525 is one of the very few Luftgaukommando Reports containing photographs.  Sometimes, like the pictures of Chicago’s Own, such images suggest the features, components, and design aspects of American warplanes that particularly drew the attention of German investigators and technical analysts.

In a large sense, perhaps an apt word for such images is “evocative”.  It’s one thing to read “about” the loss of an American military plane in a book, article, or Missing Air Crew Report.  It’s quite another to actually see and hold an image of what that aircraft looked like, to those who actually flew within it over seven decades ago. 

____________________

This post presents another series of German photographs of a downed American warplane:  An entirely intact yet rather broken 8th Air Force B-24 Liberator – ironically nicknamed “Tell Me More” – which was examined by the Germans after force-landing in Holland on April 29, 1944.  The 15 images presented here, in Luftgaukommando Report KU 1679, represent the second highest total quantity of images found in any of the Luftgaukommando Reports (whether J, KU, or ME Reports) I’ve thus far examined.  (The largest quantity of photographs in a Luftgaukommando Report– 19 – hopefully the subject of a future post!)

“Tell Me More”, a B-24H 41-28754 of the 787th Bomb Squadron, 466th Bomb Group, 8th Air Force, squadron code 6L * N, was piloted by 1 Lt. Carl E. Hitchcock, and was lost during the Group’s mission to Berlin on April 29, 1944.  Its loss is covered in MACR 4447.  The 466th lost one other Liberator that day (41-29399, “T9 * D”, of the 784th Bomb Squadron, covered in KU 1681) while the 8th Air Force lost 61 other B-17s and B-24s; the 15th Air Force 4 B-24s. 

In human costs, approximately six hundred and seventy men.

According to tables of B-24 Liberator serial numbers in Allan Blue’s The B-24 Liberator (pp. 195 and 202), Tell Me More was a B-24H-1DT, and – going by serial numbers alone, rather than calendar date of manufacture and delivery – was the very first ”H” version of all 3,100 B-24H Liberators manufactured. 

The crew list from the MACR is shown below:

____________________

Neither the MACR nor the KU Report contain information describing the actual cause of the aircraft’s loss.  The KU Report simply states that the plane, “made an emergency landing 6 km east of Apeldoorn”, also vaguely mentioning “Liberator Shot Down”.  Regardless, as can be seen from the list in the MACR and KU Report, the entire crew of 10 was eventually captured.  

Fortunately, all survived the war. 

They were:

PilotHitchcock, Carl Edward, 1 Lt., 0-664597
Mrs. Mary Hitchcock (mother), North Bradley St., McKinney, Tx.
Born 1/17/15, Tx.; Died 9/23/95
Buried Sunset Memorial Park, San Antonio, Tx.
POW Stalag 7A (Moosburg)
Captured by 6/22/44

Co-PilotYoung, Lloyd G., 2 Lt., 0-680791
Mrs. Mary Young (mother), Park View Ave., Knoxville, Tn.
Born 9/25/18, Smith County, Tn.
POW Stalag Luft 3 (Sagan)
Captured May 3, 1944, at Vorort v Tiel, by Officer Heitzwebel

NavigatorWillson, Robert Edwin, 2 Lt., 0-698245
Mrs. Frances (Gardner) Willson (wife), 3026 Lebanon, El Paso, Tx.
Born 9/9/20, Sherman, Tx.; Died 2/3/08
Buried Dallas – Fort Worth National Cemetery, Dallas, Tx.
On tombstone – “Ex-POW – It is well with my soul.”
POW – Camp Unknown
Captured by 6/22/44

Robert Willson’s tombstone, photographed by FindAGrave contributor William Nance, is shown below:

BombardierBochicchio, Vito Joseph, 2 Lt., 0-682047
Mrs. Margaret Bochicchio (mother), West 21st St., New York, N.Y.
Born 1/1/17, New York, N.Y.; Died 3/23/10
Buried Calverton National Cemetery, Calverton, N.Y.
POW Stalag Luft 3 (Sagan)
Captured May 3, 1944, at Vorort v Tiel, by Officer Heitzwebel

Flight Engineer DiManno, Carmine Gerard, T/Sgt., 31276739
Mrs. Mary Dimanno (mother), 19 Orchard St., Hartford, Ct.
Born 7/7/23; Died 5/29/77
Buried East Cemetery, Manchester, Ct.
POW Stalag Luft 4 (Gross-Tychow)
Probably Captured April 29, 1944, near Apeldoorn

Radio OperatorMcCue, Thomas J. (“Thomas Francis”?), S/Sgt., 12188732
Mrs. Lee V. McCue (mother), 476 Dean St., Brooklyn, N.Y.
POW Stalag Luft 4 (Gross-Tychow)
Captured April 29, 1944, near Apeldoorn

Gunner (Ball Turret)Browne, Charles Graham, S/Sgt., 19116027
Mrs. Agnes G. Browne (mother), East South Mariposa St., Glendale, Ca.
Born 12/21/19, Twin Falls, Id.
POW Stalag Luft 3 (Sagan)
Captured April 29, 1944, near Apeldoorn

Gunner (Right Waist)Smith, David Leon, S/Sgt., 18213749
Mrs. Mary Smith (mother), General Delivery, New Franklin, Mo.
POW Stalag Luft 1 (Barth)
Captured by January 5, 1945

Gunner (Left Waist)Lugosi, Alex Paul, S/Sgt., 36631214
Mrs. Anna Lugosi (mother), 12632 Wallace St., Chicago, Il.
Born 11/11/21, Chicago, Il.
POW – Camp Unknown (numerical indicator is “0”)
Captured April 29, 1944, near Apeldoorn

Gunner (Tail)Dorrian, Thomas George, S/Sgt., 12121740
Mr. James Dorrian (father), 2541 99th St., East Elmhurst, Long Island, N.Y.
Born New York, N.Y.
POW Stalag Luft 3 (Sagan)
Captured April 29, 1944, near Apeldoorn

____________________

The crew list and other documents in the KU Report imply that the crew split up after landing – the enlisted men in one group, and the four officers in two pairs – in an attempt to evade capture.  This is suggested by their dates of capture, which are listed in the KU Report as follows:

Captured on April 29, at Apeldoorn:

T/Sgt. Carmine G. DiManno (flight engineer)
S/Sgt. Thomas J. McCue (Radio Operator)
S/Sgt. Charles G. Browne (Ball Turret Gunner)
S/Sgt. Alex P. Lugosi (Left Waist Gunner)
S/Sgt. Thomas G. Dorrian (Tail Gunner)

Captured May 3, at “Vorort v Tiel”, by an “Officer Heitzwebel”:

2 Lt. Lloyd G. Young (Co-Pilot)
2 Lt. Vito J. Bochicchio (Bombardier)

Captured by June 22, at an unspecified location:

1 Lt. Carl E. Hitchcock (Pilot)
2 Lt. Robert E. Willson (Navigator)

Managed to evade until early January, 1945; location of capture unspecified:

S/Sgt. David L. Smith (Right Waist Gunner)

____________________

The specific location of the aircraft’s landing is presented as follows:

1) The American Air Museum website lists the plane as having crash-landed at Apeldoorn.

2) The Eighth Air Force Historical Society lists the plane as having landed at Wilp-Achterhoek, in Gelderland.

3) The KU Report gives two locations for the plane’s loss:

a) 6 kilometers east of Apeldoorn
b) 4 kilometers south of Touge

Touge is east-northeast, and Wilp-Achterhoek directly east, of the geographic center of Apeldoorn.  Based on this information, I’ve created three Oogle maps at successively larger scales, “zooming in” on the location which seems (seems!) to be the best composite of the above-reported locations.  This is denoted by the north-south oriented red ovals superimposed on the map, just southwest of Wilp-Achterhoek, and repeated on the Google Earth view of the same locale. 

These maps and the aerial photograph are presented below:

Here is an image of Tell Me More from the American Air Museum website, showing the relatively intact and rather bent B-24 resting on its forward fuselage, on a vacant field.  The American Air Museum website includes two other images of the plane, one showing what seems to have been a very hastily applied individual aircraft letter – “N” – on the lower port fin. 

____________________

But, what about the images in the KU Report?  To be told more of Tell Me More, refer to the next post…

Captive Technology: German Photographs of Electronic Equipment in a Downed Special Operations Squadron B-24 Liberator – I

The three prior blog posts concerning photographs in Luftgaukommando Reports (that for P-51D Mustang 44-14040 (“Chicago’s Own”) in Report J 2525, and the two posts for B-24H Liberator 41-28754 (“Tell Me More”) in Report KU 1680) share a fortunate similarity:  The aviators aboard that Mustang and Liberator all survived the loss of their planes.  Taken prisoner, they all returned to the United States after the war’s end. 

The loss of the aircraft covered in this blog post – B-24D Liberator 42-63792 of the 36th Bomb Squadron, 328th (later 801st) Bomb Group, 8th Air Force, covered in Missing Air Crew Report 3666, resulted in a different outcome:  One crew member evaded capture, but one aviator was killed in the loss of the aircraft, and the remainder spent the rest of the war as POWs.

In historical and archival terms, the Luftgaukommando Report (KU 1054) covering the loss of this bomber so far has the distinction of having the largest number of photographic images I’ve found in any KU Report I’ve examined.

This is probably attributable to the nature of the electronic equipment found in the plane, which comprised three notable items: 1) A BC-929-A “Rebecca” Radar Interrogator, 2) An APN-1 Radar Altimeter, and 3) A M.C.R.-1 Miniature Communications Receiver.

____________________

This nicknameless Liberator, piloted by 1 Lt. Frank G. McDonald, squadron letter “U”, was lost at 23:30 on the evening of March 2 – 3, 1944, during an operation dubbed “Musician 5”.  The Crew’s Mission Report for March 3, 1944 describes the plane’s load as 3 packages and 13 containers (both of unspecified contents), and 10 leaflets (containers of leaflets?). 

Roy Tebbutt’s extraordinarily comprehensive document “Aircraft lost on Allied Force’s Special Duty Operations & Associated Roll of Honour” states that the plane was shot down by flak mounted on railway cars.  The crash location in his compilation is stated as “Hem-Hardinval, Fienvillers (Somme)”, France, which is consistent with the location given in the KU Report as “five kilometers southwest of Doullens”.

Co-pilot Lt. Frederick C. Kelly’s Escape & Evasion Casualty Questionnaire (one page of which is included in the MACR; the transcribed account is given below), states that the propeller on the #1 engine was damaged, the #2 engine was on fire, the #3 engine was struck by flak and inoperative, the tail turret would not work because of damage to the hydraulic system.  And unsurprisingly, the fuselage was peppered with flak holes.

Here is a page from the KU Report describing the plane’s wreckage.  Note that the investigator identified the plane as a “Boeing Fortress II”.  (!)

____________________

Here is the crew list in the MACR:

More information about the crew – all of whom were still in the aircraft when it crashed – is given below:

Pilot
McDonald, Frank Green, 1 Lt., 0-675932

Mrs. Mary Thornton (mother), 1975 Sabine Pass, Beaumont, Tx. (or) 2823 South Adams St., Fort Worth, Tx.
Born 7/15/17; Died 1/15/99
Buried Hopewell Cemetery, Bowie, Tx. (https://www.findagrave.com/)
POW Stalag Luft 1 (Barth) – (North Compound 1)

Co-PilotKelly, Frederick Clyde, 2 Lt., 0-681112
Mrs. Frederick C. Kelly (wife), 26 Bellevue Road, Arlington, Ma.
Mrs. Elnora E. Watson (mother), Main Street, Taftsville, Vt.
Born 7/14/23
Evaded – Returned to England approximately June 1, 1944

NavigatorKendall, Thomas H, 2 Lt., 0-690665
Mr. Philip R. Kendall (father), Williamsburg, Oh.
POW Stalag 7A (Moosburg)

BombardierShevlin, Edward Francis, 2 Lt., 0-679669
Mrs. Mary R. Shevlin (wife), 908 Presidio, Forth Worth, Tx.
Born 8/12/19, Cortland, N.Y.; Died 3/7/11
Buried Oaklawn Memorial Gardens, Titusville, Fl. (https://www.findagrave.com/)
(Edward Shevlin’s tombstone – illustrated in his biography at FindAGrave – gives his wartime rank as S/Sgt.  This is almost certainly in error.)
POW Stalag Luft 1 (Barth) – (North Compound 1)

Flight Engineer Gellerman, Norman Raymond, T/Sgt., 37309882, 5 missions, AM, PH, KIA – Sole Fatality
Mrs. Virginia L. Gellerman (wife), 1415 Palace St., St. Paul, Mn.
Mr. and Mrs. Raymond Louis and Winnifred Gertrude (McHugh) Gellerman (parents)
Brothers and sister: Vincent Clay, John Paul, Francis J., Louis Ernest, Roger Leonard, and Kathleen Mary
Born 12/20/17, Ramsey County, Minnesota
Normandy American Cemetery, St. Laurent-sur-Mer, France – Plot A, Row 13, Grave 32 (https://www.findagrave.com/)

Radio OperatorRoss, Warren Lewis, T/Sgt., 16092986
Mrs. Carrie E. Ross (mother), 216 West Ann St., Ann Arbor, Mi.
POW Stalag Luft 6 (Heydekrug)

Gunner (Right Waist)Goswick, Leroy Ellsowrth, S/Sgt., 13090050
Mrs. Amy Goswick (mother), 19 South 2nd St., Youngwood, Pa.
Born 7/28/22, Youngwood, Pa.; Died 1/12/17, Greensburg, Pa. (https://www.findagrave.com/)
Buried Youngwood Cemetery, Youngwood, Pa.
POW Stalag Luft 4 (Gross-Tychow)

Gunner (Tail)DeCoste, Edward Henry, S/Sgt., 11087792
Mr. Alcid Decoste (father), 36 Adams St., Newtonville, Ma.
POW Stalag Luft 4 (Gross-Tychow)

____________________

Though the MACR gives no details, translated German documents indicate that Lieutenant Shevlin was captured on March 3 in Rosieres, and was hospitalized at Luftwaffe Hospital 8 /31 at Amiens with a broken leg and a wound to his lower left arm.  Sergeant Goswick appears to have been captured by May 11.  The German crew roster in the MACR (translated from the German KU Report) also lists the capture of Lieutenants McDonald and Kendall, and Sergeant De Coste, but does not specify the dates and places of their capture.  The surnames of Lieutenant Kelly, and Sergeants Ross and Jennings appear in the translated crew roster with no further information.  The 801st/492nd BG website specifically states that some of the POWs had been betrayed to the Germans by collaborators.

What about Lieutenant Kelly?  As mentioned above, he was the proverbial “one that got away”. 

A transcript of the typewritten account he composed for his Escape & Evasion Report (E&E Report 699) appears below.  (Notably, what follows isn’t a verbatim transcript.  I’ve included those few sentences and phrases which were “struck out” of the original document, as struck-through text.) 

____________________

LIEUTENANT FREDERICK C. KELLY’S ACCOUNT OF ESCAPE AND EVASION

We were shot down by flak.  The plane crashed and a couple of us were thrown out.  We walked several miles and slept the rest of the night in a gully, where we also stayed the next day.  That night some Frenchmen who had seen us brought us bread.  We continued walking, and lay up in a shed on the edge of town, and spent the next day there.  In the evening a girl who had come upon us gave us food.  At nightfall we continued on our journey southwards, found a barn from which no dogs scared us away, and rested part of the night in a barn.

The third morning we approached an old man.  He said that the women of the village would take care of us.  We were led down the main street of the village, still dressed in our flying clothes, and taken in out of sight.  We were then given civilian clothes and taken to a house from which our journey was arranged.

However, when I got down in the S of France something went wrong with my helpers’ connections, of the people who were helping me.  I was given a railroad ticket to another town and continued the journey to Spain on my own.  After the train ride I walked out of the town and spent the night in bushes by a river.  The next morning I made the mistake of walking to the NE.  I spent the night outside a village and approached help the next morning and was told to take a bus to a town where I could find directions for getting to Spain.  The bus, however, went only as far as the town at which I left the railroad.  So I continued walking S and was taken in by a peasant who agreed to shelter me if I would leave my identity papers with him for the night.  It seemed that the farther S in France I went the more suspicious the people were

I walked to the town to which I had been directed, was fed by a peasant, and went on to a town farther to the S.  On the way a French gendarme checked my identity papers and asked me where I was going.  When I told him he asked me why I was going there.  “To work”, I explained, my identity card said that I was a blacksmith.  The gendarme laughed and let me go.  I spent an uncomfortably cold night in a shed outside of town and was colder than hell

I walked all the next day and spent that night in a sheep-fold.  The next day I continued walking.  About 1000 the next morning a women took me in and fed me.  She explained that it was dangerous to be found in the area along the Spanish border, that it was a in the Zone Interdite along the Spanish border, which I already knew from P/W lectures.  This woman kindly arranged got a guide to take me over the mountains.

Additional Comments

Airmen should have explained to them the difference between regular French gendarmes and the Vichy police – they wear different caps, for instance.  Men should be especially careful in the south of France where the people are not as friendly as in the north; they will feed you but are less likely to shelter you.

If you are not being moved it is a good idea to set a definite date by which your helpers must take some action; if they do not move you or do not give you a good reason for their failure to move you, you had better go on your own.

Statement of information covering the period from 2 March to 21 April 1944

Appendix B

Traveling by train from AMIENS to Paris in middle April informant saw that the railway yards at ALBET had been thoroughly blown up by bombing, with box cars strewn around and locomotives overturned.  AMIENS railway yards had also been hit but had not suffered so much damage.

In March or early April there was some kind of maneuvers around CONTY (Somme).  Infantry and tanks were involved (hearsay).

Informant saw a submarine in the river at BORDEAUX in middle April.

Informant was told, that DAX was a military headquarters of some sort.  Between BORDEAUX and DAX he saw a lot of German soldiers, most of whom seemed to be young.  There seems to be a large hospital at DAX; informant saw many German nurses.

There are a number of airfields between DAX and PONTONX  (Pontoux sur l’Adour)

Appendix D

I used the Horlocks tablets, milk tube, halazone tablets, matches, adhesive tape, chewing gum, water bottle, and compass.  The water bottle leaked.  There should be a check to see that the kits are new and in good condition.

I carried a yellow purse, the contents of which I gave to helpers. 

I carried eight passport-size photographs, one of which I used on my identity card.

I had been lectured on evasion and escape.  The lectures were of value only in so far as they concerned the use of the escape kits.  I don’t believe that I had ever heard of evaders.  At CCRC on November I believe I heard only a lecture on enemy interrogation, which was excellent.

Suggestions:  Carry every escape aid that you can.  Keep optimistic.

Lieutenant Kelly arrived in Spain on April 21, reached Gibraltar on May 29, and departed for England May 31. 

____________________

Akin to the blog post concerning B-24H Tell Me More, I’ve used Google (what else…no-one escapes Google!)* to generate maps – at successively larger scales – of the plane’s crash site, with the “concluding” image being an aerial view of the crash site as it appears in now, 2017.  The most probable general location of the crash site is denoted by a red oval superimposed on the maps and photo. 

____________________

The next two blog posts cover the 19 photographs contained in the Luftgaukommando Report for 42-63792.  Click ahead…!

* Yet…. 

Japanese Technology at War: The Interrogation Transcript of a Japanese Naval Aviation Mechanic in 1944

The central focus of literature about military aviation has traditionally revolved around the men – the aviators – who fly and fight within combat aircraft. 

Accounts concerning a less acclaimed but still vital aspect of aerial warfare – the maintenance and repair of military planes – are far fewer in number.  But, regardless of the conflict, country, or military force, the maintenance, modification, and repair of military aircraft has been an essential aspect of combat flying since the inception of military aviation. 

____________________

This post covers one such example.  It’s an interrogation transcript of a Japanese Petty Officer First Class who served in the 751st Naval Air Unit (3rd Maintenance Unit, to be specific) at Vunakanau, Rabaul, from September of 1943 through February of 1944.  He was captured by an American destroyer after the two naval transports on which he was successively a passenger – the Kokai Maru, and Nagaura Maru – were sunk in late February of 1944.  His interrogation transcript presents an interesting and detailed account of his service as a mechanic on G4M Betty bombers, his activities including adjustment of propellers and engine electrical wiring, with his specific duty being servicing carburetors. 

His position as an engine mechanic in the 751st, coupled with having been stationed at Vunakanau (he was present during a 5th Air Force strafing attack against that airdrome in October of 1943), his observations of Japanese military aircraft, and aspects of his military service such as his observations of Allied POWs, open an unusual window upon the history of the Pacific Air War.     

Unfortunately, the man’s name is not given, but the document does provide a few clues about his background.  Born on May 5, 1920, in Toyohashi (Aichi Prefecture, on Honshu), he completed six years of primary school and two years of higher primary school (equivalent of American 8th grade)?, and worked as an assistant at a silk cocoon and silk thread processing farm. 

Were he alive today, he would be 97 years old. 

____________________

The Report was discovered at the National Archives at College Park, Maryland, where – listed as Interrogation Report No. 357 – it’s one of the 783 ATIS (Allied Translator and Interpreter Services) Interrogation Reports of Japanese Prisoners of War, which date from September of 1942 through September of 1945.

Importantly…  A list of titles of the specific titles of all ATIS Interrogation Reports can be found at the website of Japan’s National Diet Library.  This is an invaluable resource, for along with the Report Number, it lists the identity of the military unit to which the captured POW belonged, and even in some cases the name of the POW. 

____________________

Given that the interrogating officer placed special emphasis on radar carried by G4M bombers, this post includes some of the very few images available of the components and features of the Type 3 Ku-6 radar system.  (Now, where does one find the instruction manual for the Ku-6?!) 

I’ve transcribed the Interrogation Report, which is available for you here, in PDF format

Paralleling the original physical document, the PDF includes four representative sketches drawn by the POW, showing characteristics of the Kyushu Shiden, the modified tail gun position of the G4M bomber, and the configurations of the nose and tail antenna installations of the Ku-6 radar.  Note that the POW illustrated the nose radar antenna as projecting “whisker-like” – perpendicular – from the fuselage.  However, the images below show the Ku-6 nose antenna as a single mast extending forward from the bomber’s nose, with smaller antenna extending to both sides of the main mast.

____________________

Here are images of the first two sheets of the Interrogation Report, complete with NARA’s declassification sticker at the top.  The first image illustrates the supplementary handwritten notes, and stamps, and signature on the original document.

Excerpts from the text of the document follow below…

____________________

Designation and Markings of the 751st Naval Air Group

4. UNIT OR FORCE

751 Naval Air Unit     PW believed 751 Naval Air Unit would have been disbanded by now because of severe losses.  When unit arrived at RABAUL, Sep 43, it had about 40 airplanes.  Owing to ALLIED raids, Unit had only 20/25 airplanes in Jan 44, and by Feb 44 only 15 were left.  On 19 Feb 44, he heard all remaining airplanes were sent on a special suicide mission against ALLIED Naval forces then attacking either TINIAN or TRUK.  PW doubted that any survived.

Change in Tail Markings of 751 Naval Air Unit

At KANOYA – Apr 42  Tail marking was K-300 series in white numbers on dark green background.  Thought the K stood for KANOYA.

At KAVIENG – Aug 42  Unit name was changed from KANOYA Naval Air Unit to 751 Naval Air Unit and marking was changed simply to the 300 series, the K being dropped.  Numbers were painted in white.

At TINIAN – Jun 43  The marking was changed to read Z2 followed by 300 series in white.

At RABAUL – til Nov 43  The marking was changed back to simply the 300 series painted in
white, Z2 being dropped.

At RABAUL – from Dec 43 on  The marking was altered to 51 followed by 300 series.  Thought 51 possibly referred to the last two digits of 751.  Thought tail marking was changed on Units’ arrival at each new base.

Unit Losses  (See Sec 7, “Modification of BETTY Tail Turret”)

____________________

Information about Kawashini N1K2 Shiden Fighter Plane;
Possible Reference to Mitsubishi Ki.67 Type 4 Hiryu Bomber

7.  SHIPS AND AIRPLANES

Super Fighter     (KYOKUCHI SEN) (#1) (See Appendix “A”).  PW had not seen it but another maintenance man who arrived at RABAUL from JAPAN (Feb 44) told him about this airplane and drew him a sketch.  PW thought KYOKUCHI SEN was only a factory name and that Navy might already have given airplane another name.

Following are particulars he heard:

Type     Fighter pursuit ship (TSUI GEKI KI) said to be much faster than the ZEKE or the P-38 and thought it was the Navy equivalent of the Army TOJO because he recognized similarities when shown a photo of the TOJO.

Construction     Slightly larger in all dimensions than the ZEKE and silhouette from side was “fatter”.  Cockpit was set well back (about middle of fuselage).

Engine     KASEI, of about 1300 HP.

Performance     Could climb very fast and maintain a steady climb at an angle of about 40o.  It required as much runway to take off as did the ZEKE.  Not capable of more than four or five hours’ continuous flight.

Armament     13 mm MGs and 20mm machine cannon.

Propellers     Either 3 or 4 blade.

Manufacturer     Possibly KAWANISHI.  It was originally produced as a float airplane fighter and when tested showed excellent speed, manoeuvrability and climb.  Better results were obtained in tests with undercarriage changed to ordinary ground landing gear.  It was then decided to make slight modifications and produce it as a regular Navy pursuit ship.

General     When first produced in quantity and delivered to Naval Air Units in JAPAN it was used in training.  However, because of its frail construction it many times disintegrated in the air, so was temporarily banned from Service about end 43 or beginning of 44, but after it had been reinforced it was used again.

Y20     While at RABAUL PW heard of a new Naval Bomber called Y20 or Land Bomber (RIKU BAKU) which was a cross between Type 96 2EB NELL Mk 2 and Type 1 2EB BETTY.  It was said to be smaller and much faster than BETTY, carrying a crew of only three or four.  It could carry the same bomb load but fly a greater distance than BETTY and was equipped with 13mm MGs.  Heard it was made by MITSUBISHI and used by some Naval Air Units.

PW thought Y20 was the factory number, and had never heard of its official name.

____________________

Modification of G4M Tail Turret

Modification of BETTY Tail Turret     About Jan 43 while 751 Naval Air Unit was at KAVIENG twenty BETTYs went on a bombing mission to GUADALCANAL, and only six returned.  Airmen who returned complained that revolving tail turret of BETTY was so sluggish and difficult to operate that they were unable to cope with ALLIED fighters, which concentrated their attack on their tail.

Unit therefore effected an immediate improvement by cutting away part of the tail turret to allow freer action of tail gun, although such modification made the airplane at least two or three knots slower.  They simply cut the section right off and did not add any supporting brackets, or covering shield.  The tail was left entirely open, allowing the gunners full traverse of the rear gun. (See Sketch 1 Appendix “B”).

While at TINIAN, Aug 43, about ten new BETTYs arrived for the Unit and they all had improved tail turrets allowing freer action of the rear gun.  The modifications had been effected at the factory in JAPAN, and observed from the top, the tail turret had a “V” shaped section cut away.  This type of turret was also entirely open.  (See Sketch 2, Appendix “B”).

____________________

An American POW at Rabaul

(Probably 1 Lt. Bernard E. Sahl of VMF-223, shot down over Vunakanau in F4U-1 57464 on December 25, 1943; Severely burned; mentioned in Report by Lt. John M. Arbuckle; Held captive by 81st Naval Guard Unit; “executed” (euphemism…) while POW, probably mid-1944)

13.  MORALE AND PROPAGANDA

JAP Prisoners of War       PW had heard that at NOMONHAN, one complete SENDAI Unit, about 2,000 men, was captured by the RUSSIANS.  When the truce was made, those men were returned to JAPAN.  Unit CO committed suicide and it was arranged for the 2,000 men to be sent back to MANCHURIA, rather than to allow then to remain in JAPAN.

ALLIED PsW     On Air Objective Folder No. 92.2 SINGAPORE, PW located an ALLIED PW camp holding thousands of prisoners, as being immediately North of Empire Dock Area. (Target 12).  While on a six-hour leave (Apr 42), he had seen three large, two storey barracks, each capable of housing 500 to 600 men under JAP Army standards.  White PsW could be seen at the windows and one stood guard at the front of the barracks.  There was no fence or wall around camp.

Aug 42, while KATSURAGI MARU was docked at Target Area 11 for three days, PW saw white prisoners crossing by boat to BLAKANG MATI Island just off the Southern tip of SINGAPORE Island.  They did not seem to be working.  They wore light khaki clothing.

In Nov 43, a Fighter was shot down near a native village near VUNAKANAU airfield.  Pilot was brought by natives to HQ 751 Naval Air Unit.  As there was no interpreter present prisoner was sent to RABAUL.  PW heard that prisoner was a Capt.  He was about 5’7” tall and heavily built.  He wore no rank badges but on the sleeve of his flying suit was yellow or gold badge on a black or blue background.  The pilot was uninjured except for burns on the face.

He had seen ALLIED PsW working around RABAUL.  It was not customary to guard them since they could be quickly identified if they attempted to escape.

____________________

Here’s an image of G4M1 Betty “367” which the POW – perhaps? – may actually have seen and maintained.  The aircraft belongs to the 751st Naval Air Group, and was photographed during the 345th Bomb Group’s strafing attack against Vunakanau on October 24, 1943.  The image is one of several pictures of 751st NAG G4M bombers appearing in Lawrence Hickey’s Warpath Across the Pacific.  Six of these aircraft carry three-digit tail numbers, the leading digit being a “3”.      

____________________

The interrogation accorded much attention to the Type 3 Ku-6 radar carried in the G4M bomber.  The following three images, from the USAAF photo collection at Fold3.com, show a G4M2a bomber equipped with this device, as well as other notable aspects of the G4M2.  This aircraft – 763-12 – is the subject of a three-view illustration in William Green’s 1969 book Famous Bombers of the Second World War

____________________

Photographed at Clark Field in 1945, aircraft number “12” of the 763rd Kokutai is shown under examination by members of the Air Technical Intelligence Division of the Army Air Force, with Sergeant H.W. Willis (from Beckley, West Virginia) prominently appearing in two of the images. 

The photo caption for this image (A-68394 AC / A30416) states that the aircraft had been strafed by P-51s but was not badly damaged.  Sergeant Willis is standing next to the port gun window.  The portly yet nicely streamlined shape of the fuselage is quite apparent, as are the dorsal and tail mounted Type 99 cannon mounted in those positions.  Also visible are the radar antennas mounted in the tip of the nose, and, alongside the rear fuselage.  The latter is entirely consistent in configuration with the description given by the POW.

____________________

This image (68389 AC / A30413) shows Sergeant Willis examining the port Type 99 cannon.  (Is he handling an ammunition magazine?)  Notable details include what appears to be a flash suppressor at the cannon’s muzzle; the cylindrical notch at the rear of the waist position for stowage of the cannon (via the flash suppressor); the circular fuselage entry hatch upon and around which the Hinomaru has been painted; the mounting struts for the radar antenna.  Also, notice the rectangular data plate painted below the port stabilizer.

____________________

The last of the three pictures (68390 AC / A 30414) of Sergeant Willis and Betty 763-12 shows fascinating aspects of the plane and its equipment.  Enlargement of the data plate shows the serial number to be “2134”.  Though very faint in the photo, someone has hastily scrawled the warning “BOOBY TRAPPED!  DO NOT (rest of the text is illegible, but the meaning is clear)…” below the horizontal stabilizer.  The cut-away modification to the tail gun position described and sketched by the POW is very obvious.  Finally, the life raft.  The photo caption states that Sergeant Willis is, “…examin[ing] the novel life raft with which the plane is equipped.  He is using the bellows which inflate the boat.  The raft is made of light rubberized material [and] is propelled with wooden paddles.”

__________________

The Rising Decals company (Czech Republic), manufacturer of aftermarket decals and detail sets for Japanese aircraft of the Second World War, has produced an update kit for creating 763-12 based on Hasegawa’s 1/72 G4M2.  This image shows the components of the update set, further illustrating the configuration and mounting of the Type 3 Ku-6 antennas.

____________________

This image, from the website of the National Air and Space Museum, shows a Type 3 Ku-6 (Model 4) radar set and associated connecting cables.

____________________

Here are three views of the cathode ray tube utilized in the Ku-6 Radar, also from the National Air and Space Museum website. 

References

ATIS Interrogation Report 357, from Records of the War Department General and Special Staffs, Assistant Chief of Staff (G-2) Intelligence Library Project File, ATIS Interrogation Reports.  (NARA Records Group 165, Box 325, Entry 79, Shelf Location 390/33/27/5-6/7) 

Green, William, Famous Bombers of the Second World War, Doubleday & Company, Inc., Garden City, N.Y., 1960 (Mitsubishi G4M Type I, pp. 52-58)

Green, William, Famous Fighters of the Second World War, Hanover House, New York, N.Y., 1958 (Kawashini Shiden pp. 111-116)

Hickey, Lawrence H., Warpath Across the Pacific – The Illustrated History of the 345th Bombardment Group During World War II, International Research and Publishing Corporation, Boulder, Co., 1984 (751st Naval Air Group G4M bombers, pp. 78-79)

Thorpe, Donald W., Japanese Naval Air Force Camouflage and Markings – World War II, Aero Publishers, Inc., Fallbrook, Ca., 1977

National Diet Library of Japan (English-language version), at http://iss.ndl.go.jp/?locale=en&ar=4e1f

Index to all ATIS Interrogation Reports, with English-Langauge descriptions, at National Diet Library of Japan (click hypertext)

The Age of Advertising: Reeves Sound Laboratories (1943-1944)

This advertisement is particularly eye-catching in its use of light and dark, which visually symbolizes its message:  An organization, operating regardless of day or night, producing vitally needed products for the military.  The company?  Reeves Sound Laboratories.

Located at 215 East 91st Street in Manhattan (unfortunately, there does not seem to be a Google street view of the address), the company, founded by Hazard E. Reeves, was a division of Reeves-Ely Laboratories, and conducted research into advanced gunfire control systems and computers, radar and tracking systems, guided missile controls, aircraft control instruments, flight trainers and aerodynamical computers, precision instruments, servo mechanisms, and, sound recording systems.  By 1956, the company merged into the Dynamics Corporation of America.

IT’S 4 A.M. IN TIMES SQUARE

AND OVER BERLIN – BOMBER CREWS ARE USING A PRODUCT MADE JUST OFF BROADWAY

Previously, the cutting of crystal oscillators had been an art known to only a few technicians.  But then these New Yorkers pitched in:  Debutantes, dancing teachers, actors, stenographers, artists, clerks, butcher boys, beauticians, models and others joined hands with housewives to show what they could do when a war industry came to Times Square.

Over a thousand workers (mostly women) came from the five boroughs and the suburbs.  Everyone started from scratch.  Management and workers were unskilled at the start.  They learned the job together under the guidance of the United States Army Signal Corps experts.  Production processes were studied and broken down into the simplest possible operations.  X-Ray equipment and other highly scientific apparatus were brought in to help.

In the first month, only a few crystal were produced.  Now a year later, these people are turning out many more crystals than was believed possible a year ago.

A production miracle?  Perhaps.  But maybe it’s because these people are Americans – because they’re New Yorkers…or because a large percentage of the employees have relatives doing the toughest job of all – in the Armed Service of their country.

These workers have done their work so well that they have been awarded the Army-Navy “E” which they accept with this pledge:

“I promise to wear this pin as a promise to every man in our Armed Services that, until this war is won, I will devote my full energies to the cause for which they are giving their lives.”

First to fly above Times Square, this pennant will give promise of even greater things in store for ’44.

For a fascinating glimpse into the Lab’s activities with a direct connection to the advertisement, watch the 1943 video Crystals Go To War, (at Jeff Quitney’s channel) – “narration by one of the research scientists of the U.S. Army Signal Corps” – produced for Reeves Sound Laboratories by Andre deLaVarre.  The film is also available at Archiv.org.

References

Industrial Research Laboratories of the United States – Including Consulting Research Laboratories (Bulletin of the National Research Council) Number 113; July, 1946.  Compiled by Callie Hull, with the assistance of Mary Timms and Lois Wilson.  

Hazard E. Reeves, at https://en.wikipedia.org/wiki/Hazard_E._Reeves

Reeves Instrument Corporation, at https://en.wikipedia.org/wiki/Reeves_Instrument_Corporation

The Missing Photos – II: Upon an Endless Sea – A B-24 Liberator Shot Down Over the Central Pacific, 1944 – An Addendum

The prior post – covering photographs of the loss of the 42nd Bomb Squadron B-24 Liberator Dogpatch Express – ended on an uncertain note. 

Both the Missing Air Crew Report and 42nd Bomb Squadron history present detailed accounts of the bomber’s loss.  However, both documents are ambiguous about the specific cause of the aircraft’s loss, let alone what ultimately befell the few survivors of the plane’s ditching.  Given that PBY rescue planes later reported neither survivors nor wreckage at the site of the Express’ ditching, the Squadron history suggested that any surviving crewmen may have been captured by the Japanese, or, they were killed by strafing Zeros. 

There, the matter seemed to rest. 

A search for additional information about the “Grey Geese” and Dogpatch Express yielded a new and rather unexpected account, which appears in the 1996 book 11th Bomb Group (H): The Grey Geese.  There, some fifty-three years after the Taroa bombing mission of December 21 1943, veteran Jesse Stay – whose account of the loss of Dogpatch Express appears in MACR 1423 – presented an account of the event that fully and sadly clarifies what happened to the plane and crew. 

Mr. Stay’s account – presumably written in the 1990s – is presented below. 

It turns out that the plane was initially struck by anti-aircraft fire in the cockpit (oddly, not mentioned in either the MACR or squadron history), to the extent that Lt. Smith was forced to fly, and ditch, the aircraft unassisted.  As for the survivors, the impression is given that they were strafed in the water by more than one Zero (again, not mentioned in the MACR or squadron history). 

Notably, Mr. Stay wrote that the pilot of the Express, 1 Lt. George W. Smith, was filling in for the crew’s regular pilot, Lt. Thompson, who was wounded over Wake on July 24, 1943.  This may explain an aspect of the photo of the Express’ crew, which appears both below, and in the prior blog post:  The fact that a member of the plane’s crew – probably having been wounded – is seated in a wheelchair. 

Could this man be Lt. Thompson? 

THE DOGPATCH EXPRESS AND THE BELLE OF TEXAS
By Jesse Stay

A mission out of Funafuti is worth remembering.  It was on Dec. 20, 1943.  We were bombing Maloelap Island in the Marshall group.  This was shortly after we had taken Tarawa and the Japanese were able to bomb Tarawa from Maloelap.  Our squadron was scheduled to bomb the target in three flights of three planes each.  I was leading the second flight.  We were to bomb from about 12 thousand feet at approximately noon.

My right wing man was scheduled to be Les Scholar but he became ill and was scratched from the mission.  With Les out of the formation, that left only two planes in my flight.  The pilot of the second plane, Lt. Charlie Pratte, flying the “Belle of Texas,” also got sick and began to throw up right after take-off.  He had a capable co-pilot, however, so they decided to continue the mission.

When we reached Maloelap, the first flight went over the target and dropped their bombs without too much difficulty.  We learned later that a 90 mm shell had come up through the open bomb bay doors, through another open door into the back of the airplane and out through the roof of the plane, directly over the heads of the two waist gunners and exploded harmlessly several hundred feet above the plane.

I then led my flight of two planes across the target and we dropped our bombs.  As we cleared the target, we were picked up by a dozen or so Zeros so we tried to close up with the first flight for our mutual protection.  Our tail gunner then told us that the “Dogpatch Express,” flown by Lt. Smith in the third flight, had been badly hit by anti-aircraft fire and was falling behind the formation.  The Zeros were on him like a pack of wolves.

I made a 360 turn with my flight and got in formation with the stricken airplane to try to give him some protection.  At the same time, the leader of the first flight, Lt. Warren Sands, made a turn in the other direction and brought his formation up on the other wing of the plane that had been hit.

Apparently an anti-aircraft shell had exploded inside the cockpit, killing the co-pilot and the top turret gunner.  There was blood all over the cockpit.  Two engines on the right side were out, one of which was on fire.  We fought Zeros and tried to encourage Lt. Smith at the same time.  His crewmen were throwing out all extra weight in the hopes that the plane could fly on the two left engines.  It was too much for the pilot to handle, however, and he finally ditched the plane about 90 miles south of Maloelap.

The plane sand in about 30 seconds.  It appeared to us that some of the crew were in the water so we dropped our life rafts as close as we could to the crash site.  The other flights had left by this time because of lack of fuel.  I stayed around for a few more minutes circling below the clouds at low level, until the Zeros left to return to Maloelap.  They were machine gunning the debris from the crash and any survivors.  We were trying to discourage this with the few guns we had on our two plans.  We were still under attack by the Zeros and there were times on this mission when I could see a hail of tracers coming between my airplane and the “Bell of Texas” on my wing.

Finally Charlie Pratte also had to leave and headed for Tarawa to re-fuel.  He had over 300 holes in his airplane but didn’t have one man wounded.  On one pass the Japanese machine guns had stitched holes the length of his fuselage and had blown up the oxygen tanks which had knocked down the two waist gunners in time for the machine gun bullets to pass through the fuselage where they had been standing.  I later found out that his hydraulic system was also shot out and he landed at the new strip at Tarawa with parachutes tied to the waist and tail guns and which the crewmen deployed as they touched down to slow the airplane because they had no brakes.  We had talked about this possibility before but the crew of the “Belle of Texas” received a commendation from General “Hap” Arnold, Chief of Staff of the Army Air Corps for making the first recorded parachute landing.  This technique is now used for many of our high speed aircraft and on the space shuttle to slow down on landing.

We called for Dumbo rescue but Smitty and the “Dogpatch Express” were never found.  There were no survivors.  Lt. Smith was flying on this mission with the crew of Lt. Thompson who had been wounded over Wake Island on July 24, 1943.

Lt. Pratte had his crew were lost on January 22, 1944 on a low level mine laying mission out of Guam over Chichi Jima.

I landed on Tarawa on the old, bomb pocked strip a little later and after taking on 1,000 gallons of fuel from give gallon cans, we took off for Funafuti, a small atoll about six hundred miles to the south.  We didn’t want to waste fuel climbing to the south, so we decided to stay below the clouds.  For this reason we couldn’t get a fix on the stars and by this time it was dark so that we couldn’t measure our wind drift from the waves below us.  We navigated by dead reckoning for what we estimated to be six hundred miles and then started a square search for our little island.  On our second right angle turn of our square search we saw some faint lights a few miles away and we were soon back on the ground after being gone for 19 hours with 17 hours in the air.  We didn’t have a single hole in our airplane when we examined it after landing.

Reference

May, Bob; Parker, Bud; Gudenschwager, Phil, 11th Bomb Group (H): The Grey Geese, Turner Publishing Company, Paducah, Ky., 1996.

The Missing Photos – II: Upon an Endless Sea – A B-24 Liberator Shot Down Over the Central Pacific, 1944

Previously, I presented photographs from two Missing Air Crew Reports (MACRs) covering the loss of two 416th Bomb Group A-20 Havoc attack-bombers over France in 1944.  That post concluded on an “upbeat” note:  The six aviators from both planes safely parachuted and survived the war as POWs, eventually returning to the United States.

The circumstances surrounding “this” post – covering the loss of an 11th Bomb Group (…”Gray Geese”…) B-24 Liberator in the Central Pacific Ocean in late 1943 are, sadly, very different.  Though at least some members of the plane’s crew initially survived the ditching of their plane in the Central Pacific, they were never seen again.   

In that sense, this Missing Air Crew Report and the two photographs within it epitomize – in a manner far more powerful than words – the nature of the Pacific air war, some seven decades ago.

____________________

The aircraft in question, B-24D 41-24214 (Dogpatch Express) was one of a group of eight B-24s of the 42nd Bomb Squadron, 11th Bomb Group, 7th Air Force, which staged through Nanomea (the northwestern-most atoll in the Polynesian nation of Tuvalu) for a strike against Taroa Island (not to be confused with Tarawa, in the Gilbert Islands!), in the Maloelap Atoll of the Marshall Islands, on December 21, 1943.

Here is a superb photo of Dogpatch Express’ nose art, from Pinterest (via Hawaii.gov):

Here’s another view of the plane (the crewmen are unidentified) appropriately from B-24 Best Web:

____________________

What happened?

The MACR (# 1423) describes the sequence of events surrounding the loss of the bomber in very great detail, an aspect of MACRs covering 7th Air Force B-24 losses which seems to have been quite consistent.  

After the squadron’s bombing run on Taroa, Lt. Smith’s plane was observed to lag behind the other seven bombers, though the specific cause is not delineated in either the MACR or squadron history.  Five other B-24s turned back to provide protection for the Express, with one escorting pilot, Captain Jesse Stay (whose account is presented below) maintaining radio contact with Lt. Smith.  Having already lost his #4 engine, the Express’ #3 engine soon began emitting smoke, upon which 252nd Kokutai Zeros and Hamps (assigned to the defense of Taroa, as described at Pacific Wrecks) – which had been attacking the formation from the time it left the target – began to especially concentrate their fire upon Smith’s aircraft.

Heavily damaged, with its #4 engine out and #3 engine smoking, Lt. Smith lost altitude, and, eventually ditched. 

The Liberator broke in two immediately behind the flight deck, with part of the tail remaining afloat for several minutes.  Throughout, three Zeros, which had probably expended their ammunition, remained in the area to observe the scene. 

Taken together, the accounts of Captain Stay and Lt. Sands indicate that at least three – and possibly four – of the crew survived both the ditching and a strafing run by a solitary Zero.  Two life rafts were deployed, and “water marker” (dye marker?) at the scene was visible from a distance of 10 to 12 miles.

So, at least some of the crew – presumably gunners in the rear of the aircraft – remained alive after the crash. 

Later that day, upon the arrival of two PBYs at the location of the ditching (the time of their arrival is not listed and the naval squadron is unidentified) – nothing was found.  To quote the squadron history: “It was later found that upon arriving at the spot, no trace was found of the survivors, and it is presumed that they either were strafed by returning Jap airplanes or taken prisoner.”  

____________________

The accounts of Captain Stay and Lt. Sands are presented below verbatim, along with a summary of the mission from the records of the 42nd Bomb Squadron:

Captain Stay’s Account

My flight, consisting of myself and Lt. Pratte in A/P #156 followed Capt. Storm’s flight of three airplanes over the target on Taroa Island.  We were followed by “C” flight in which Lt. Smith in A/P #214 was No. 2 man.  We made our run and turned off to the left, increasing our power and diving to catch up with Capt. Storm’s “A” flight.  We had been off of the target approximately 12-15 minutes when S/Sgt. Blackmore, my tail gunner called me to say that one A/P in “C” flight had become a straggler and was being attacked by several Zeros.  As he told me this Lt. Sands in A/P #073, who was flying #2 position in “A” flight pulled out of formation and started a turn back.  My flight of two ships turned with him and at the same time my Co-pilot informed Capt. Storm of the straggler.  Lt. Sands fell in on Lt. Smith’s right wing and I took up a position on his left wing with Lt. Pratte flying on my left wing.

Shortly after this Capt. Storm and his remaining wing man, Lt. Perry in A/P #007 fell into our formation.  At this time we noticed that the #4 engine on A/P #214 was feathered and he had many holes in the fuselage and emphennage of his A/P, and he was losing altitude fast.  Approximately 3 minutes after we joined him in formation his no. 3 engine caught fire giving off a heavy white smoke.

I spoke to Lt. Smith over V.H.F. and suggested that he feather no. 3 engine and try to put cut the fire with his Lux System.  Lt. Smith called back asking me to get Dumbo service for him and I acknowledged.  Shortly after Lt. Smith feathered #3 engine and the fire was apparently extinguished.  From the time that we had left the target we had been having a running fight with from 15 to 20 Zeros.  When Lt. Smith’s #3 engine began to smoke the Zeros began to press their attack and from 7 to 8 overhead passes were made at the formation before Lt. Smith landed his ship in the water.  The Zero pilots made excellent use of the sun and they seemed very experienced in this type of attack.

Lt. Smith had been losing altitude rapidly and when he was at about 3,000 ft. he started #3 engine again and it immediately began to smoke again.  We dropped down through a .4 cumulus cloud cover and our formation circled through a hole to 1000 ft. to watch his landing.  At this time there were still four Zeros in the air but they were apparently out of ammunition because they made no more passes.

Lt. Smith landed in the water at 13:45 L.W.T. at a position of 08 04 N and 172 33 E. The ship broke in two and the nose appeared to go down leaving the trailing edge of the wing and very little of the bomb bay afloat.  The whole ship was under water in approximately 3 minutes.  We observed at this time one life raft with one man lying prone across it.  The rest of the formation left for their base and Lt. Sands, Lt. Pratte and myself circled the scene for cover and to give what aid we could.  Three Zeros were still in the area but appeared to be only observing the crash.  Our top gunner was only able to fire a few shots at any of them.

Lt. Sands dove in low over the raft and dropped a life raft then we dove in and dropped a box of emergency rations.  Both the raft and the rations remained intact and afloat.  We called for Life Guard service on command voice on 6210 K.C. giving our distance of 90 miles and our course of 120° M from the target.

The Zeros left and we climbed above the clouds and Lt. Pulliam took a sun shot over the raft and confirmed our position.  At the same time my radio operator was calling first Tarawa, then Makin, then Apamama but receiving no answer from any of them he again called Tarawa and sent through a request for Dumbo Service.  Our three planes left the scene for Tarawa and after we had been on course for approximately 10 minutes the men in the back of my A/P reported seeing what they thought was a submarine wake behind us.  I turned around and headed back to the raft hoping to be able to assist the Submarine but on approaching the life raft we were able to see the water marker for from 10 to 12 miles from 1000 ft.

As we dove over the scene to fifty feet we saw that there were two rafts inflated and three men ware in one and possibly one on the other.  We set our liaison up to transmit on 6210 and called for Life Guard Service again.  We left the scene finally at 1434 L.W.T. and landed at Tarawa to refuel where we learned that two PBYs had been sent out 2 hours before.

Captain Jesse E. Stay

Lt. Sands’ Account

I was flying A/P # 073 in the Number 3 position of “A” Flight.  We had left the target about five minutes when the tail gunner called and said there was a B-24 smoking and losing altitude and was alone.  I told my crew that we were going to make a 90° turn so I could get a look at it.  When I observed the conditions under which Lt. Smith was placed I continued my turn and went back to get in formation with him.  We pulled in on his right wing as that was the side that about 10 Zekes were making overhead passes at the crippled plane.  We had been in formation with Lt. Smith about three or four minutes when the four other planes pulled into formation on his left wing.  We continued to escort him until he landed in the water at about 13:45 L.W.T.

The plane appeared to break in two just back of the flight deck.  The entire plane with the exception of the tail surfaces sank almost immediately.  The tail surfaces floated for about four minutes.  One man was definitely seen to be laying across a partly inflated, overturned life-raft with possibly one other person in the water.  I ordered my crew to get a life raft ready to throw overboard which was done as we passed over at a minimum altitude.

One Zeke was seen to make a strafing attack at the spot where the plane sank.  The Zeke then left the area.  We circled for another ten minutes, and seeing no more Zekes, we departed for Tarawa.  My radio operator immediately sent out a position report of the crashed plane which was unanswered.

1 Lt. Warren H. Sands

42nd Bomb Squadron History

TAROA MISSION * 20 December 1943

Lt. Kerr in 143, Captain Storm in 155, Lt. Gall in 100, Lt. Perr (431st) in 007, Lt. Schmidt in 838m Lt. Stay in 960, Lt. Sands in 073, Lt. Smith in 214, and Lt. Pratte in 156, staged through Nonomea for a strike against Taroa on Maloelap Atoll.  Each airplane carried 6 x 500 GO bombs.  Interception began as the airplanes pulled away from an AA spattered bomb run, with 20 – 30 Zekes and Hamps rising to the attack.

AA began as the airplanes neared the island, in some cases not reported as occurring until the run had started, with a majority of the bombs landing in or near the target area.  Lt. Gall did not reach the target due to malfunction.  It was on this mission that Lt. Smith had two engines shot out either by AA or cannon fire, and found it necessary to make a water landing about 75 miles from Taroa.  Covered by other elements of the flight, he made what was described as “an excellent” water landing, from which at least four men were seen to leave the badly damaged airplane and crawl onto two rafts.  Captain Stay had, prior to the crash, radioed to both Dumbo and Lifeguard to come in, and this was later found to have reached both agencies through other intercepting mediums as well as the original call.  It was later found that upon arriving at the spot, no trace was found of the survivors, and it is presumed that they either were strafed by returning Jap airplanes or taken prisoner. 

Several Jap interceptors were knocked off on this mission, by Sergeant Kernyat of Sands crew, Sgt. Brannan of Lt. Kerr’s, Sgt. Roth, Sgt. Ball, and S/Sgt. Tanner of Captains Stay’s crew.  They were all confirmed…

____________________

To give you a better understanding of the setting and location of this incident, the following series of maps and illustrations show the location of the Marshall Islands in general and Taroa in particular, the island’s appearance in 1943 (and 2017), as well as the location where Dogpatch Express was lost in relation to surrounding islands.

____________________

Here is a map of the Marshall Islands (from Wikimedia Commons) illustrated on a global view of the earth, centered on Polynesia.

____________________

The map below, from the Diercke International Atlas, shows Taroa Island (right center) and the other islands comprising the Maloelap Atoll. 

____________________

This undated Air Force photograph shows the “Bombing of the Japanese Airfield on Taroa Islet [sic]…”  The image is from the WW II U.S. Air Force Photo Collection at Fold3.com.  (Image A42044 / 73717 AC)

____________________

Here’s a Google Earth satellite view of Taroa, circa 2017.  The island’s miniscule size is evident by the distance scale (one thousand feet!) in the lower right corner of the image.  Note the changes in the island’s shape that have ensued since World War Two, and, the still-visible remnant of one of the two runways.

____________________

This Google map shows the location of Taroa (via the red pointer), relative to surrounding islands.  Obvious (in reality, not-so-obvious) is the fact that the Maloelap Atoll and Taroa are “invisible” at the scale of this map. 

____________________

This map, generated by entering latitude and longitude coordinates in Google Earth, shows the location where Dogpatch Express was ditched (denoted by the red pointer).  Akin to above, at this scale, Maloelap and Taroa do not appear.

____________________

This map shows the location of Nanomea Island (red pointer once more) relative to the Marshalls.  Akin to the above map views, Nanomea is so small as to be “invisible”

____________________

The plane was lost. 

Ten men were lost.

Who were they?

Typical for MACRs, Report 1423 gives the names of the plane’s crewmen, their crew positions, and, their serial numbers.  However, the Report does not contain any “contact” information; the names and residential address of next-of-kin.  If you were to go by the MACR alone, the men would be, in a sense, “anonymous”: names, ranks, serial numbers, and nothing more.    

However, there is one set of records in the National Archives that gives these men fuller identities. 

This information is present in Records Group 165, in the “Bureau of Public Relations Press Branch” releases covering military casualties (specifically Missing in Action, Killed in Action, Wounded in Action), which were issued throughout the war to the news media by the War Department.  

Within these press releases, casualties are listed by theater of war (Europe, Mediterranean, Pacific, etc.), with mens’ names listed alphabetically within each category.  The name of a casualty was usually (usually) released approximately one month subsequent to the calendar date on which he was killed, wounded, or missing.  The predictably of this time-frame is a very reliable way (at least, through the late spring of 1944) to identify the year and month when the press release listing a serviceman’s name, his next-of-kin, and emergency address, was released to the news media.   

(Maybe more about this in a future post?)

Given that Lt. Smith’s crew was lost in late December of 1943, it was assumed that their names could be found in Press releases issued in late January of 1944.  Research in RG 165 verified this:  The men’s names appeared in Casualty Lists issued on January 21, 22, and 24, and (one man) February 9, of 1944.

____________________

The crew’s names are other relevant information are presented below, along with (in parenthesis) the calendar date of the relevant Press release.  

They were:

Pilot     Smith, George W.     1 Lt.          0-374301     (1/22/44)
Mrs. Ida R. Smith (mother), Prairieton, In.

Co-Pilot     Lowry, John E., Jr.     2 Lt.     0-800907     (1/21/44)
Mrs. Margaret E. Lowry, Jr. (wife), Spring St., Smyrna, Ga.

Navigator     Mortenson, Carl A.     2 Lt.     0-738872     (1/22/44)
Mr. Harry Walter Mortenson (brother), 1380 Riverside Drive, Lakewood, Oh.

Bombardier     Ortiz, Ralph P.     1 Lt.    0-663307     (1/22/44)
Mr. Daniel C. Ortiz (father), 603 Agua Fria, Santa Fe, N.M.

Flight Engineer    Sopko, Clarence T.     T/Sgt. 35308715     1/22/20     (1/22/44)
Mrs. Mary S. Sopko (mother), 2138 West 26th St., Cleveland, Oh.
Memorial Tombstone – at Ohio Western Reserve National Cemetery – Section M, Plot 6 (Photo by Douglas King)

Radio Operator     Gearon, Roy T.     T/Sgt.     20616199     (1/21/44)
Mrs. Catherine Ann Gearon (mother), 5464 Woodlawn, Chicago, Il.
Crew Picture and related  information from Patrick Maher (Second Cousin)  (See below.)

Gunner     Hudman, Jesse Harvey S/Sgt.     12146959     1918     (1/21/44)
Mrs. Florence L. Hudman (wife), 10 Marble Place, Ossining, N.Y.
Mrs. Carrie Hudman (mother), Gilbert Park, N.Y.
Memorial Tombstone – at Dale Cemetery, Ossining, N.Y. (photo by Jean Sutherland)
Notices about Sgt. Hudman appeared in the Citizen-Register, of Ossining, N.Y., on May 22 and 25, 1946, concerning a memorial service that was held in his behalf on May 19 of that year. 

Gunner     Paradise, Arnold J.     S/Sgt.     36264577     (1/21/44)
Mrs. Fern Paradise (mother), Garden Acres, Chippewa Falls, Wi.
WW II Memorial – June Havel (sister)

Gunner     Dell, Carl N.     S/Sgt.     13038323     4/19/20     (2/9/44)
Mr. William J. Dell (father), Route 1, Middle Road, Pittsburgh, Pa.
Memorial Tombstone at Saint Mary’s Cemetery, Pittsburgh, Pa. (Photo by “Genealogy-Detective”)

Gunner     Nielsen, Earl Dewayne     S/Sgt.     39831608     7/29/21     (1/21/44)
Mrs. Vera P. Nielsen (mother), Cleveland, Id.
Memorial Tombstone at Cleveland Cemetery, Franklin County, Id. (Photo by Bill E. Doman)

All the crewmen are memorialized in the Courts of the Missing (Court 7), at the Honolulu Memorial, in the National Memorial Cemetery of the Pacific, at Honolulu, Hawaii.

Remarkably, there is a photograph of this crew… 

Mr. Patrick Maher, a second cousin of T/Sgt. Roy Gearon, has posted a picture of the crew at the Memorial Page for his relative at FindAGrave.com, with the message, “We are 2nd cousins Roy.  Know you were remembered then and still by your family with a proud military tradition. May you and your crew forever rest in peace at the bottom of the ocean.  Your last mission was accomplished Sir.  Sorry on behalf of your government for your case and many like it.  Your death date was December 21, 1943 not 1946.  Silver Star recipient.  Rest in Peace Sir.”  

Mr. Maher’s entry also includes a close-up image of the final moments of Dogpatch Express, identical to one of the photographs in the MACR below.

____________________

The photos?

Unlike the images for the A-20s, these two photos are unattached to the documents in the MACR; they’re “loose” in the file.  Here they are:

____________________

Here’s the “first” image.  This shows Dogpatch Express heading back – well, trying to head back – to Nanomea, showing Lt. Sand’s B-24 to the right and slightly above Lt. Smith’s aircraft.  This may be the point at which – as described by Capt. Stay – the squadron dropped to an altitude of 3,000 feet, upon which the Express’ #3 engine emitted smoke when it was restarted.

____________________

This is a 2,400 dpi crop of the above photo.  The damage to Dogpatch Express is obvious.  The #4 engine has been feathered, and there’s a large hole in the starboard rudder.  Close examination shows that the ball turret has been rotated downwards and retracted into the fuselage, while in the dorsal turret – rotated to the rear – the guns have been elevated to 70-80 degrees.  The trail of smoke – thick smoke; dense smoke; white smoke – emitted from the #3 engine is plainly evident.

Given that the direction of flight from Taroa to Nanomea was approximately south-southeast, by looking “into” this image –  the viewer is looking west-southwest. 

Beyond and below the aircraft, and into the indefinite horizon, there are clouds, water, and, more clouds and more water. 

____________________

This picture shows the scene of Dogpatch Express’  ditching. 

(Though this post doesn’t pertain to camouflage and markings, this image illustrates the Insignia Blue overpaint of the Insignia Red surround to the National Insignia, which had been a feature of the national insignia of American military aircraft between 28 June and 14 August 1943.)

Though intended as a historical record – for which it more than serves its purpose – this photograph – like the image above – is extremely evocative of the war over the Pacific:  Distance.  Water.  Emptiness. 

The point of the B-24’s impact – a trail of churned water perhaps several hundred feet long – is obvious.  However, compared with the expanse of sea encompassed by the image and receding into the distance, the site is miniscule.

____________________

This is a 2,400 dpi crop of the above image.  Though the resolution is too low to identify details, four objects can be seen floating at the top of the “ditching trail”.  Captain Stay mentioned that the scene was visible up to 12 miles away, due to dye marker in the water.  Is the gray patch of water in the upper left of the ditching site the dye marker? 

____________________

The survivors – whoever they were – were never seen again.

The 42nd Bomb Squadron mission summary suggests two possibilities for their fate:  They were strafed by Zero fighters during the interval between the departure of the other B-24s and the arrival of PBYs, or, they were captured by the Japanese, via naval vessels.

Given the location and circumstances under which the crew was lost, and, the passage of time, what ultimately happened to the few survivors will probably forever be unknown.  There is a slight – (very slight?) – possibility that IDPFs filed for the crew may include more definitive information about their fate, but even those documents, I suppose, will be ambiguous as well.

What is not supposition was – and will always be – their bravery, and the bravery of many men like them.   

____________________

A Brief Digression on Names and Numbers

Did the Army Air Force (or post-1947, the Air Force) ever complete statistical studies comparing the chances of survival for WW II USAAF bomber aircrews lost over the Pacific, to those for aviators lost in the European / Mediterranean Theatres of War?  I don’t know!

I’ve attempted a brief comparison of that sort.  Or, at least half of a comparison…  This was based on an evaluation of statistics about 7th Air Force B-24 losses, with information derived from MACRs (my own review of those documents, extending over some years), and, miscellaneous references. 

MACRs and other sources for losses of 7th Air Force B-24s (75 aircraft covered by “wartime” MACRs, 6 aircraft covered by post-war “fill-in” MACRs, and 11 B-24 losses mentioned by books and other sources) cover a total of 92 aircraft.  (Doubtless there were other planes for which MACRs were never filed…)

Among those 92 B-24s, there was a total of 950 airmen, of whom there were 237 survivors and 713 fatalities.  The 237 survivors represent 24% of the 950 crewmen.  (There were no survivors from 51 planes, while entire crews survived among 5 of the 92 lost aircraft.)

In light of these statistics, and bearing in mind that these figures represent people, not simply “numbers” – I wonder if…it seems that…despite the greater aircraft losses incurred by the 8th and 15th Air Forces, as opposed to the 7th (and 13th, and 5th)…the chances of survival for an aircrew lost in the Pacific Theater of war were actually far lower than in Europe and the Mediterranean.

If so, I’d attribute this to the utterly different geography encompassed by and overflown in the Pacific, where combat missions by nature occurred over vast, near-featureless expanses of water; abruptly changing climatic conditions; the challenges inherent to locating downed airmen at sea, during both aerial and sea-borne searches; the lower chances of simple physical survival (aside from enemy activity) for those few aviators who may have been able to parachute onto land or sea; and last – but hardly insignificantly – the ethos of the Japanese regarding captured members of the Allied Air Forces.  (Thirteen 7th Air Force B-24 crewmen survived the war as POWs of the Japanese.*)

So, to conclude (if there is a conclusion) let these photos stand as a reminder of those who didn’t return, and the very few who did. 

____________________

Notes

For an essay on Taroa illustrated with stunningly beautiful contemporary photographs, visit The World War II Legacy of Taroa Island.

For a historical overview of Taroa, specifically focusing on the island during World War II and as a tourist destination (circa 1995), see the essay Dirk H.R. Spennemann (of the Institute of Land, Water and Society, at Charles Stuart University), at Taroa, Maloelap Atoll – A brief virtual tour through a Japanese airbase in the Marshall Islands.

* These POWs were:

ABEL, WILLIAM E.                   S/Sgt.                   36440823            Gunner (Tail)
CARTWRIGHT, THOMAS C.    2 Lt.                      0-831661             Pilot
EIFLER, HAROLD                    2 Lt.                      0-721673             Pilot
GARRETT, FRED F                 1 Lt.                      0-740163             Pilot
HRYSKANICH, PETER             2 Lt.                      0-806683             Co-Pilot
MARTIN, WILLIAM R., JR         2 Lt.                      0-2065804           Navigator
MINIERRE, LINCOLN S.           T/Sgt.                   11073217             Radio Operator
PHILLIPS, RUSSELL A.            Capt.                    0-726463             Pilot
SELLERS, CLYDE J.                Sgt.                       36871713            Gunner
SMITH, RICHARD M.                2 Lt.                      0-692346             Navigator
STODDARD, LOREN A.           Capt.                    0-428873             Pilot
WALKER, ARTHUR JAMES       Col.                      0-022462            Pilot
ZAMPERINI, LOUIS S.               1 Lt.                     0-663341             Bombardier

____________________

References

(Books)

Bell, Dana, Air Force Colors Volume 2 – ETO & MTO 1942-45, Squadron/Signal Publications, Carrollton, Tx., 1980.

Cleveland, W.M., Grey Geese Calling – Pacific Air War History of the 11th Bombardment Group (H) 1940-1945, 11th Bombardment Group Association Inc., Seffner, Fl., 1992.

Doll, Thomas E., Jackson, Berkley R., and Riley, William A., Navy Air Colors – United States Navy, Marine Corps, and Coast Guard Aircraft Camouflage and Markings, Vol. 1 – 1911-1945, Squadron/Signal Publications, Carrollton, Tx., 1983.

Forman, Wallace R., B-24 Nose Art Name Directory, Specialty Press Publishers and Wholesalers, North Branch, Mn., 1996.

Rust, Kenn C., Seventh Air Force Story …In World War II, Historical Aviation Album, Temple City, Ca., 1979.

(Web Sites)

11th Bombardment Group History, at http://oaktrust.library.tamu.edu/browse?type=subject&value=11th%20Bombardment%20Group%20(H)

At OAKTrust Digital Repository of Texas A&M University – Special Collections
http://oaktrust.library.tamu.edu/

In connection with / related to biography of T/Sgt. Paul Fredrick Adler
42nd Bombardment Squadron (Heavy).  Monthly Squadron Histories and Documents, 20 May 1943 – 5 March 1944
http://oaktrust.library.tamu.edu/bitstream/handle/1969.1/90568/3%20History-42dBS-1943-44-Missions.pdf?sequence=1&isAllowed=y (On pages 89 of 104 of PDF.)

Dogpatch Express nose-art (Pinterest), at https://www.pinterest.com/pin/551268810615004024/

Dogpatch Express crew photo (B-24 Best Web), at http://www.b24bestweb.com/dogpatchexpress-v1

Dogpatch Express nose-art (B-24 Best Web), at http://www.b24bestweb.com/dogpatchexpress-v1-1.htm

Dogpatch Express nose-art (B-24 Best Web), at http://www.b24bestweb.com/dogpatchexpress-v1-2.htm

Marshall Islands (at Wikimedia Commons), at https://en.wikipedia.org/wiki/Marshall_Islands.

Nanomea Island (Wikipedia entry – listed as “Nanumea”), at https://en.wikipedia.org/wiki/Nanumea

Taroa Island (at Pacific Wrecks Database), at http://www.pacificwrecks.com/airfields/marshalls/taroa/index.html

Taroa Island (at Charles Stuart University), at http://marshall.csu.edu.au/Marshalls/html/japanese/Taroa/Taroa.html

The World War II Legacy of Taroa Island (at Nothing Unknown), at https://www.nothingunknown.com/content/2016/10/7/taroa-island

(United States National Archives)

Records Group 165 “War Department Special Staff Public Relations Division News Branch Press and Radio News Releases, 1921-1947” (arranged chronologically), at Stack Area 390, Row 40, Compartment 3, Shelf 6.


Deprecated: Function get_magic_quotes_gpc() is deprecated in /home3/emc2ftl3/public_html/wp-includes/formatting.php on line 4365